Active vs Passive Reading
You will use active and passive reading techniques throughout your language journey. When you first start reading Japanese, most of your time will be spent actively reading. Active reading is when you actively look up lots of words, break down the grammar and sentence structure, and make flashcards. Active reading should not be done for long periods; instead, it should be done in about 15 to 20-minute chunks. However, as you continue your language journey, more of your time will be spent doing passive reading. Passive reading is more leisurely; you may look up a word or two, but you are not concerned with understanding every detail you read, just the overall idea or story. Passive reading is all about maximizing input and enjoying it, so this can be done for much longer periods, up to several hours. While you may do one of these more than the other depending on what your goals are, it is important to do both, as they will both increase your reading ability in different ways.
In this article, you will find several tools to help you with both your passive and active reading. Depending on what and how you like to read, you may find some of these tools more useful than others. I encourage you to look through all of them to see what fits your needs best. If you’re looking for information about reading resources, such as where to find Japanese books and articles, click the link below.
It’s also a good idea to have a good Japanese-English dictionary on hand, so you can look up examples and definitions for tricky words.
All Platforms
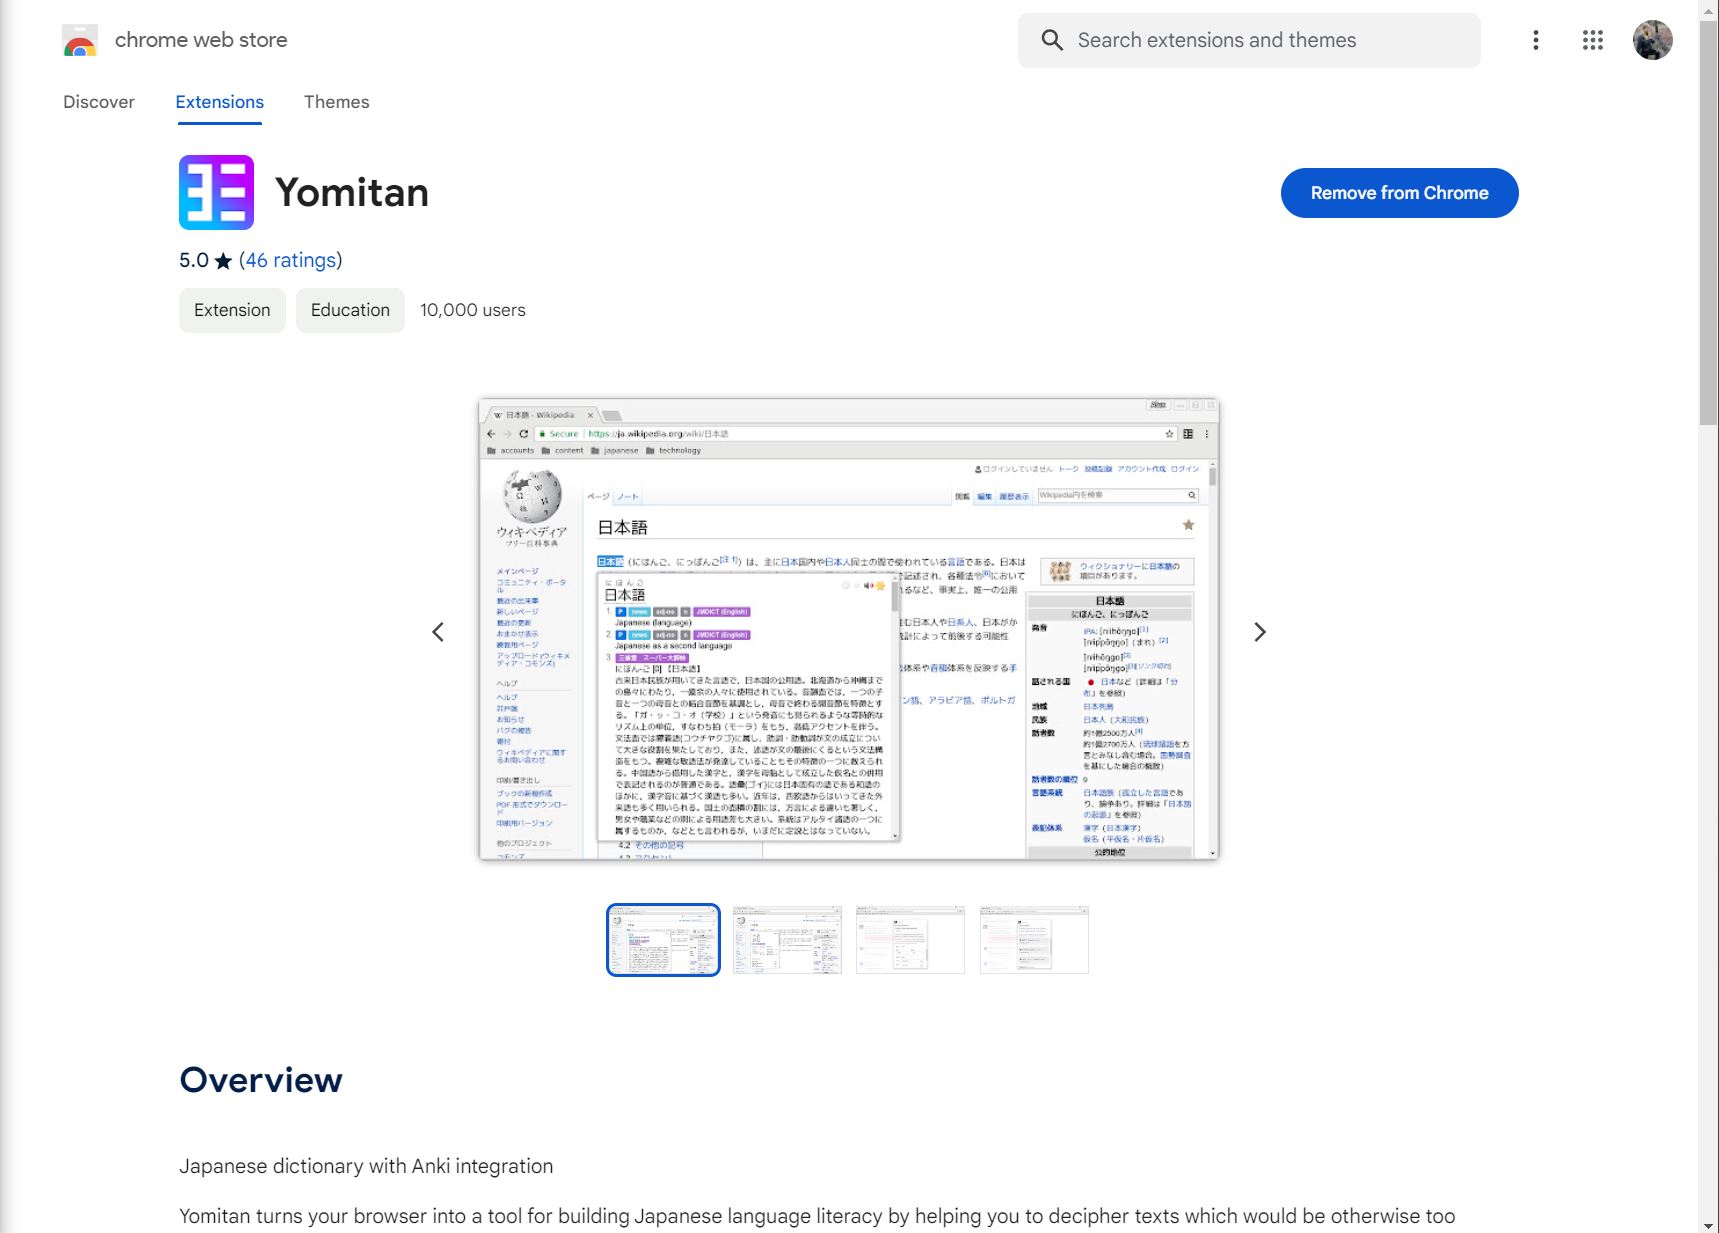
Yomitan (previously Yomichan)
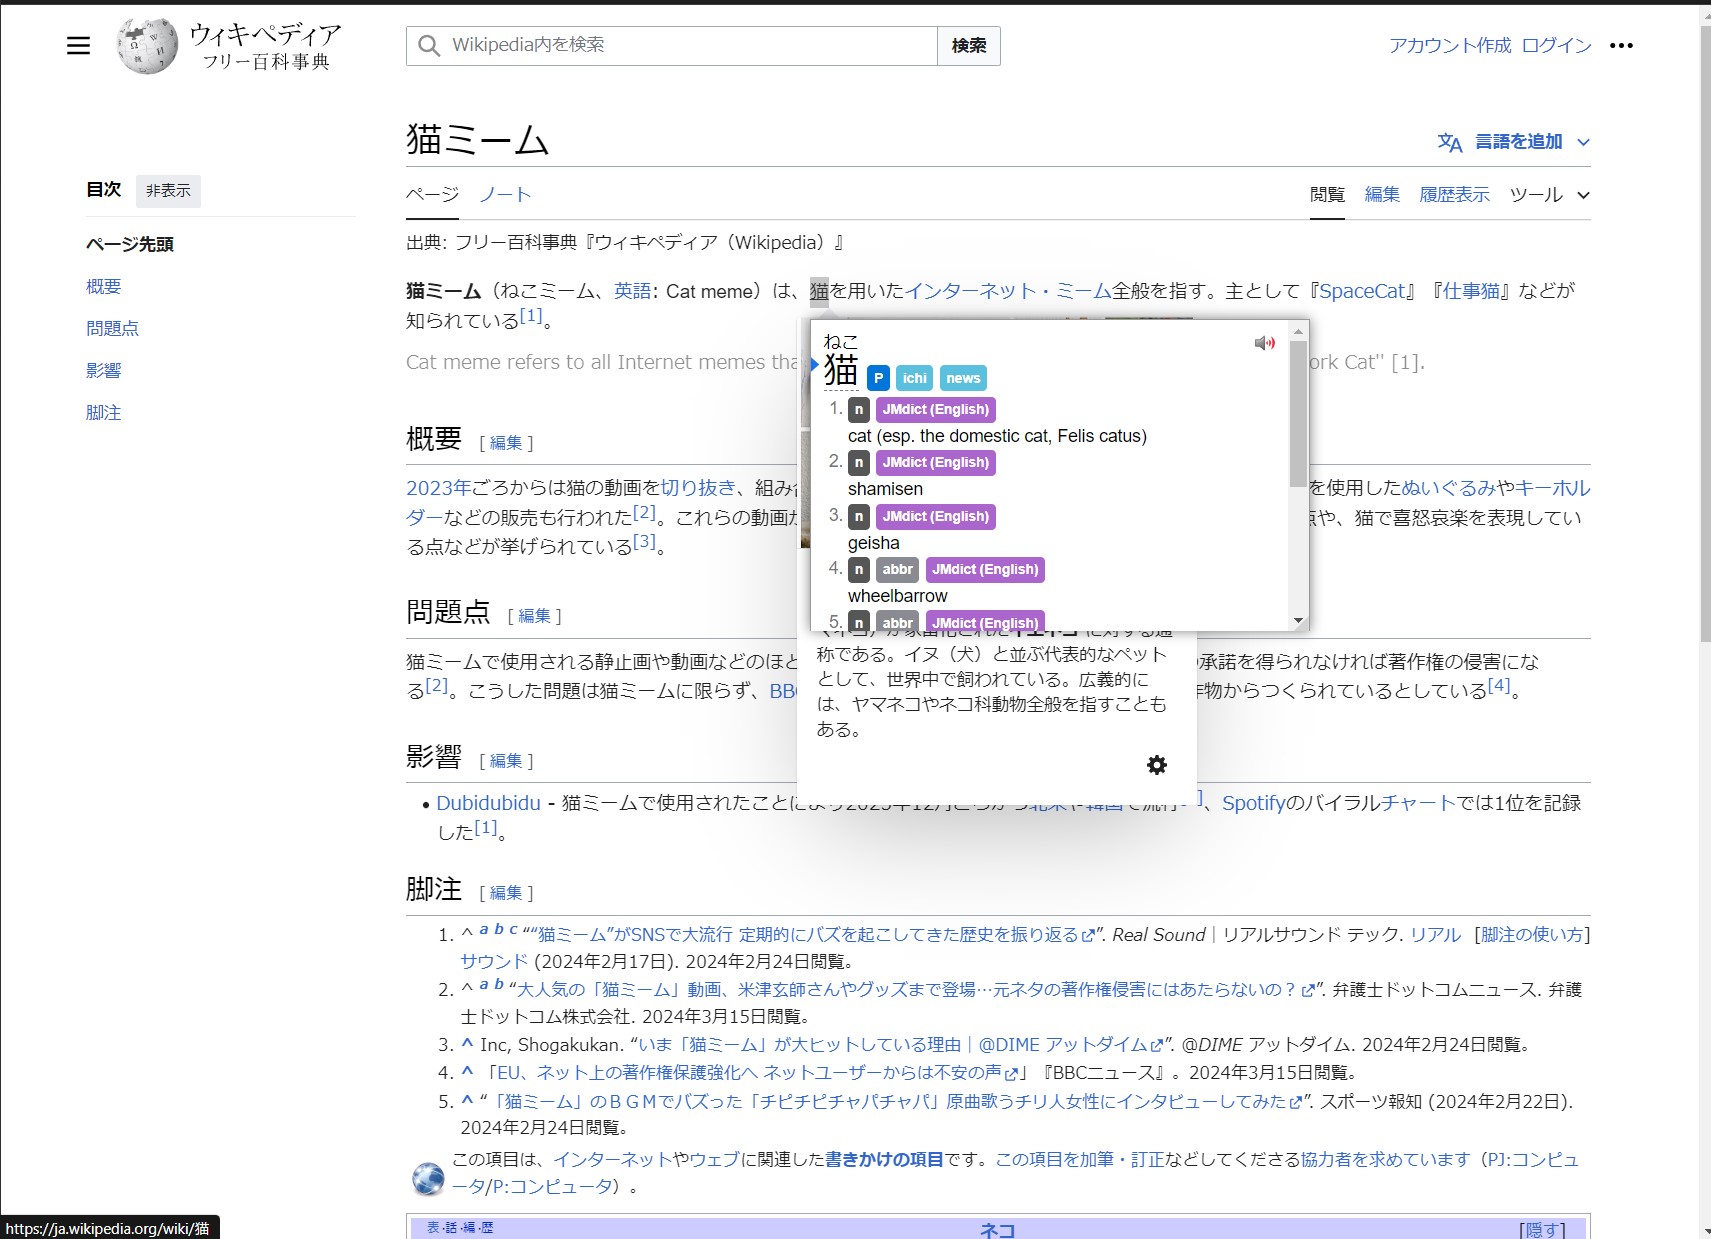
Yomitan is a pop-up dictionary extension for Google Chrome and Firefox that makes it easier to read webpages in Japanese. Once the extension is installed, all you need to do is Shift + Click a word, and the English translation will pop up. Yomitan can also be connected to Anki to quickly create vocabulary flashcards. This extension is great for learning new vocabulary, but it won’t help you much with grammar or full-sentence translation, so it is best used with texts around your reading level. The video below goes into detail on how to set up Yomitan (previously Yomichan) and connect it to Anki. If you prefer written instructions for setting up Yomitan, then you will find those below the video.
After you open the Yomitan link, choose which browser you want to install the extension for. If you are on a mobile device, use the Firefox app to install Yomitan. If you don’t already have Firefox on your phone, you will need to download it from the app store.
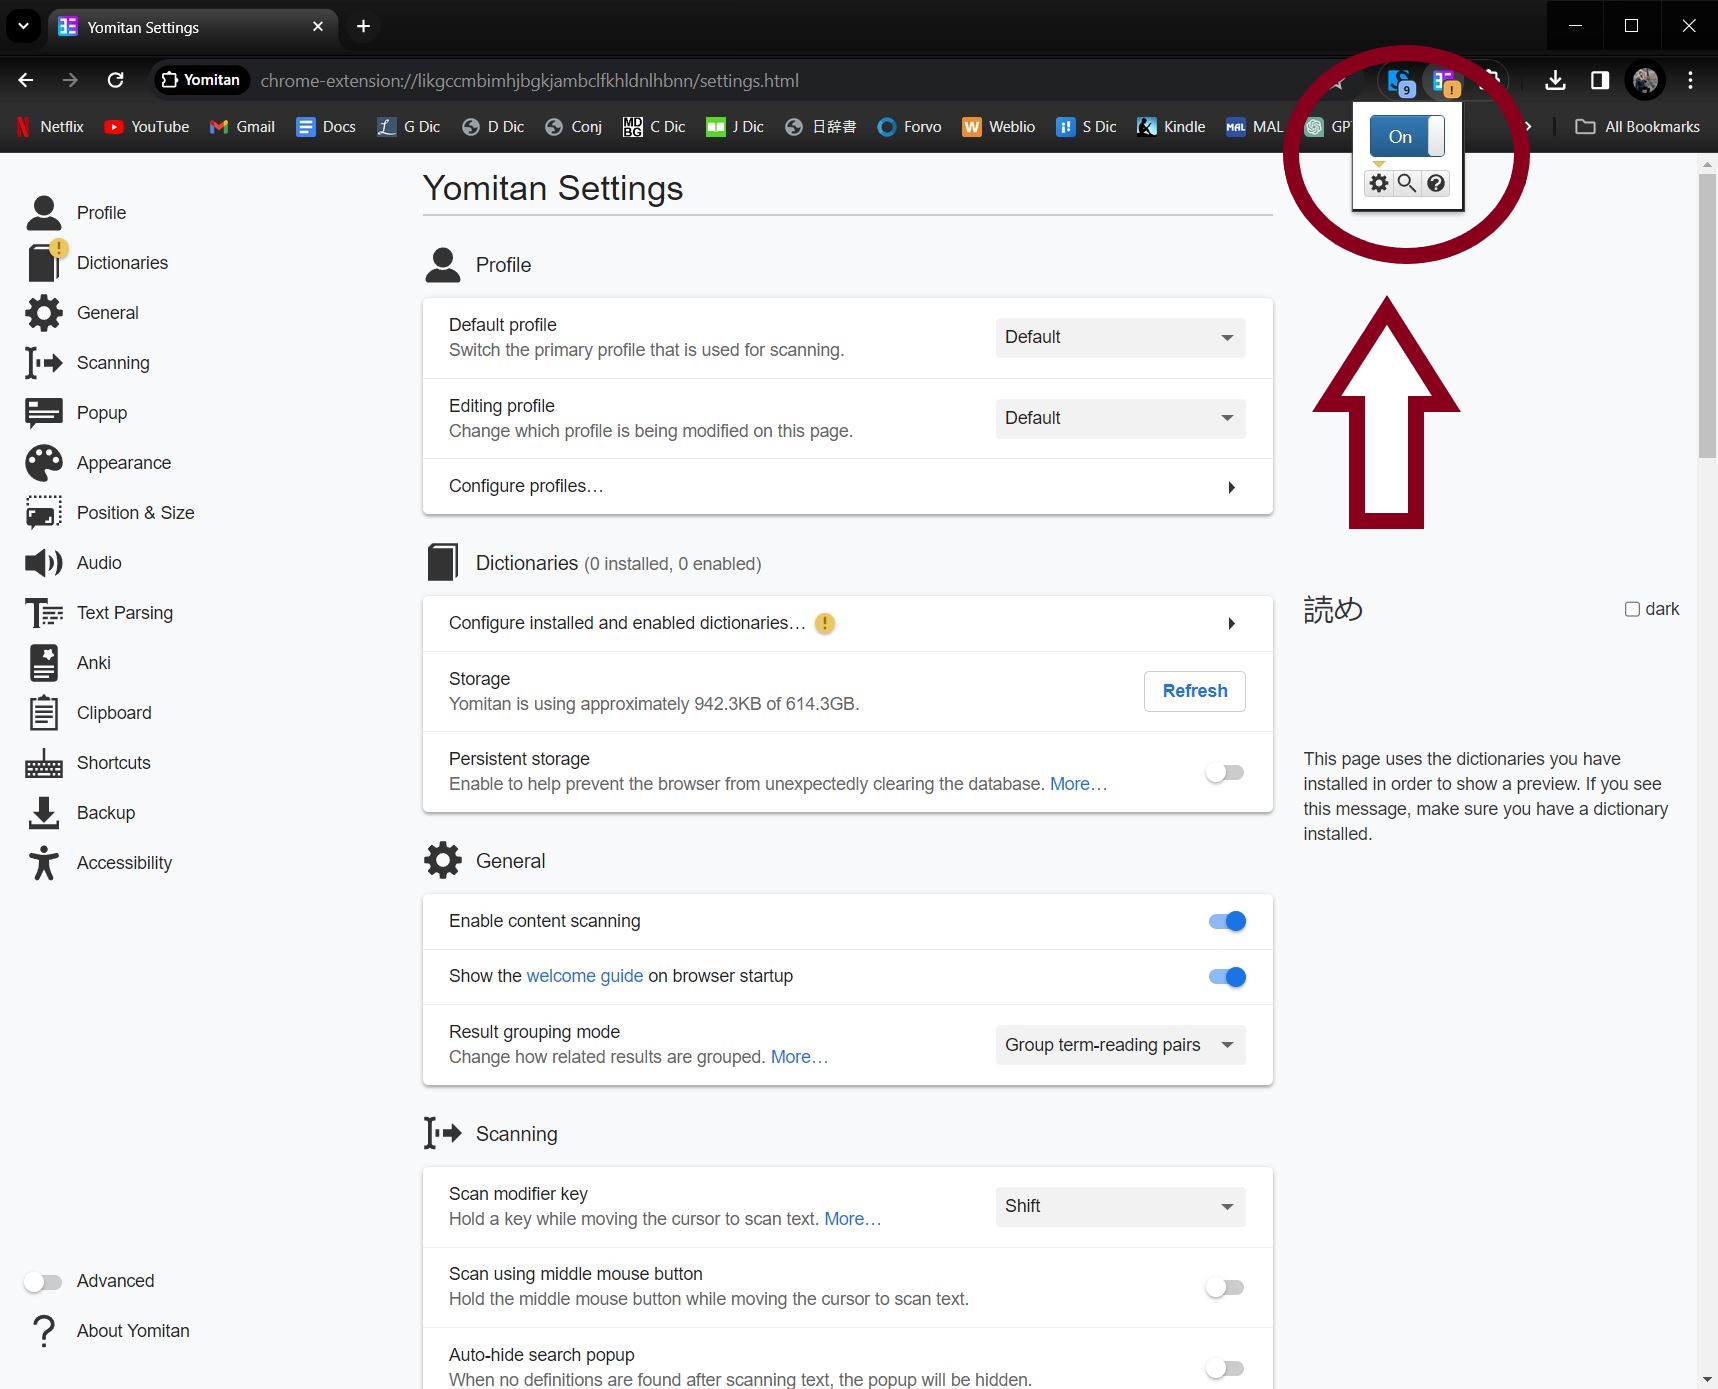
Next, go up to your toolbar and click on the Yomitan extension, then press the gear icon to go to settings.
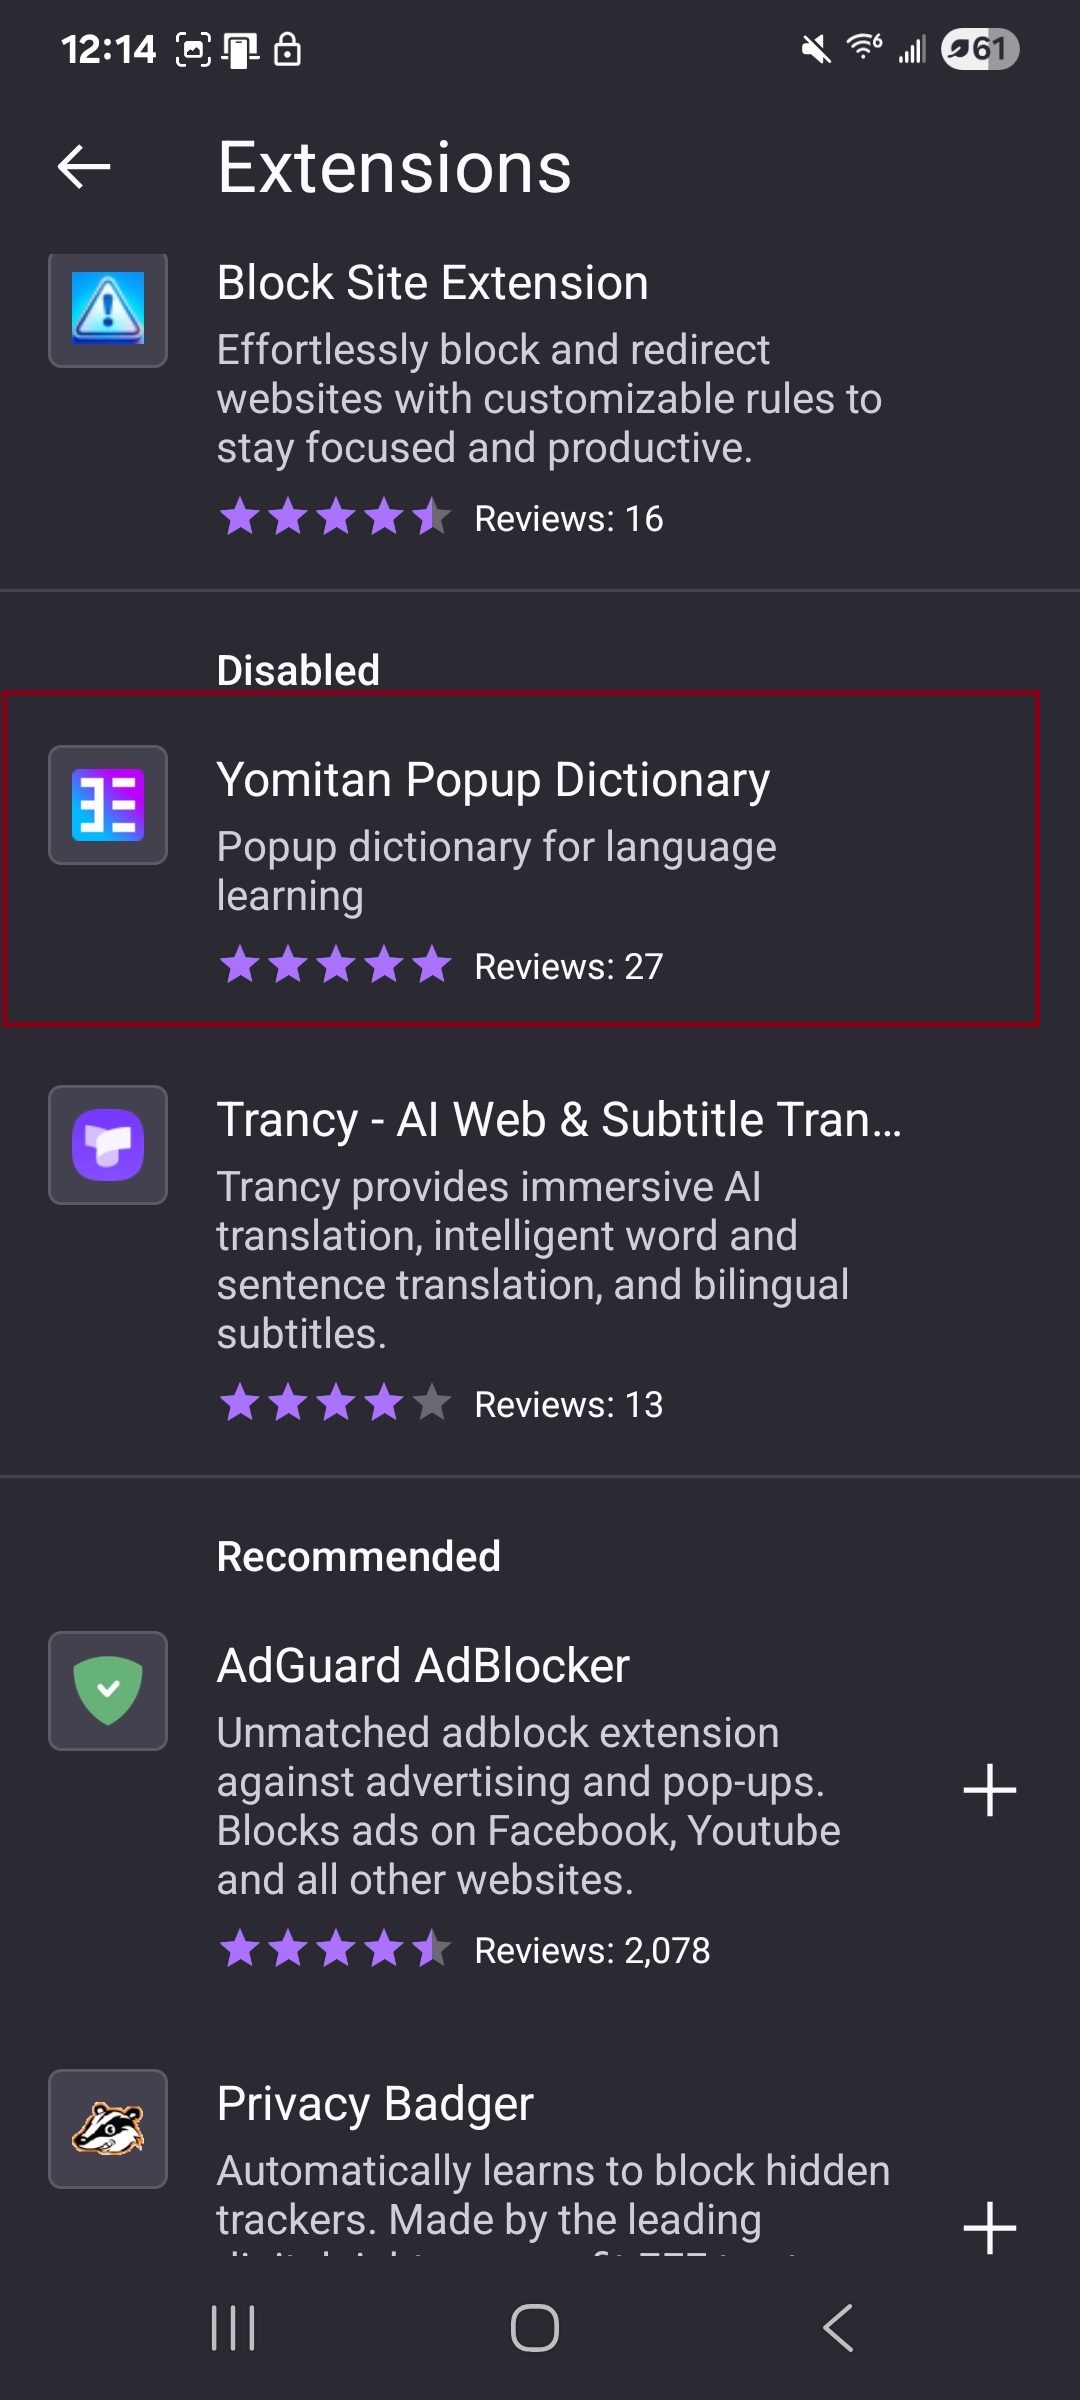
In the Firefox app, click the three dots in the upper-right corner to access Yomitan, then find “Extensions” at the bottom of your screen.
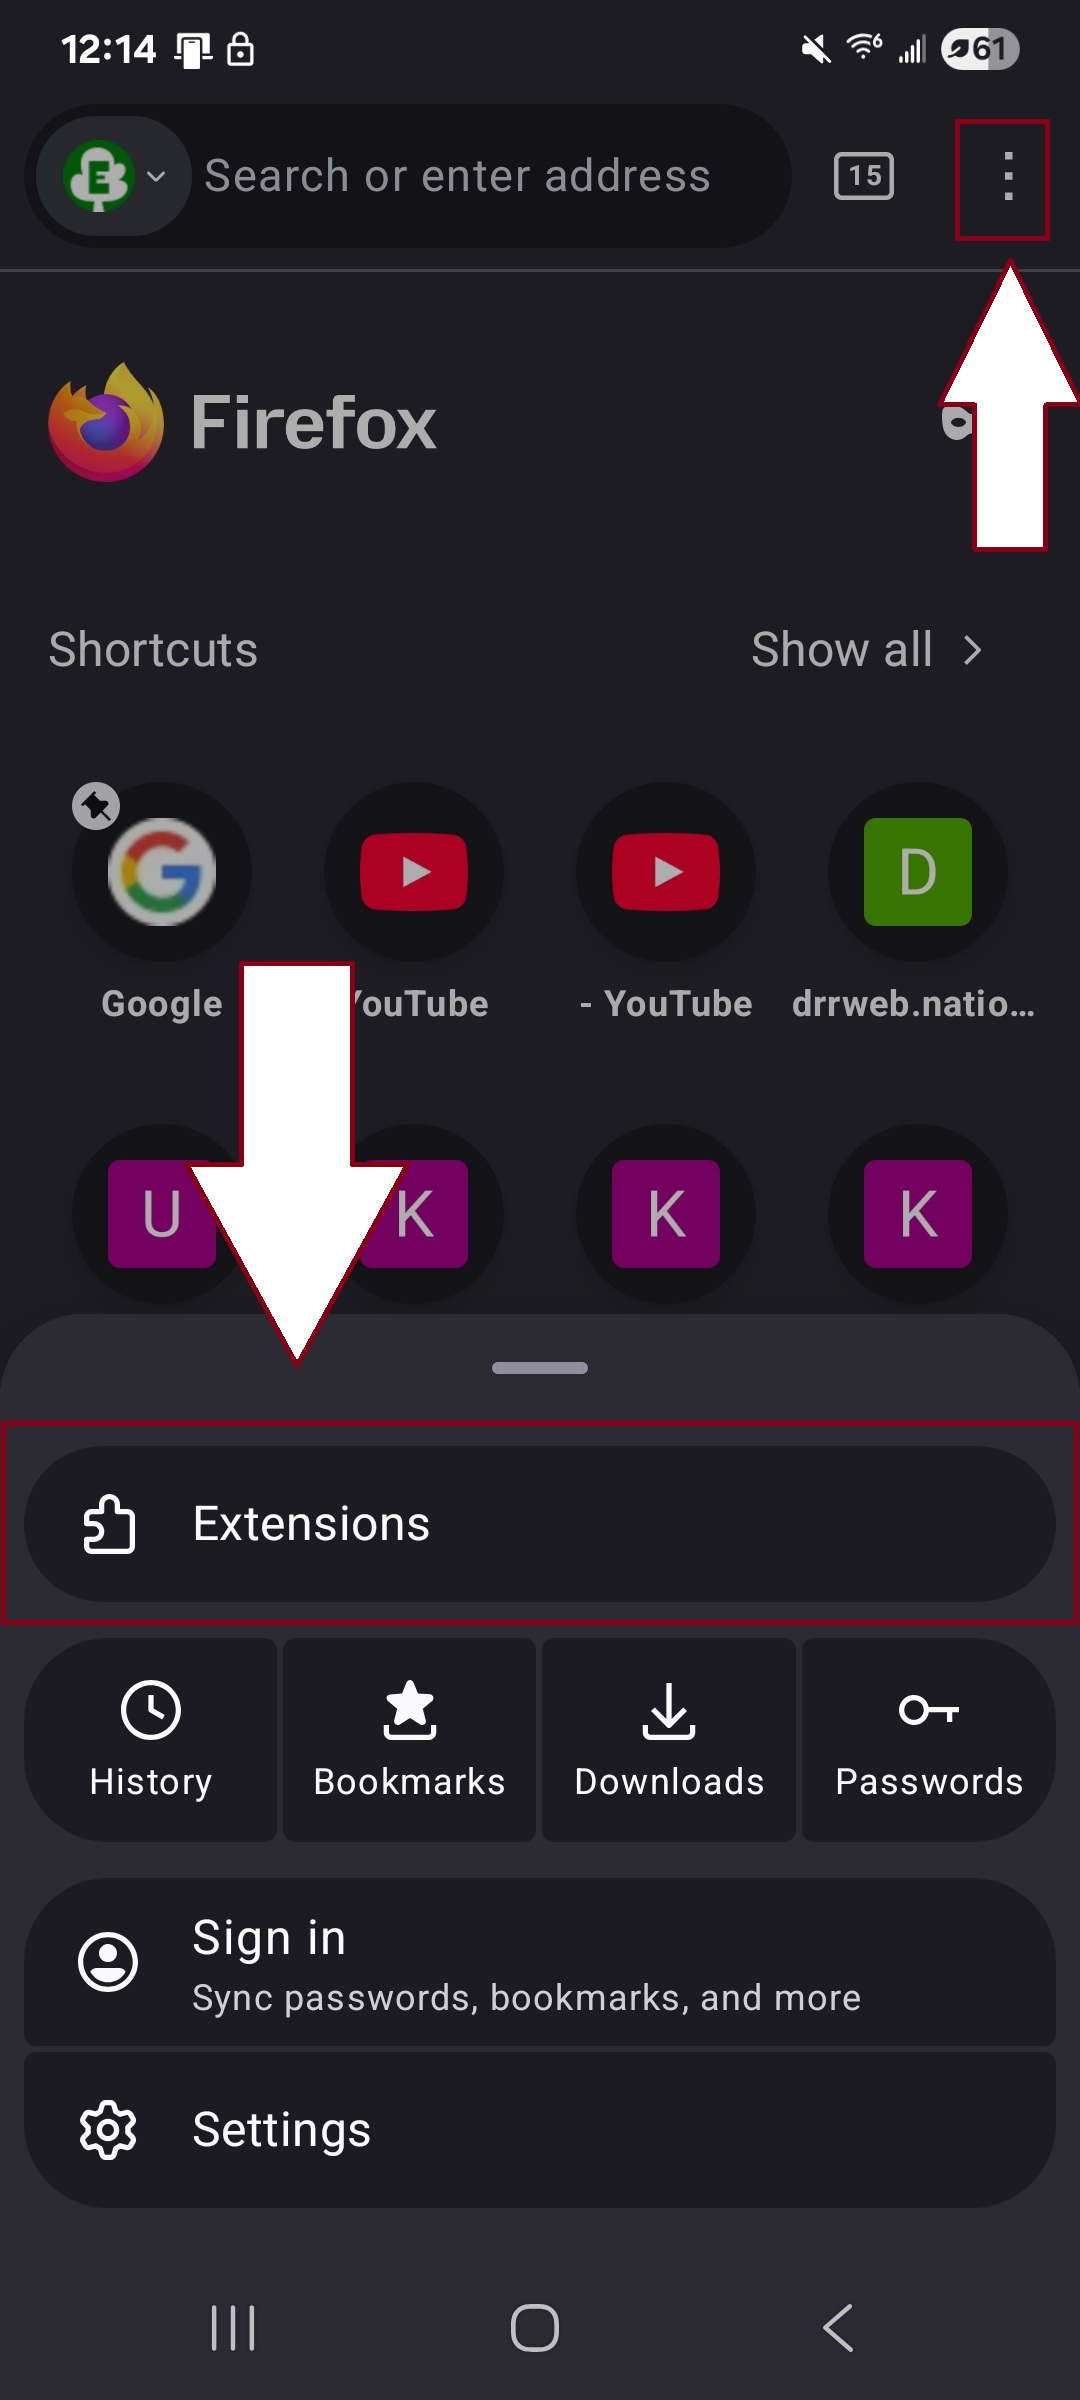
In “Extensions,” you can enable and disable Yomitan.
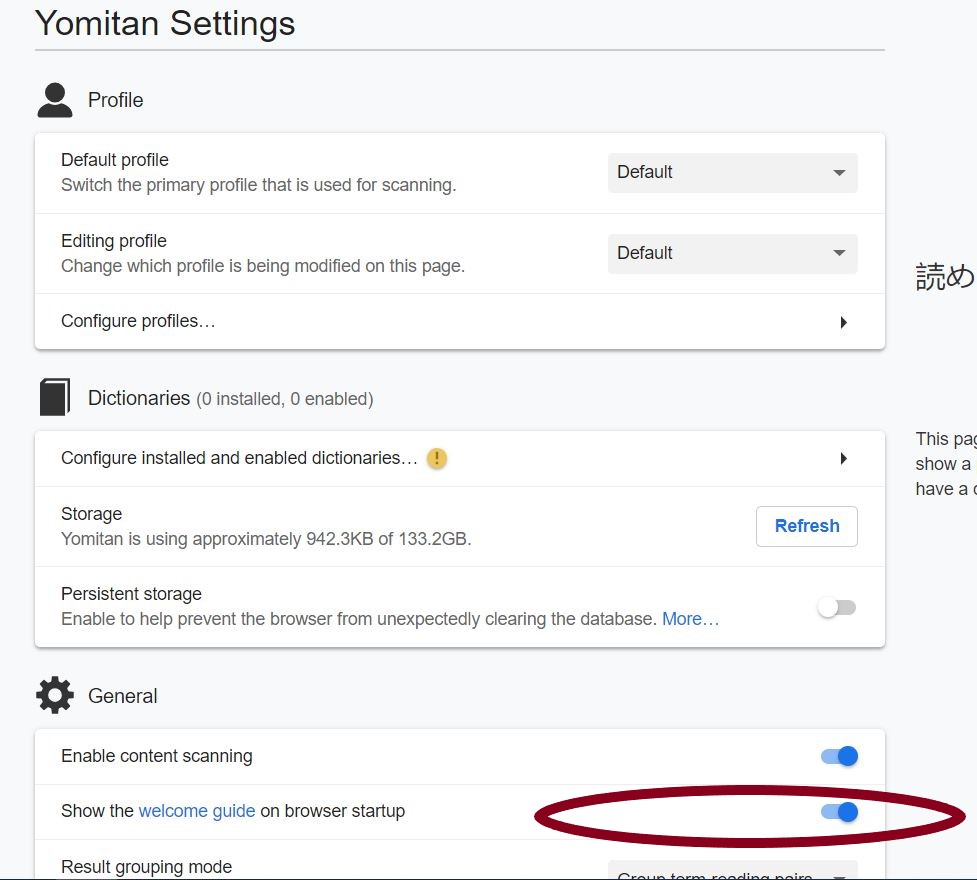
In settings, scroll down and turn off the welcome guide. This will stop it from popping up every time you open your browser.
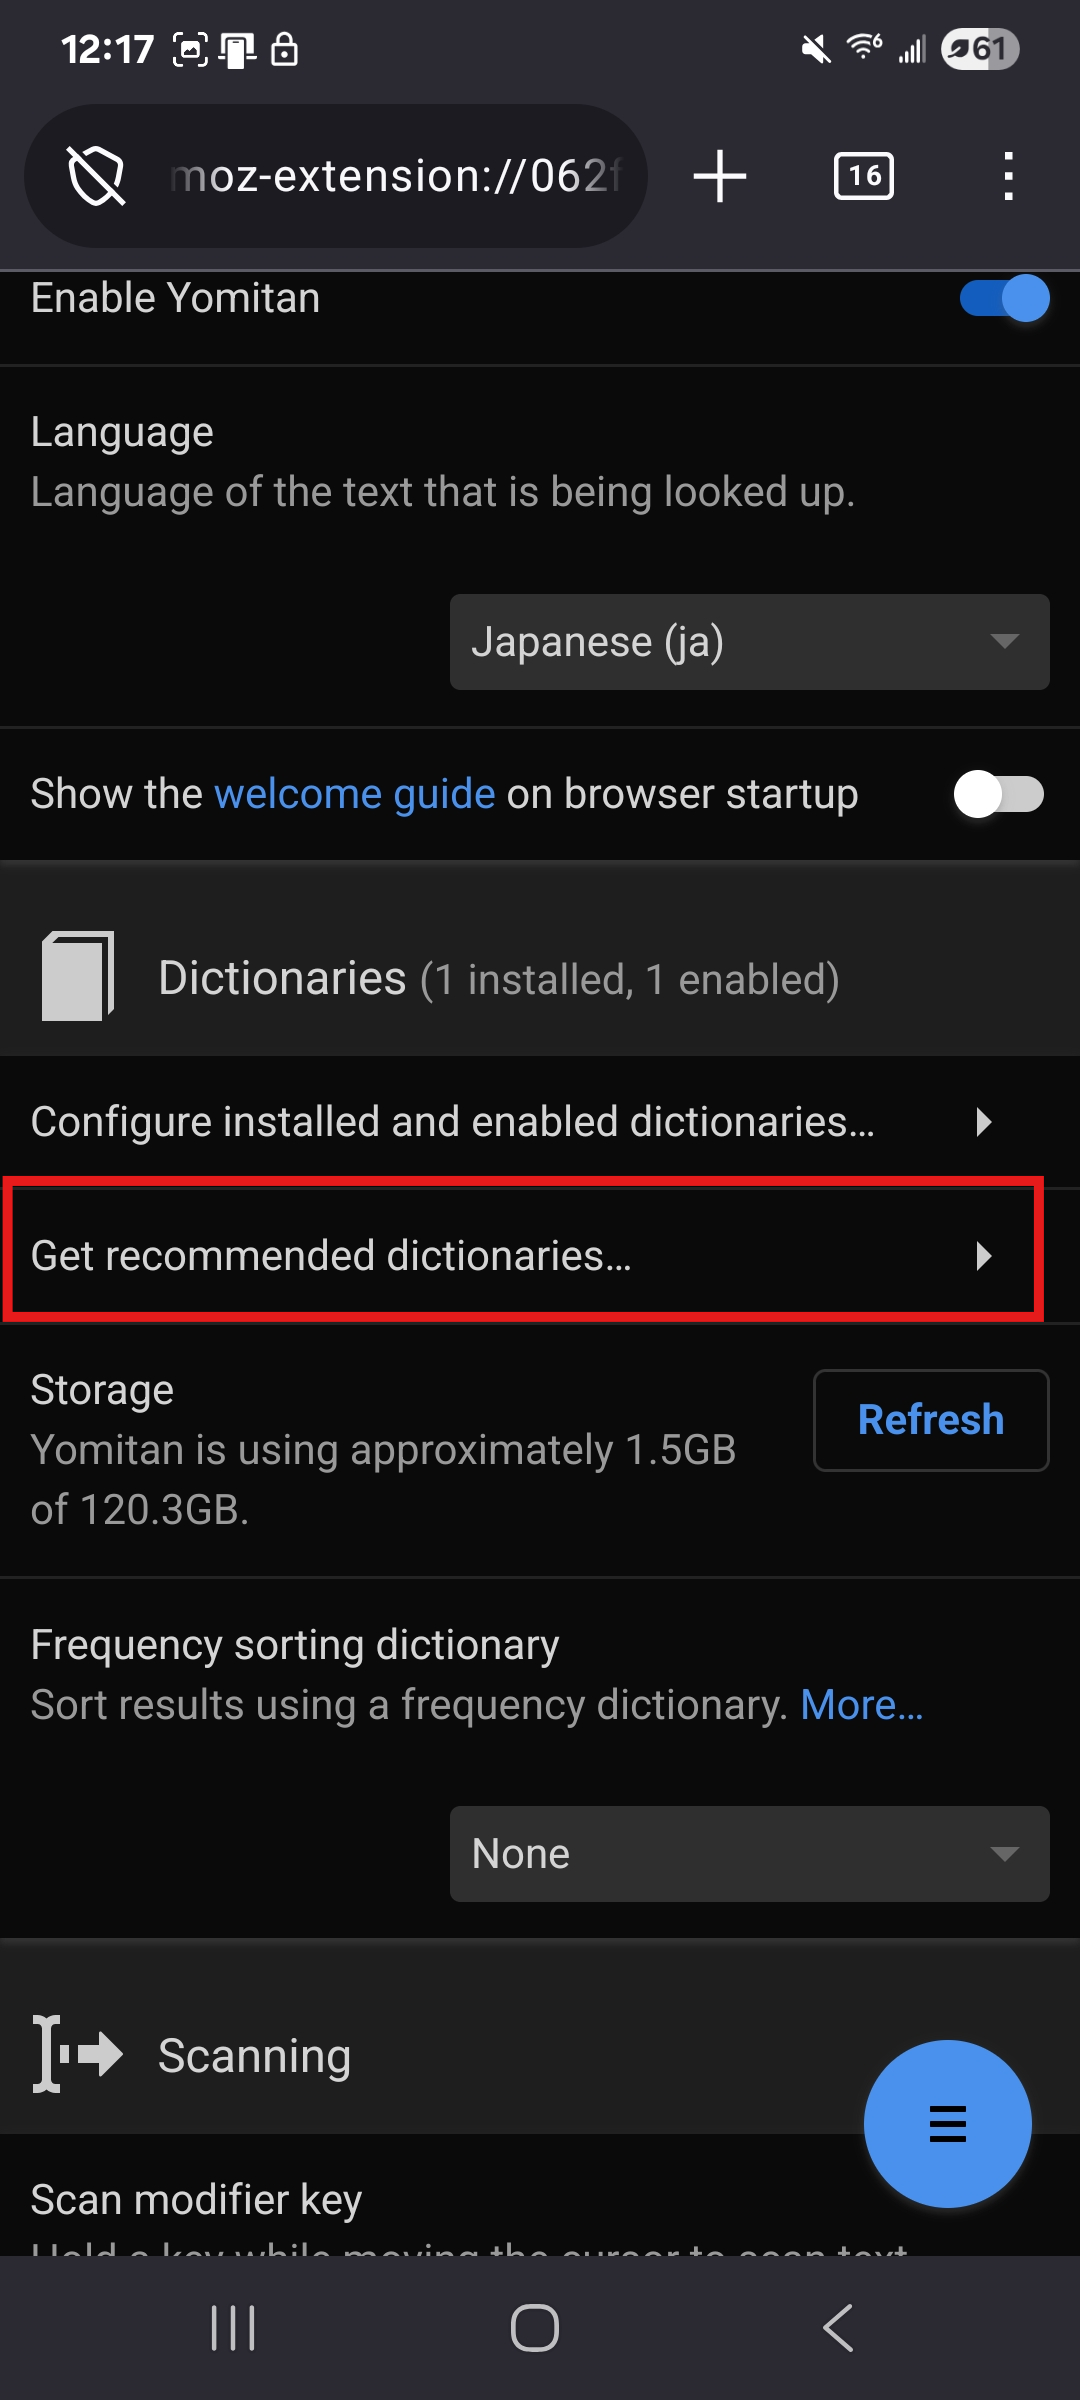
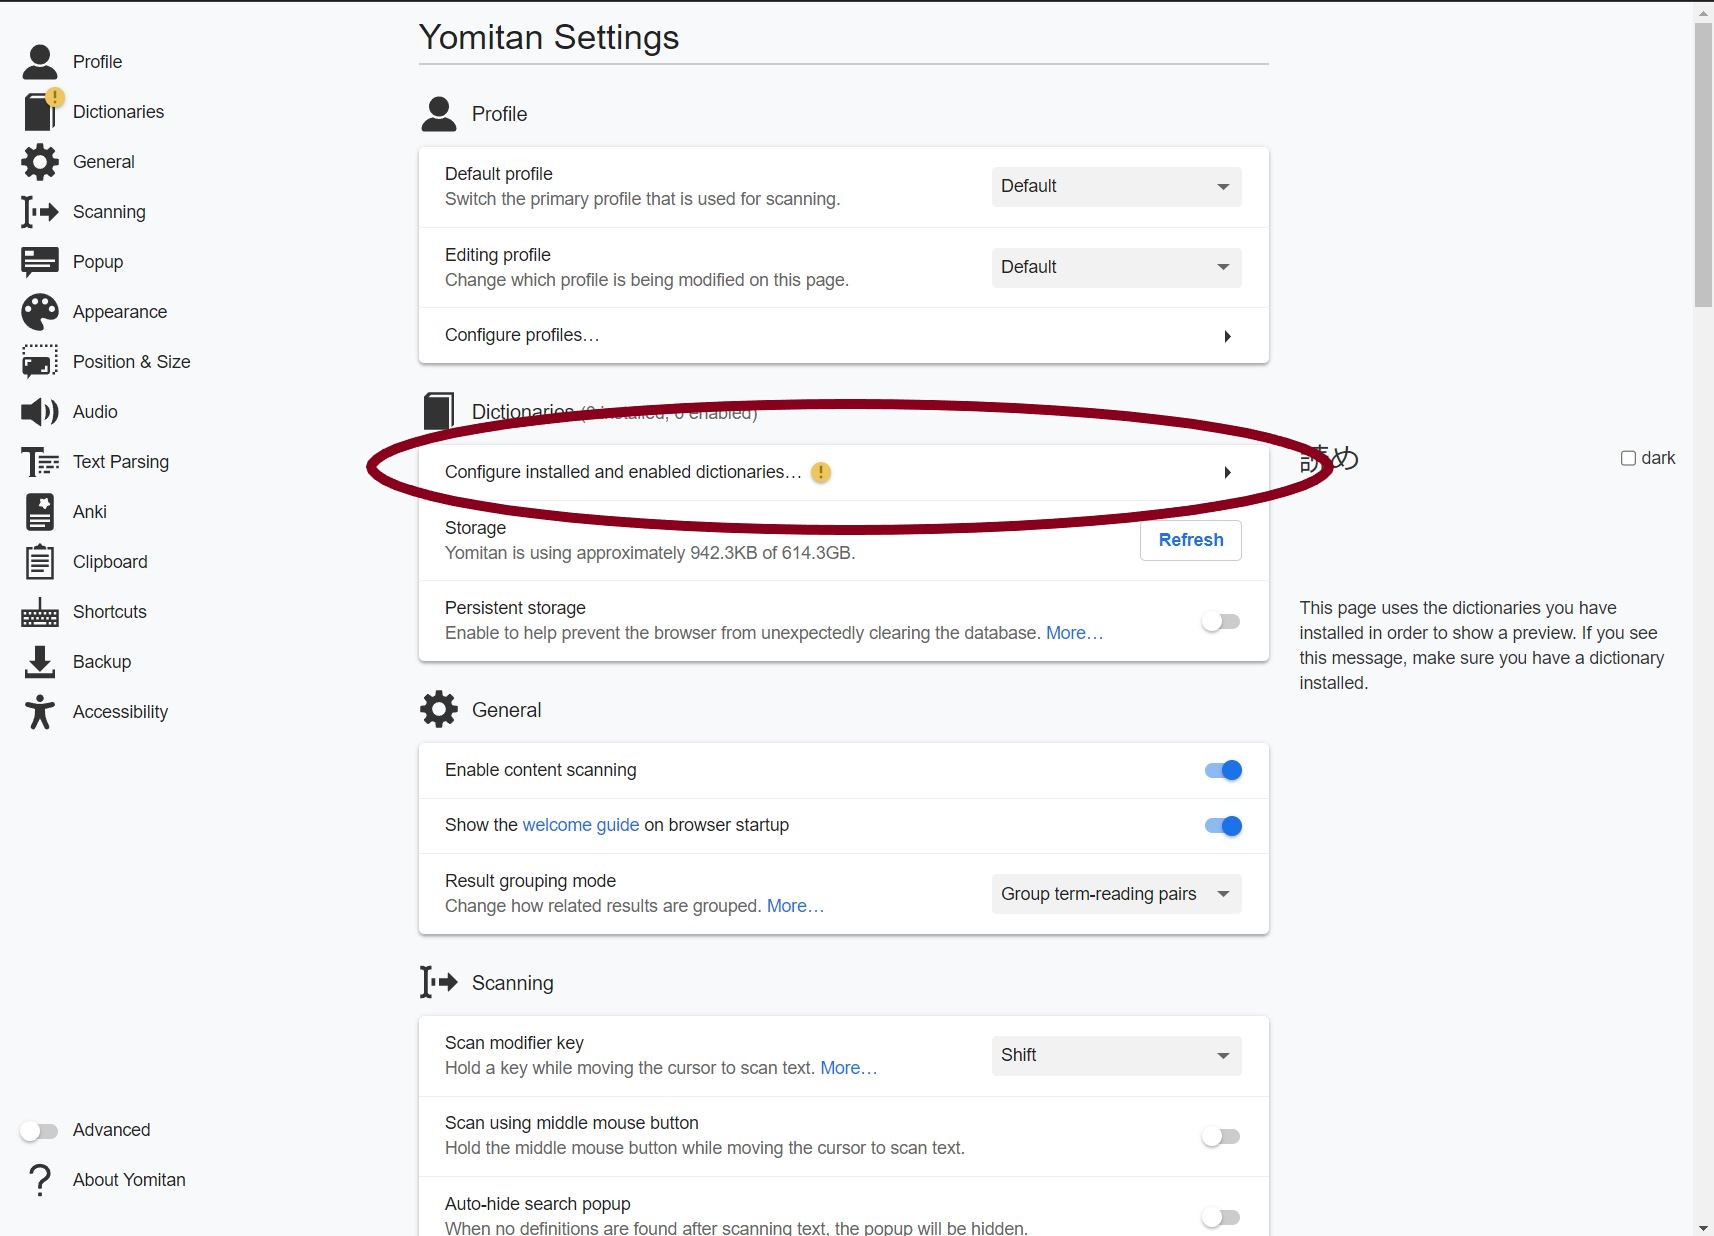
Next, you will need a dictionary. You can install recommended dictionaries directly from the extension, or upload a specific dictionary of your choice.
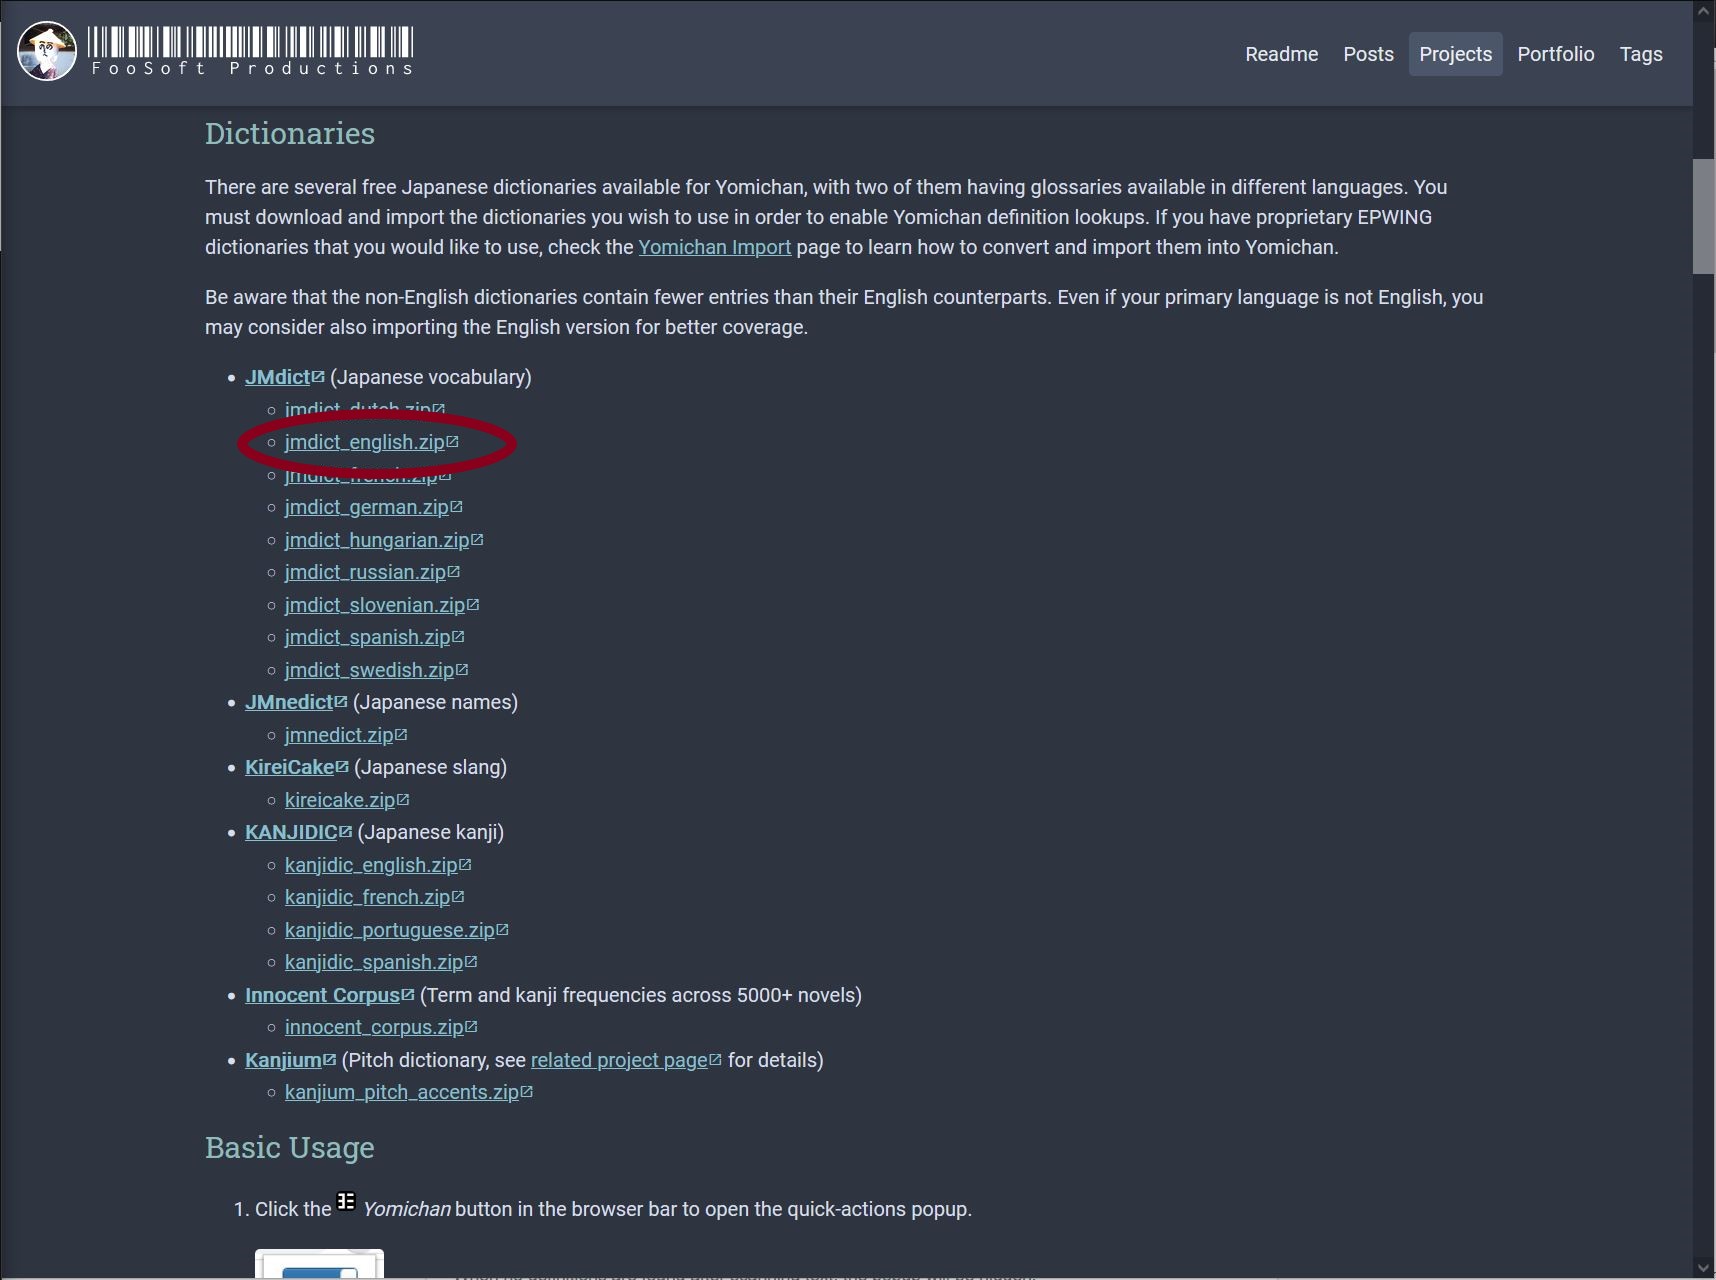
To install a dictionary, click the link below and download the Japanese-English dictionary or another dictionary of your choice. Do NOT unzip it or open it. Just download it.
Now, in your Yomitan settings, click on “configure installed and enabled dictionaries.” Select the dictionary you just downloaded, and press ok. It may take a few minutes to install it.
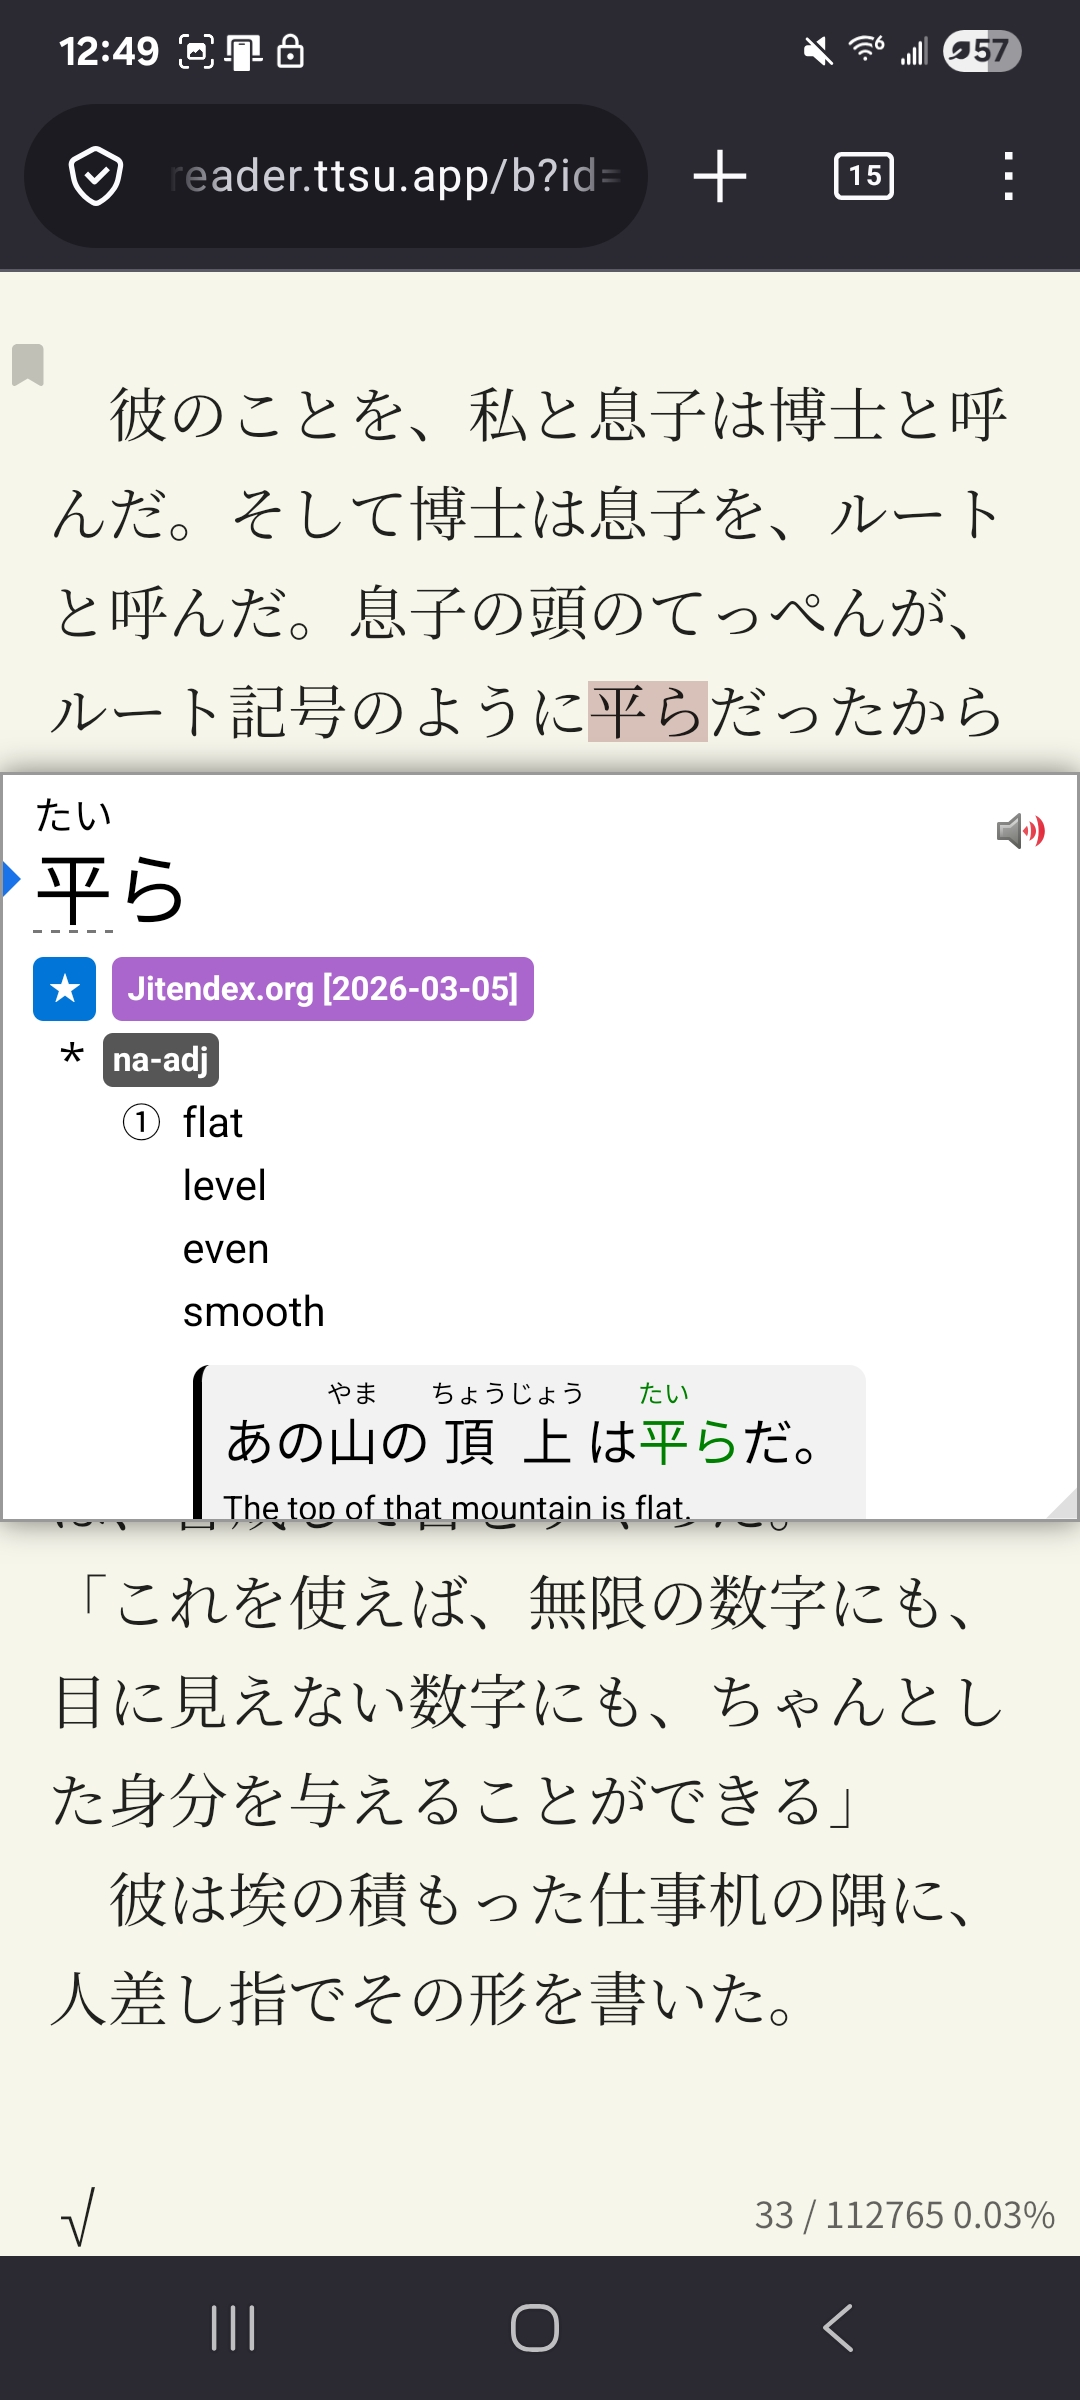
Once a dictionary is installed, you can Shift + Click over any Japanese word, and it will give you the reading and definition.
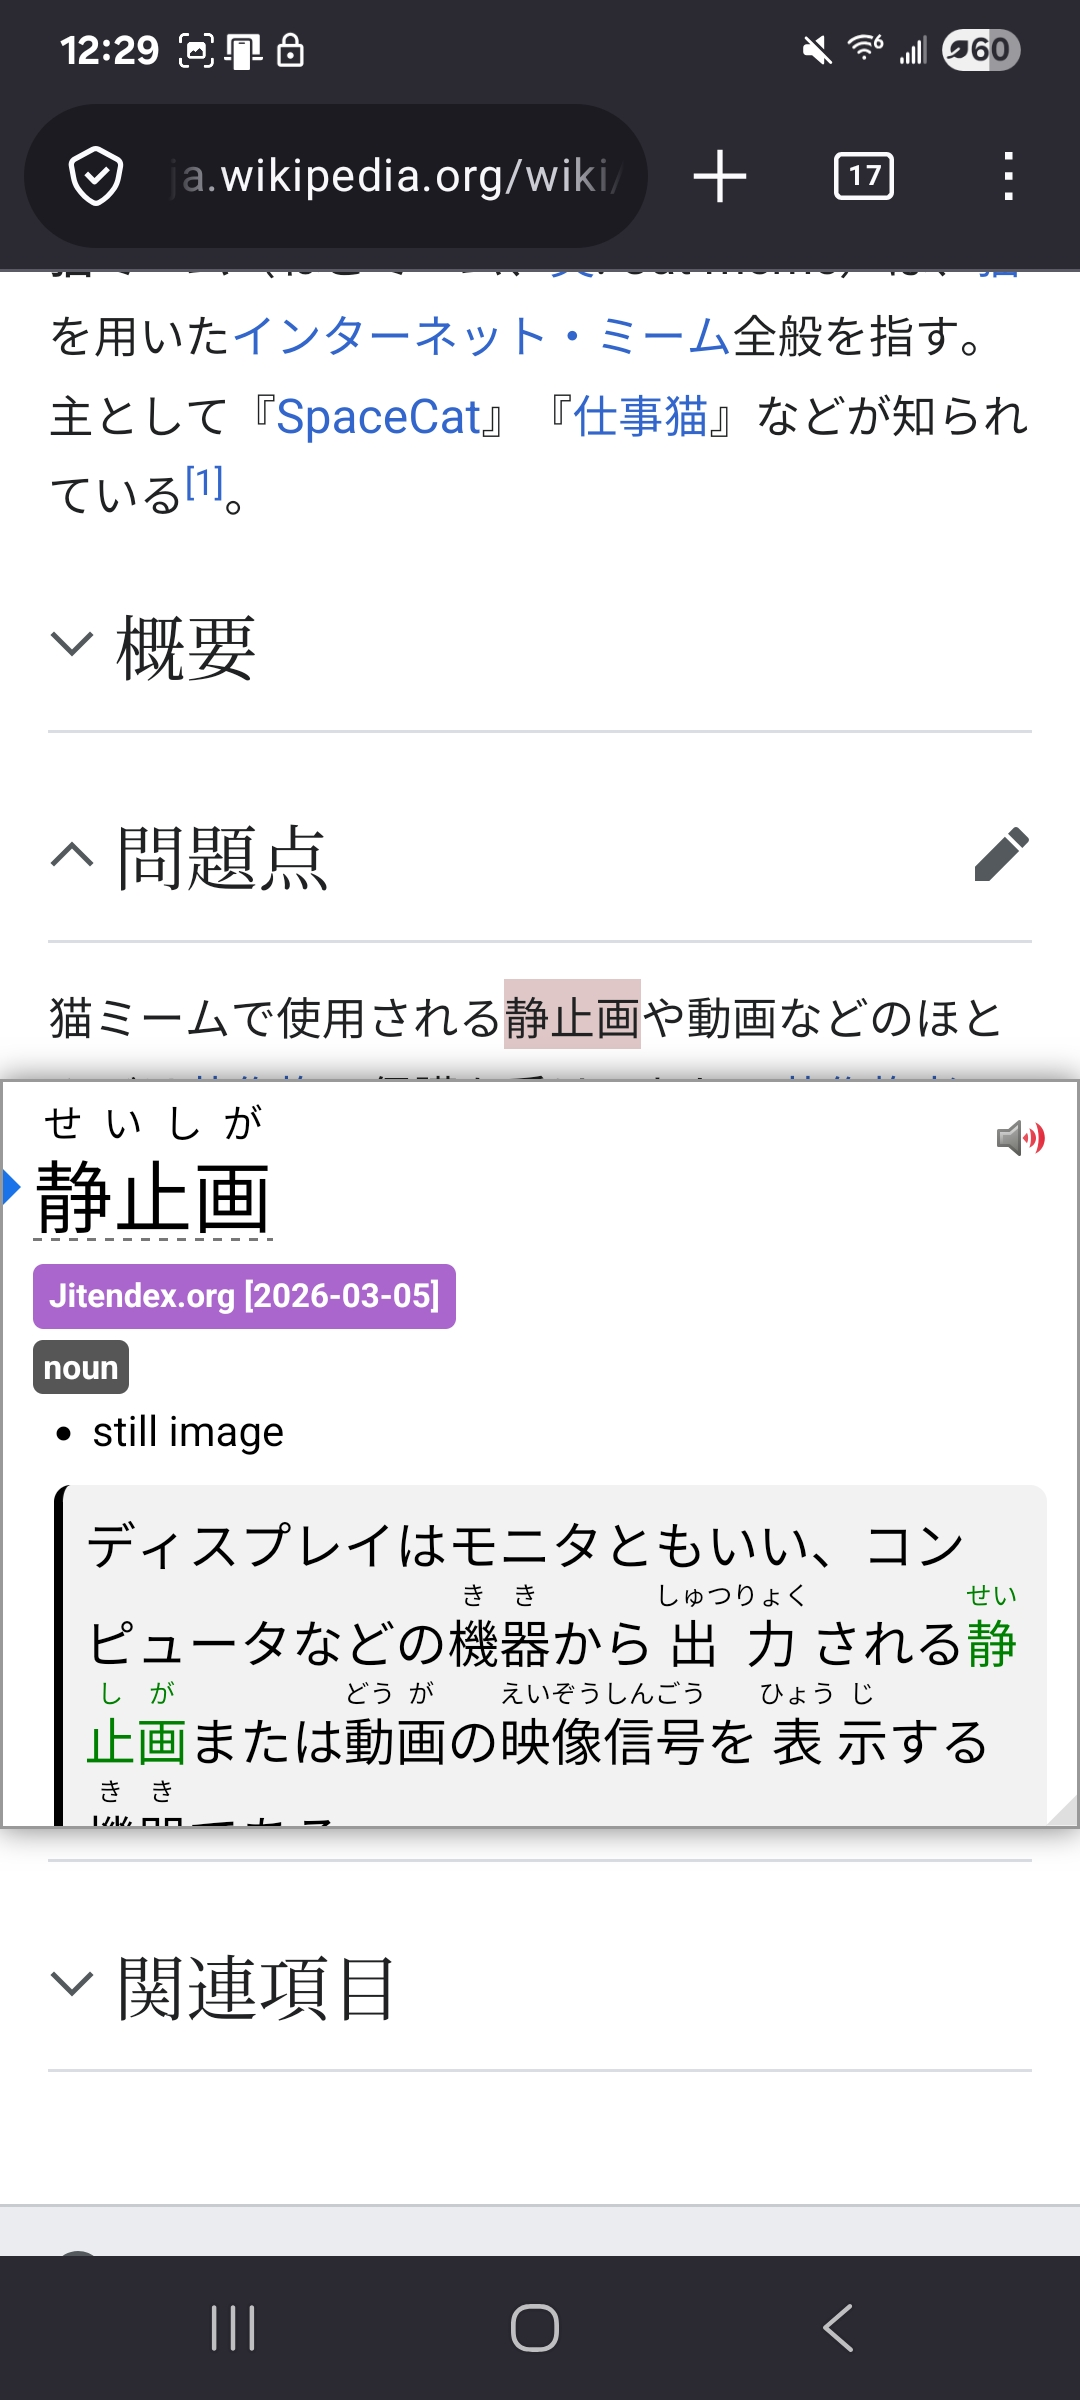
In the Firefox app, once you have Yomitan enabled and a dictionary installed, a translation will pop up anytime you tap on a Japanese word.
For more information on connecting Yomitan to Anki, watch the video above.
Tsureader
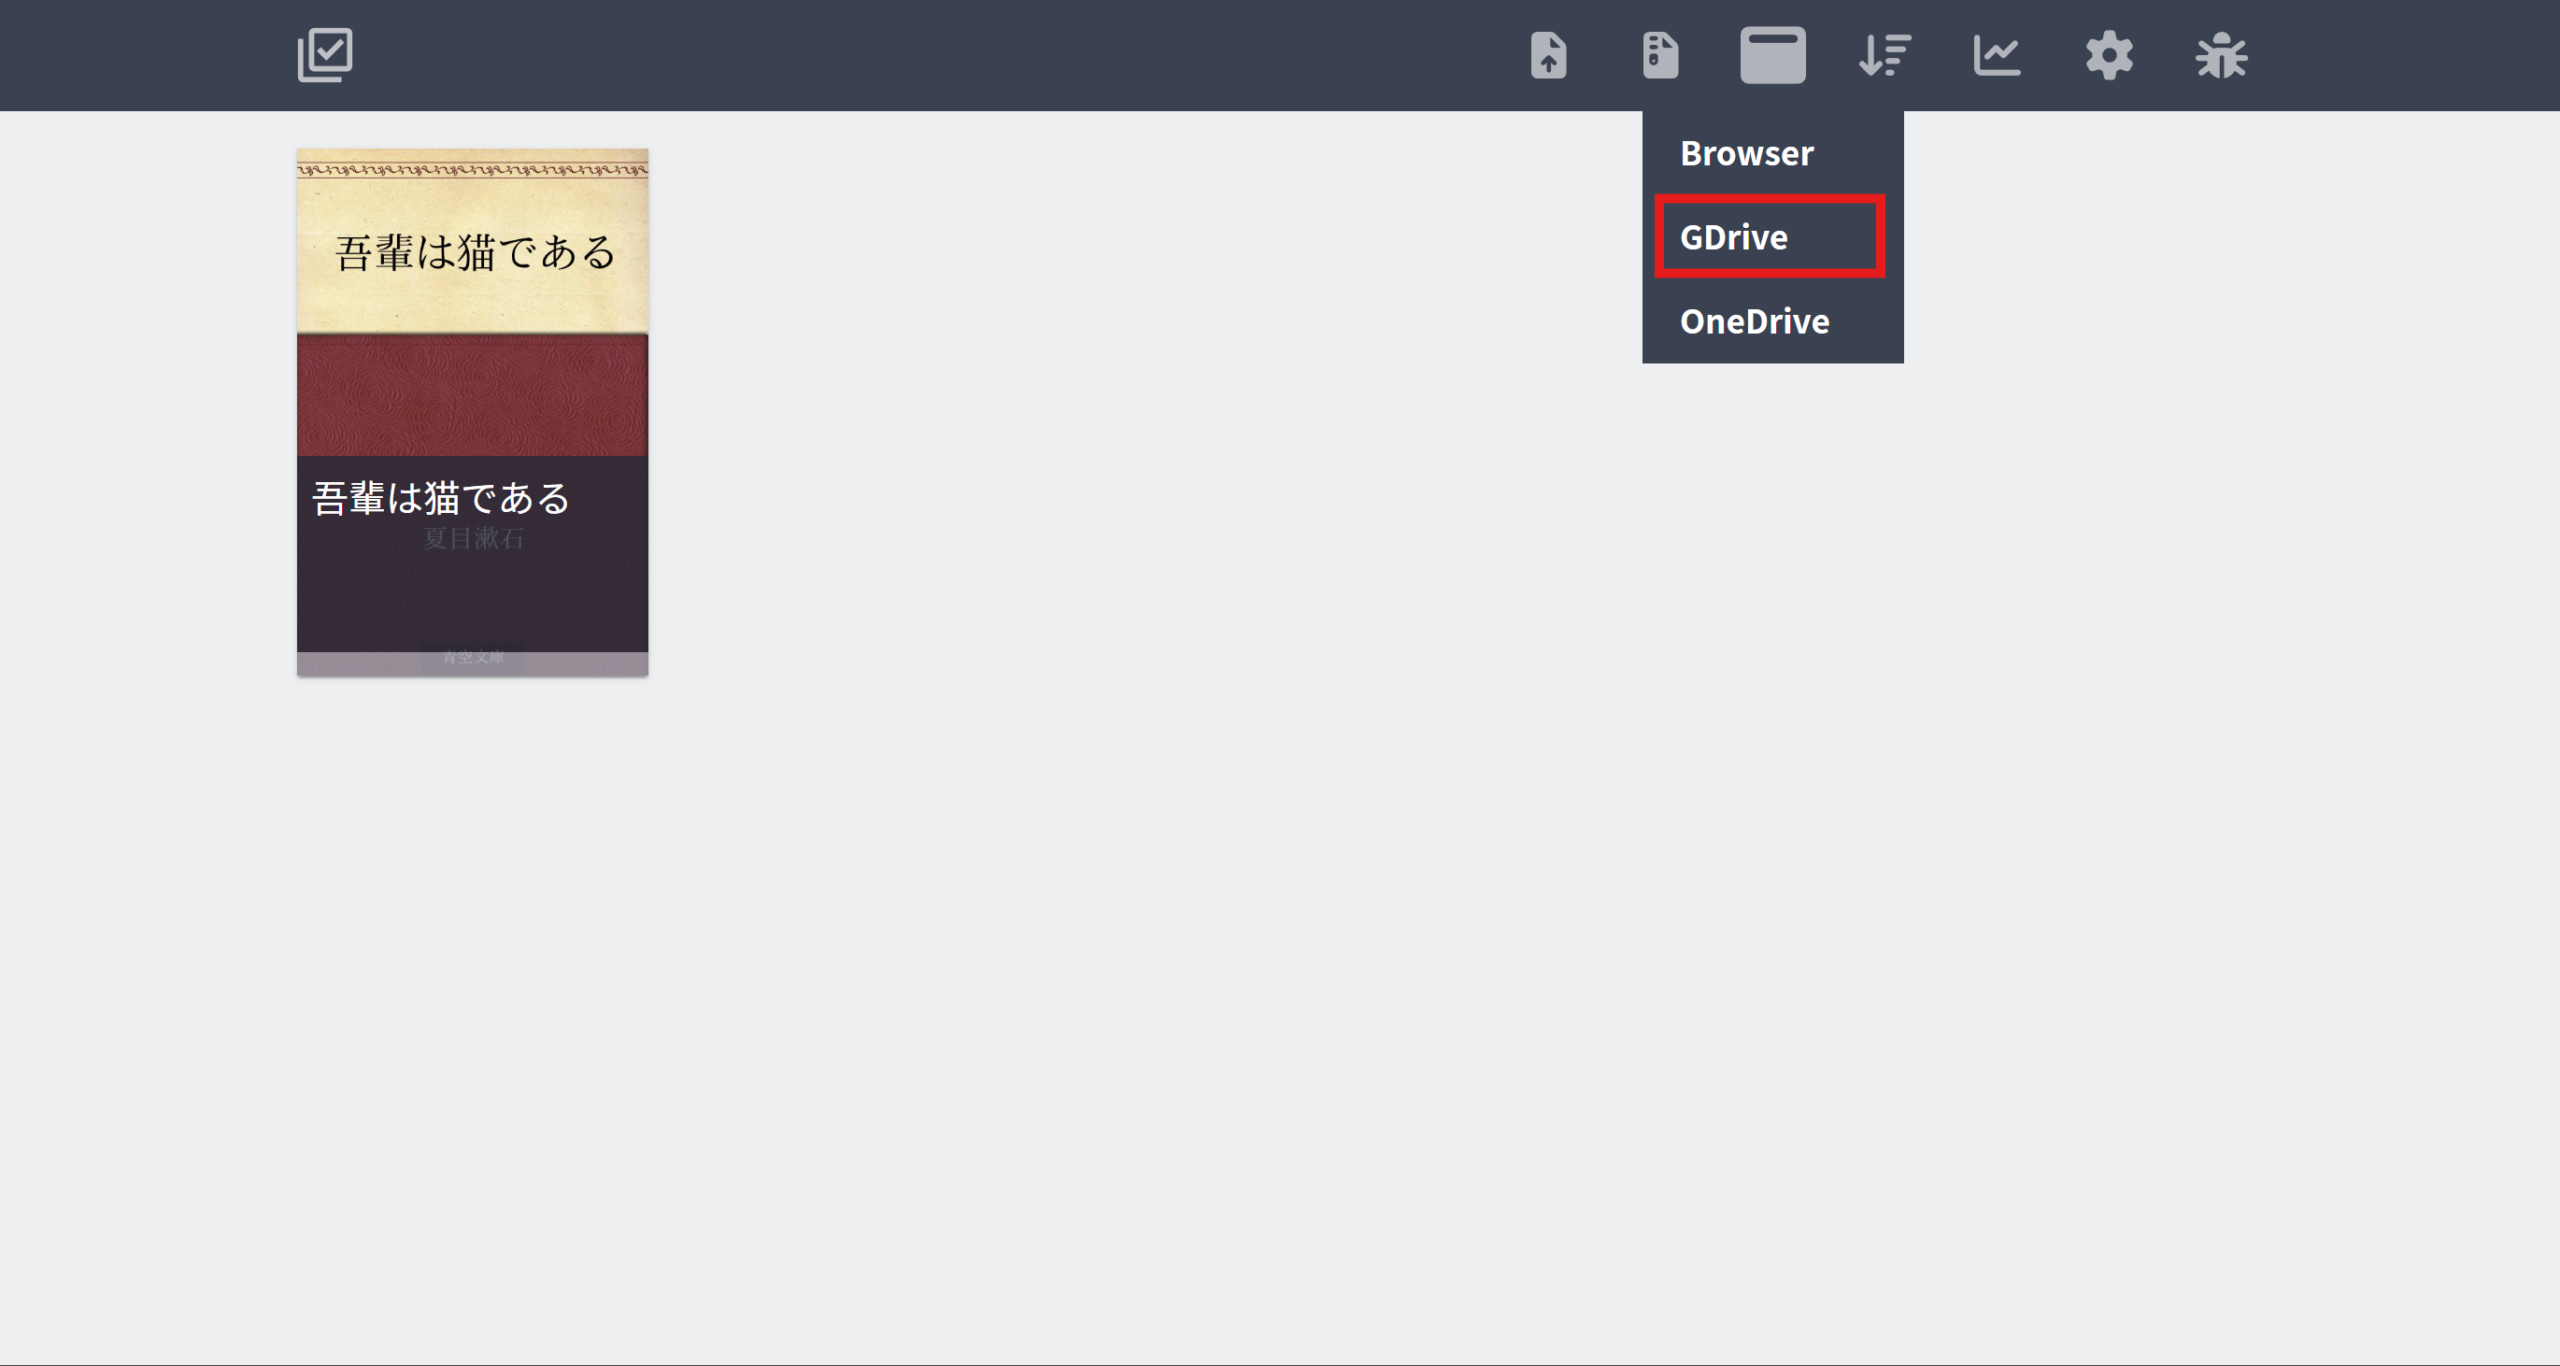
Tsureader is a free browser-based ebook reader that is compatible with Yomitan. After opening tsureader, upload any Japanese ebook you want to read in an EPUB format.
You can save the books you upload and sync them to other devices by connecting Tsu-reader to your Google account. To do this, click on the folder icon in the upper right corner and select “GDrive,” then sign into your Google account.
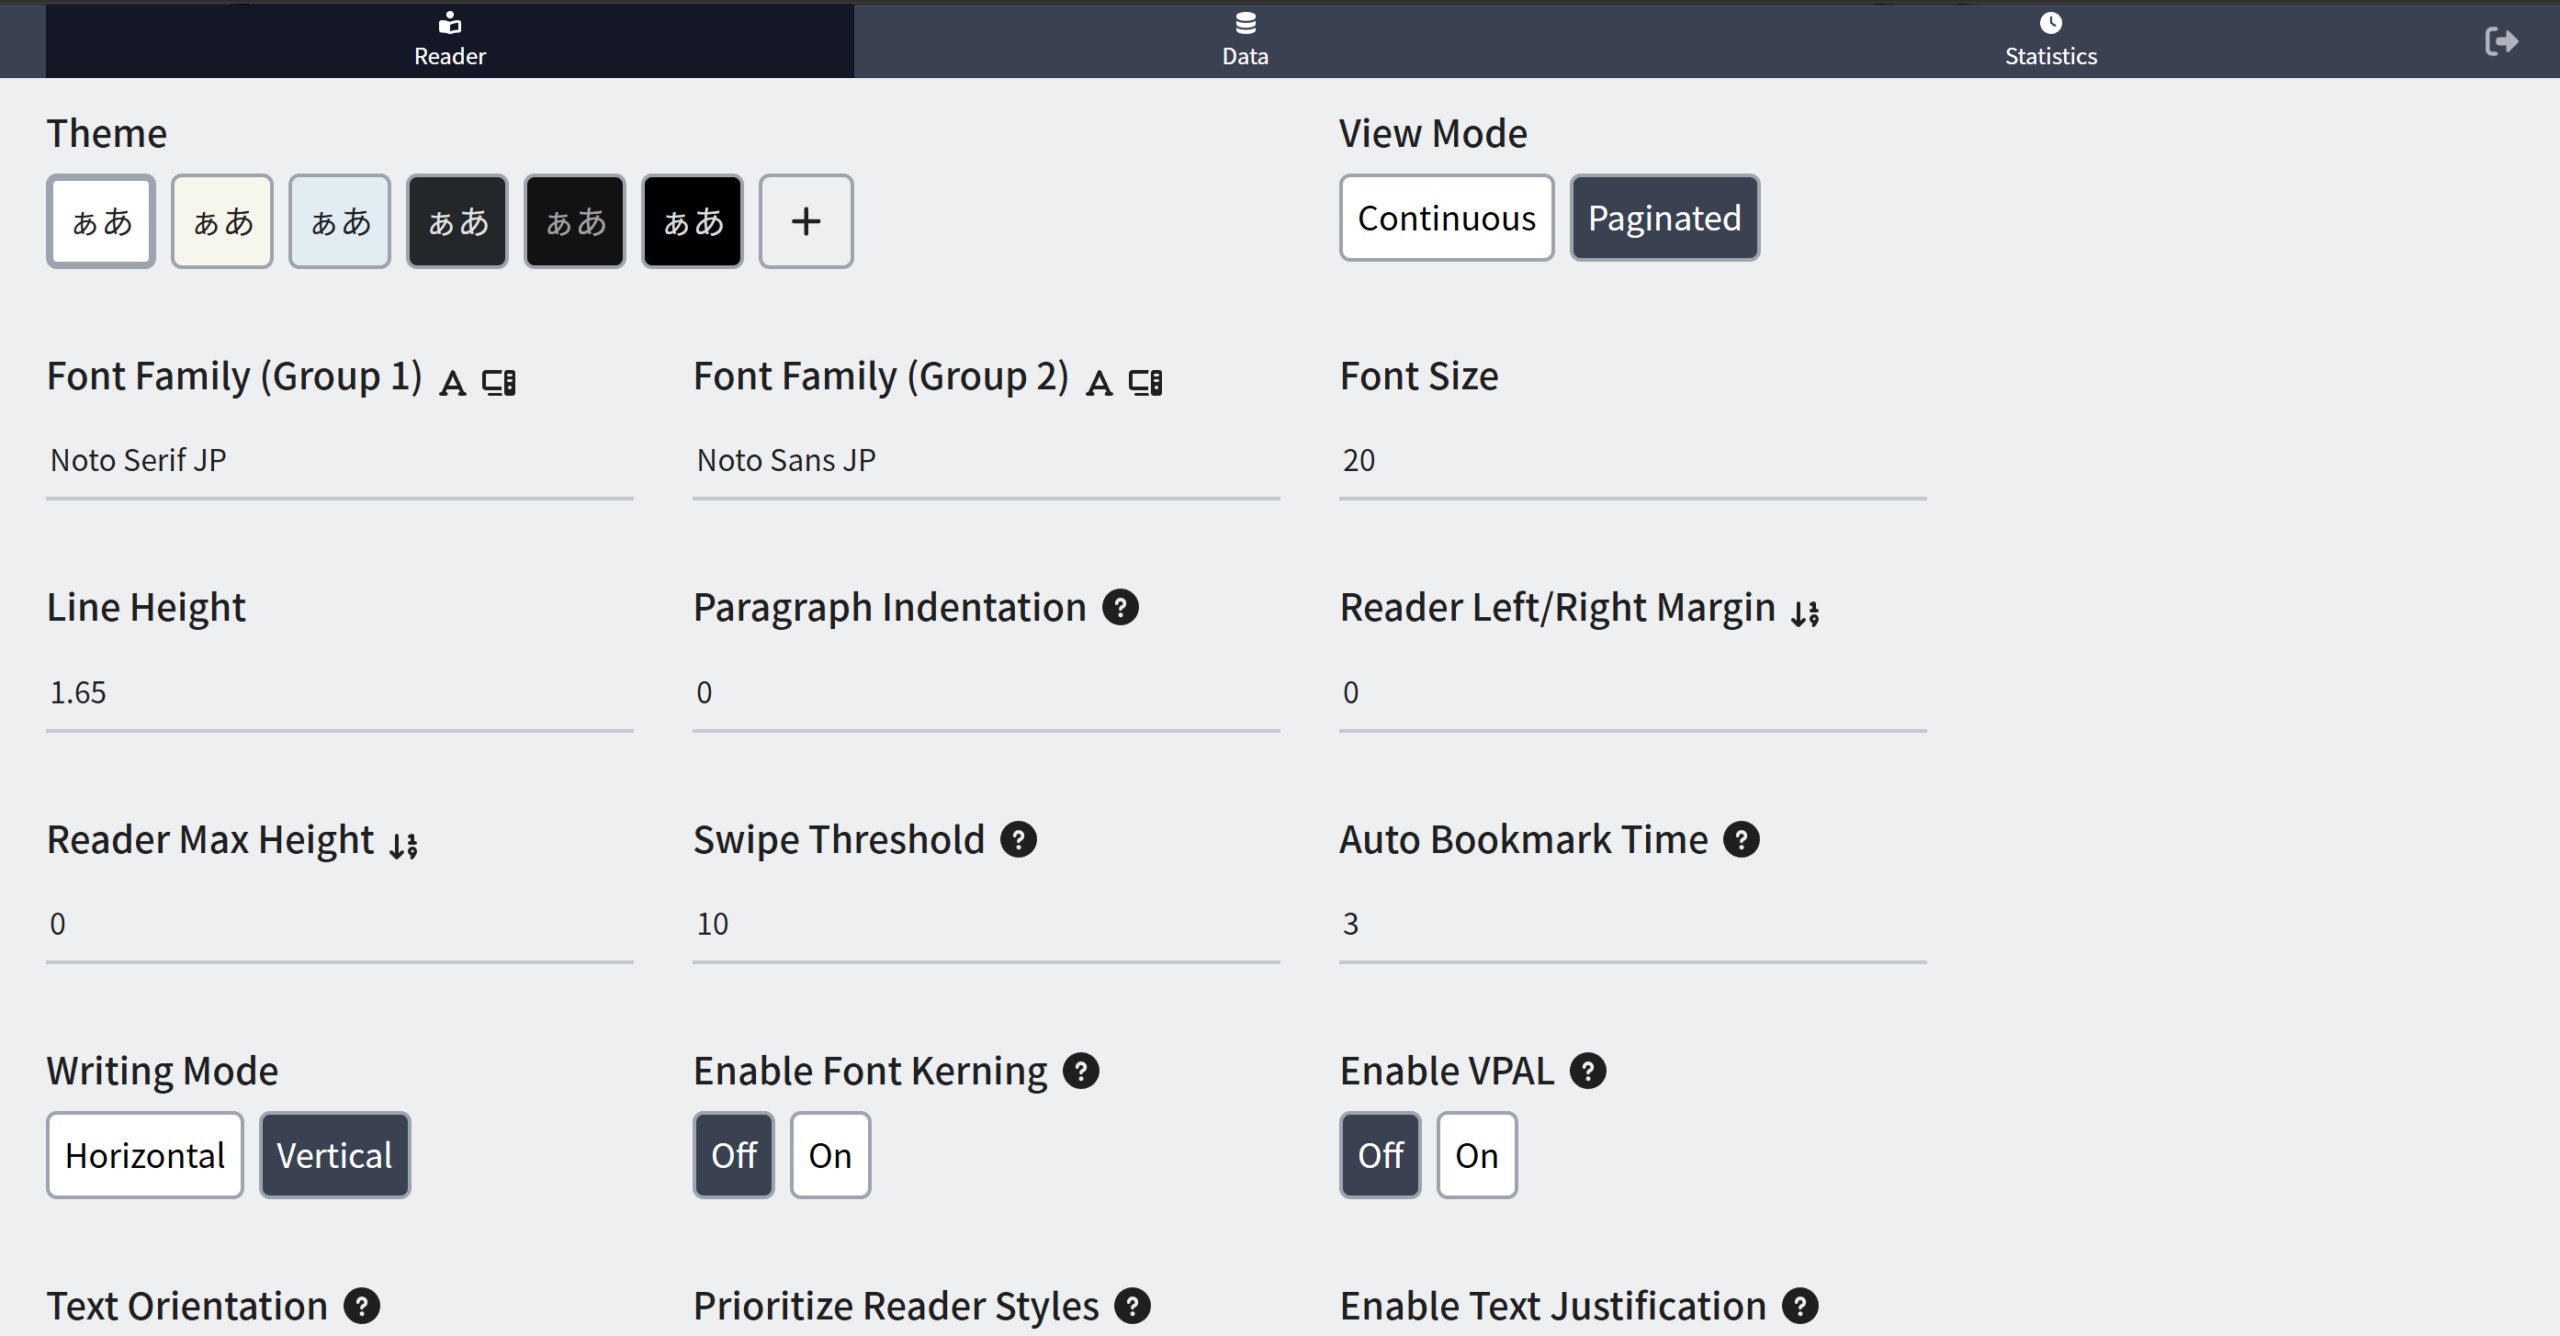
To change the appearance of the text for the book you’re reading, click on the gear icon.

In settings, you can change the page and text color, the font size, view mode, and writing mode. I prefer to read books in continuous view mode and horizontal writing mode, which are not the default settings.
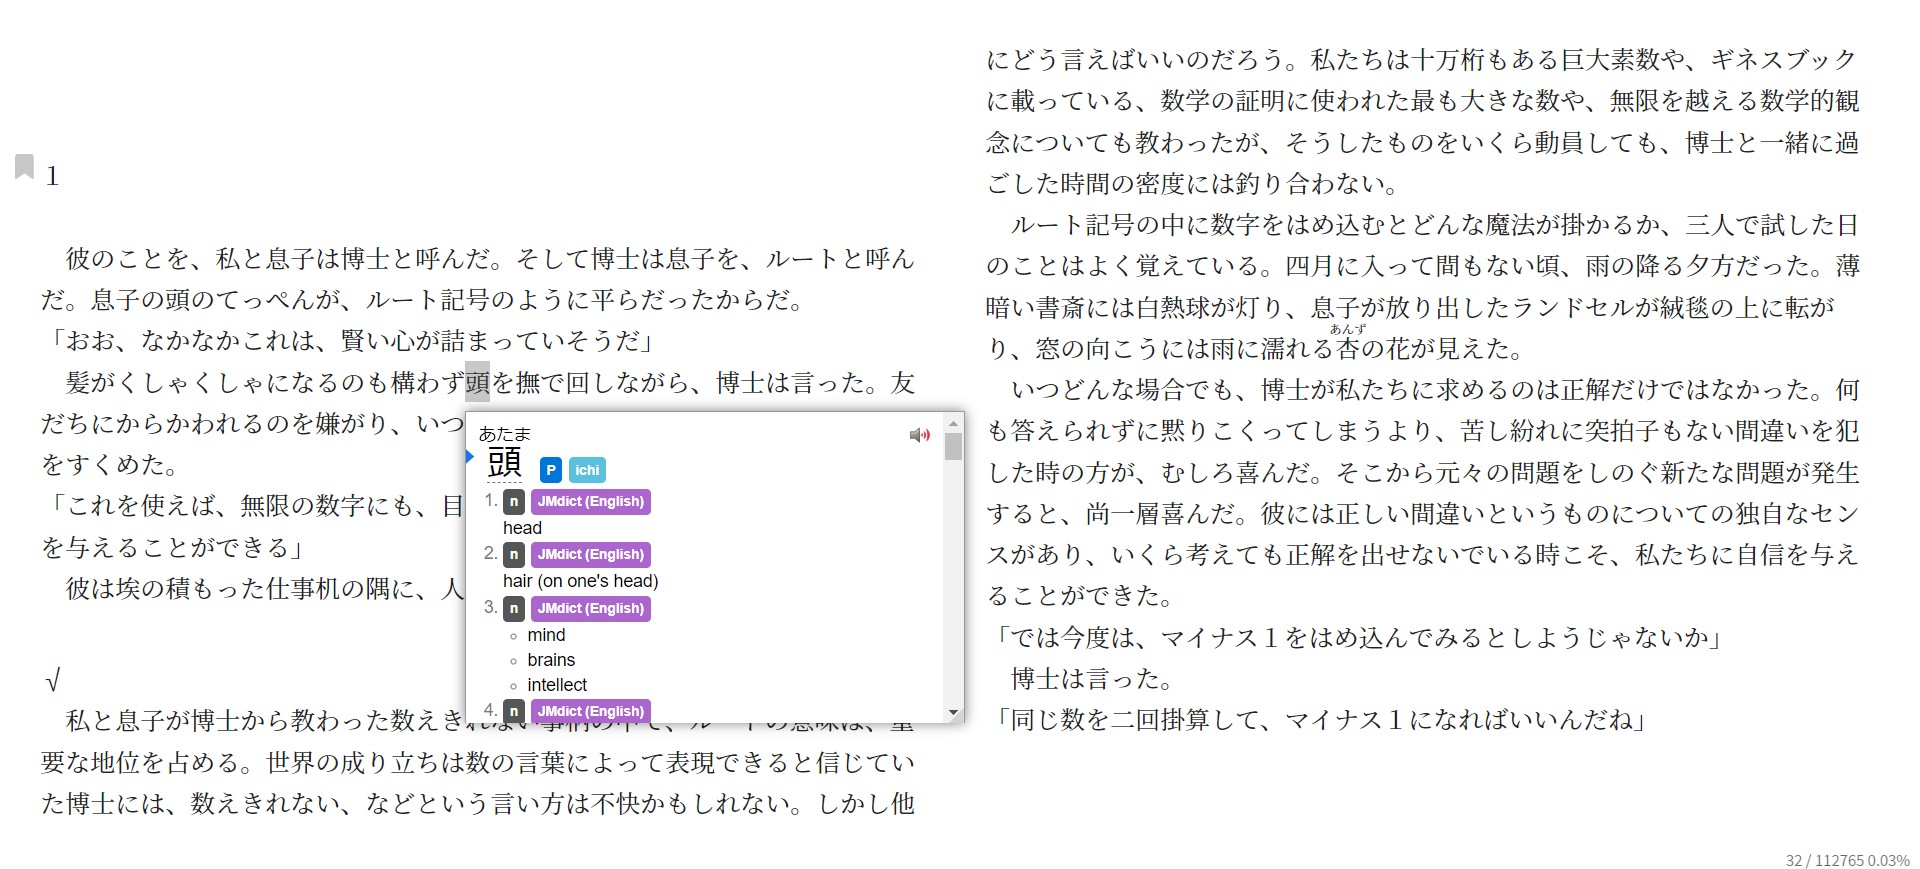
Now go back to your library and select the book you want to read. Make sure you have Yomitan enabled, then shift + click on any word to look up its translation.
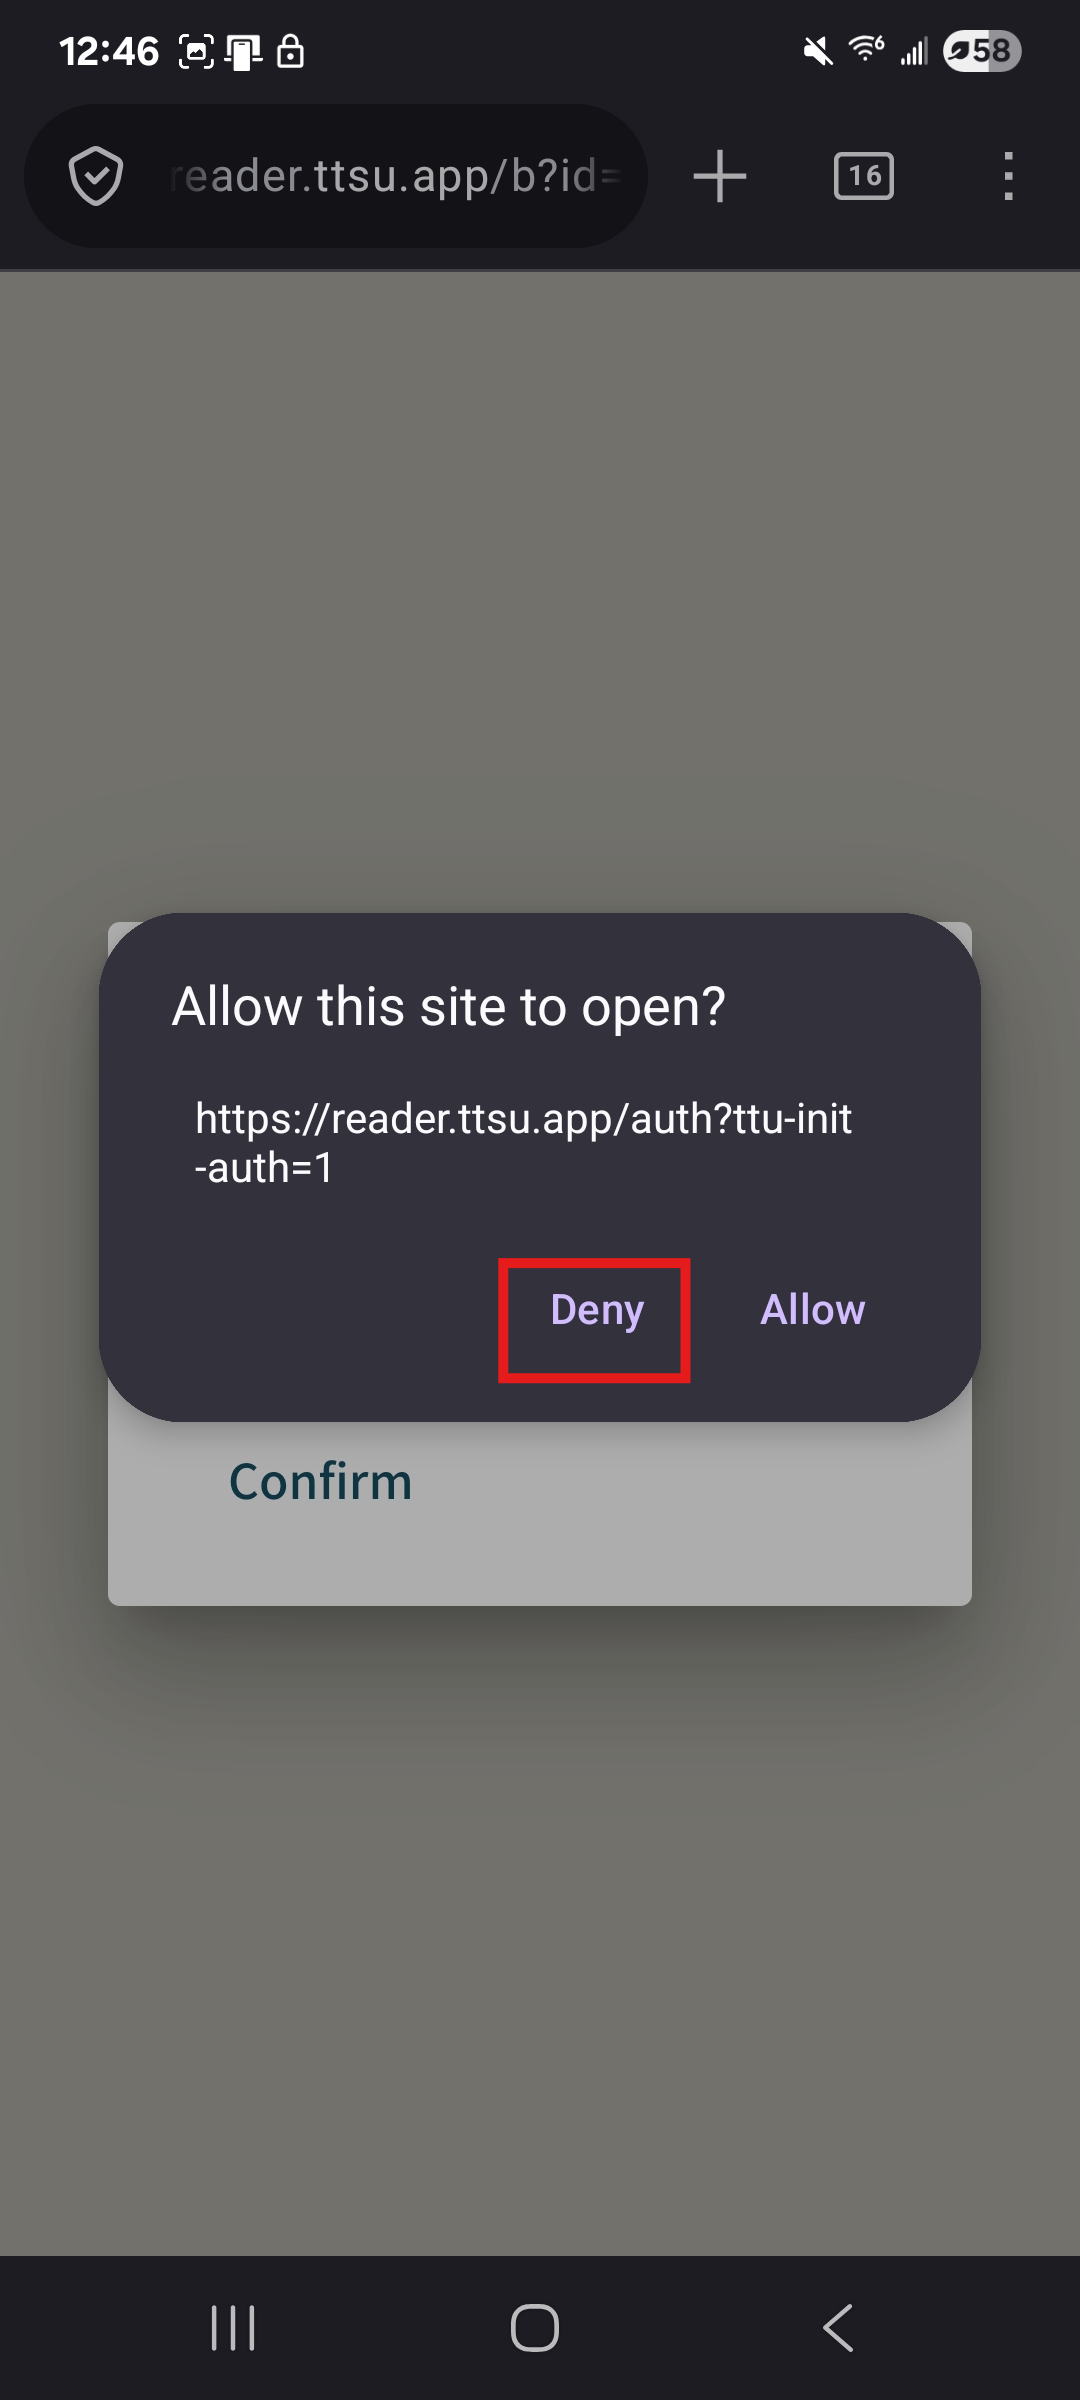
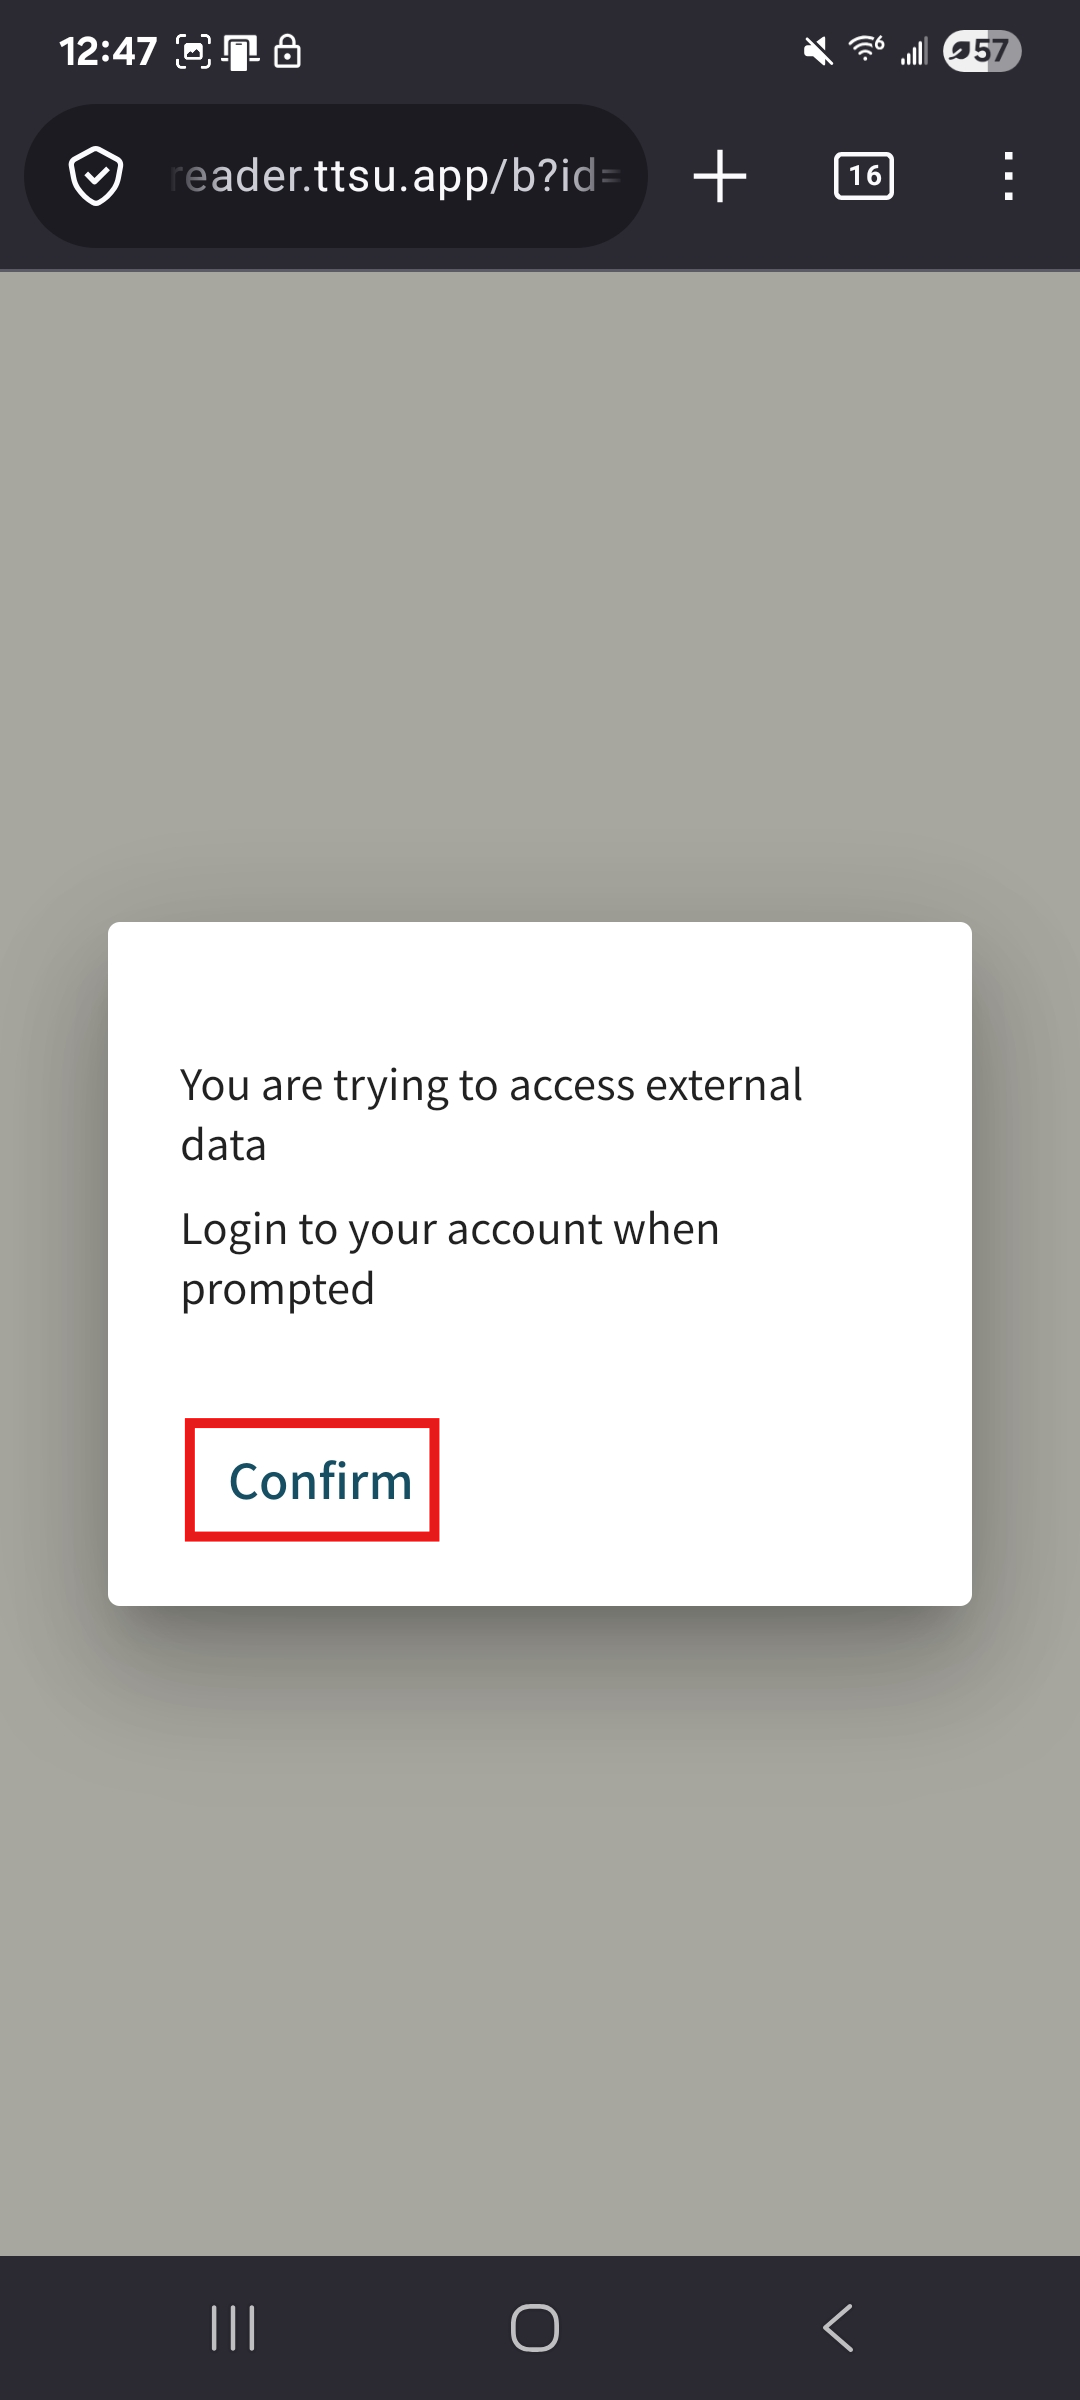
In the Firefox app, sometimes you will get a prompt asking you to “Allow this site to open?” when you go to the Tsu-reader website. Click on “Deny” so you don’t get stuck in a loop.
Next, click on “Confirm” and sign in to your Google account to access your books.
Now you can open any book you want to read and tap on a word for its translation.
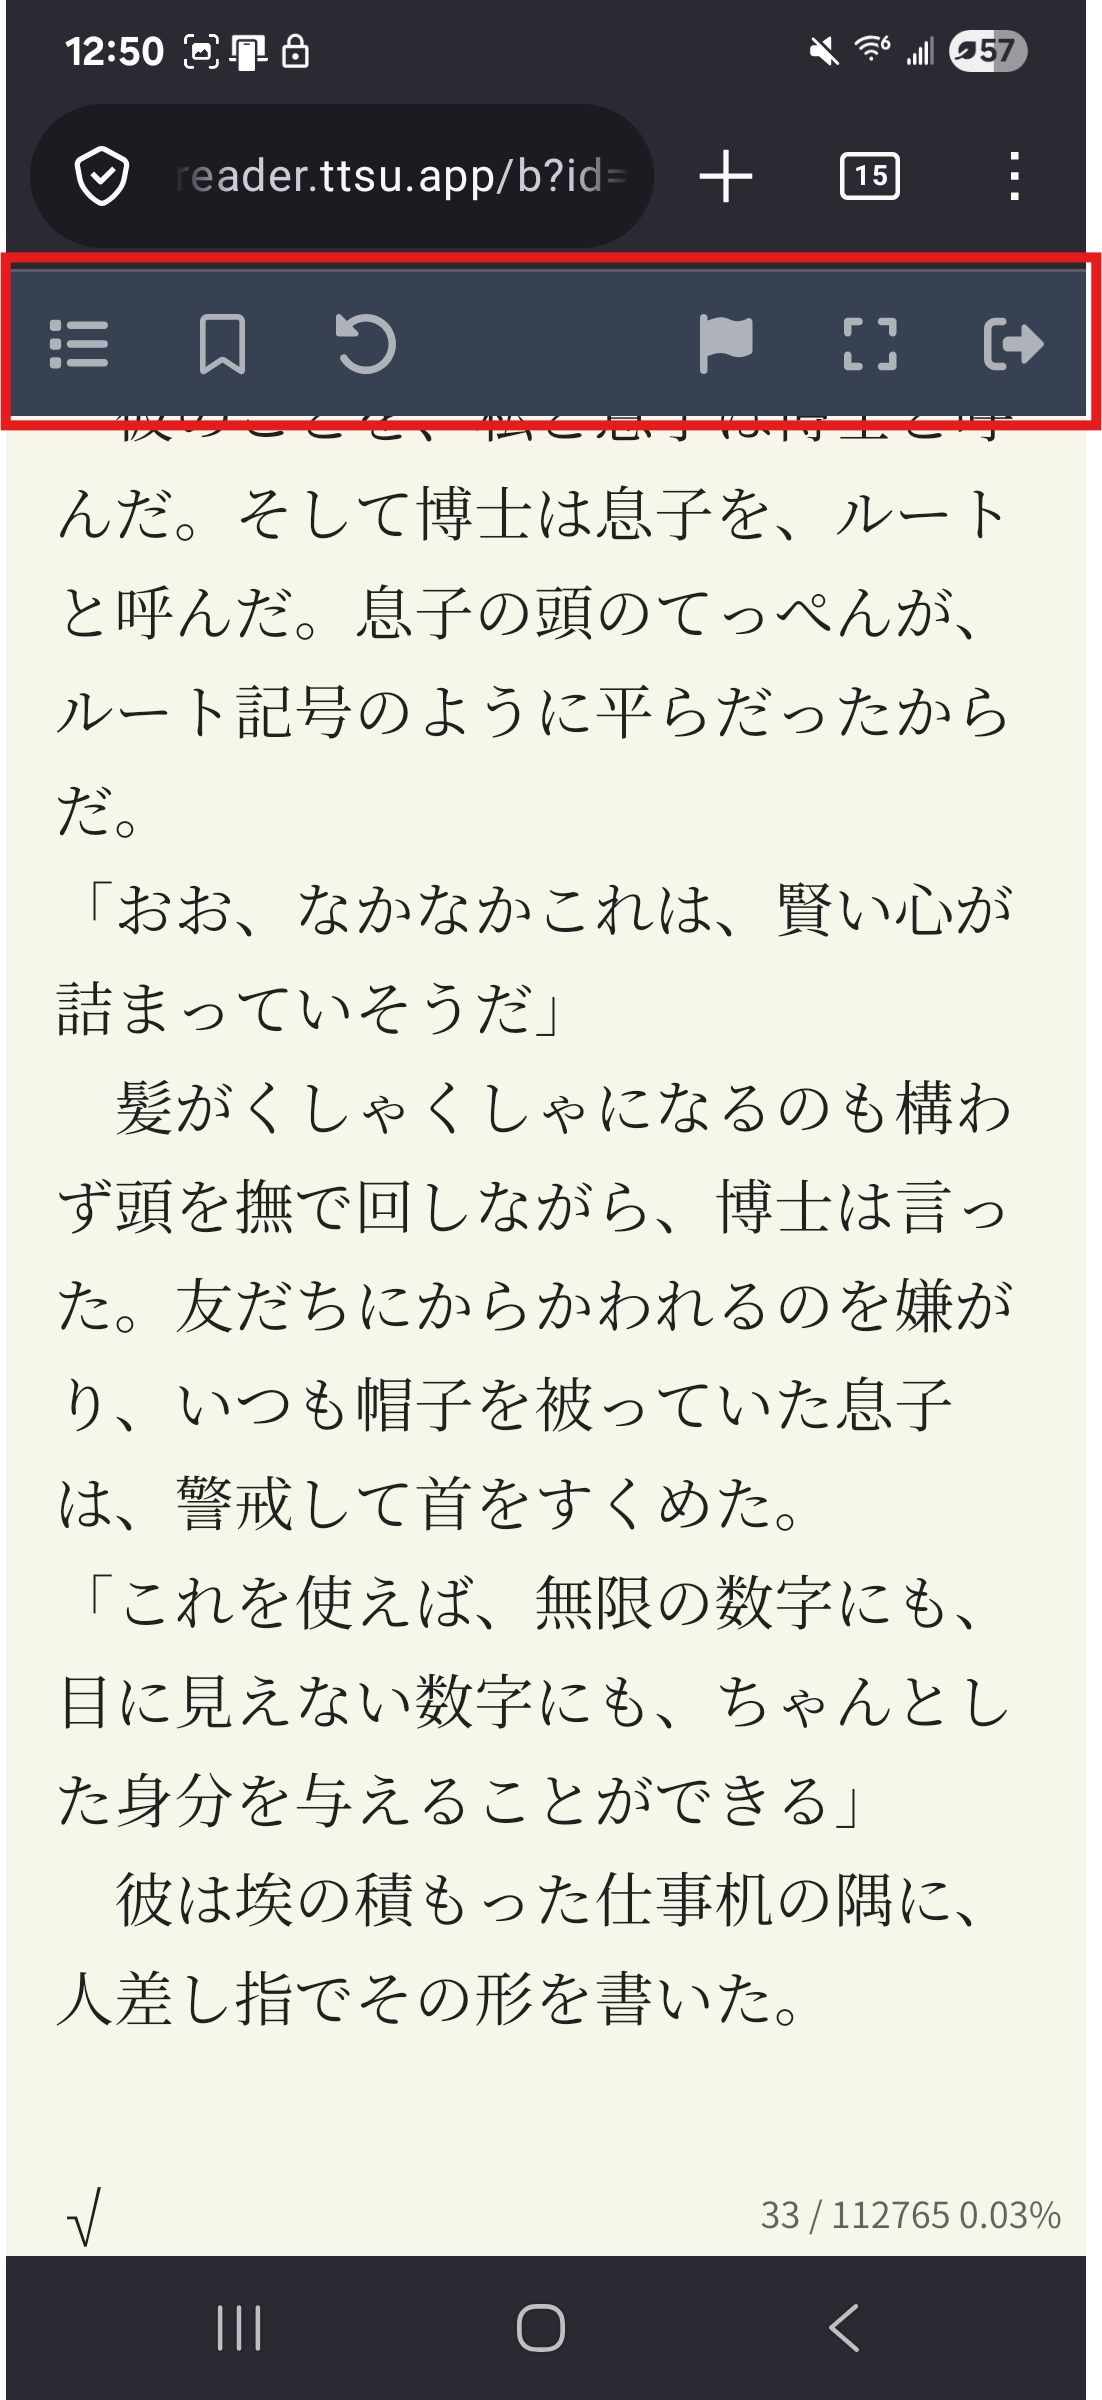
To go back to your library, double-tap the area at the top of your screen to make the toolbar appear.
Immersive Translate
Immersive Translate is a powerful extension available on all popular browsers. It allows you to read web pages and documents in two languages. This is great for language learners because it lets you check your comprehension as you read. Start by downloading the extension for the browser of your choice.
After you download the extension, a pink bubble will appear on the right side of your screen. When you click on this, it will add an English translation underneath each paragraph on the website. This is very useful when you first start learning to read, especially if you combine it with another extension like Yomitan that gives you a word’s definition and pronunciation.
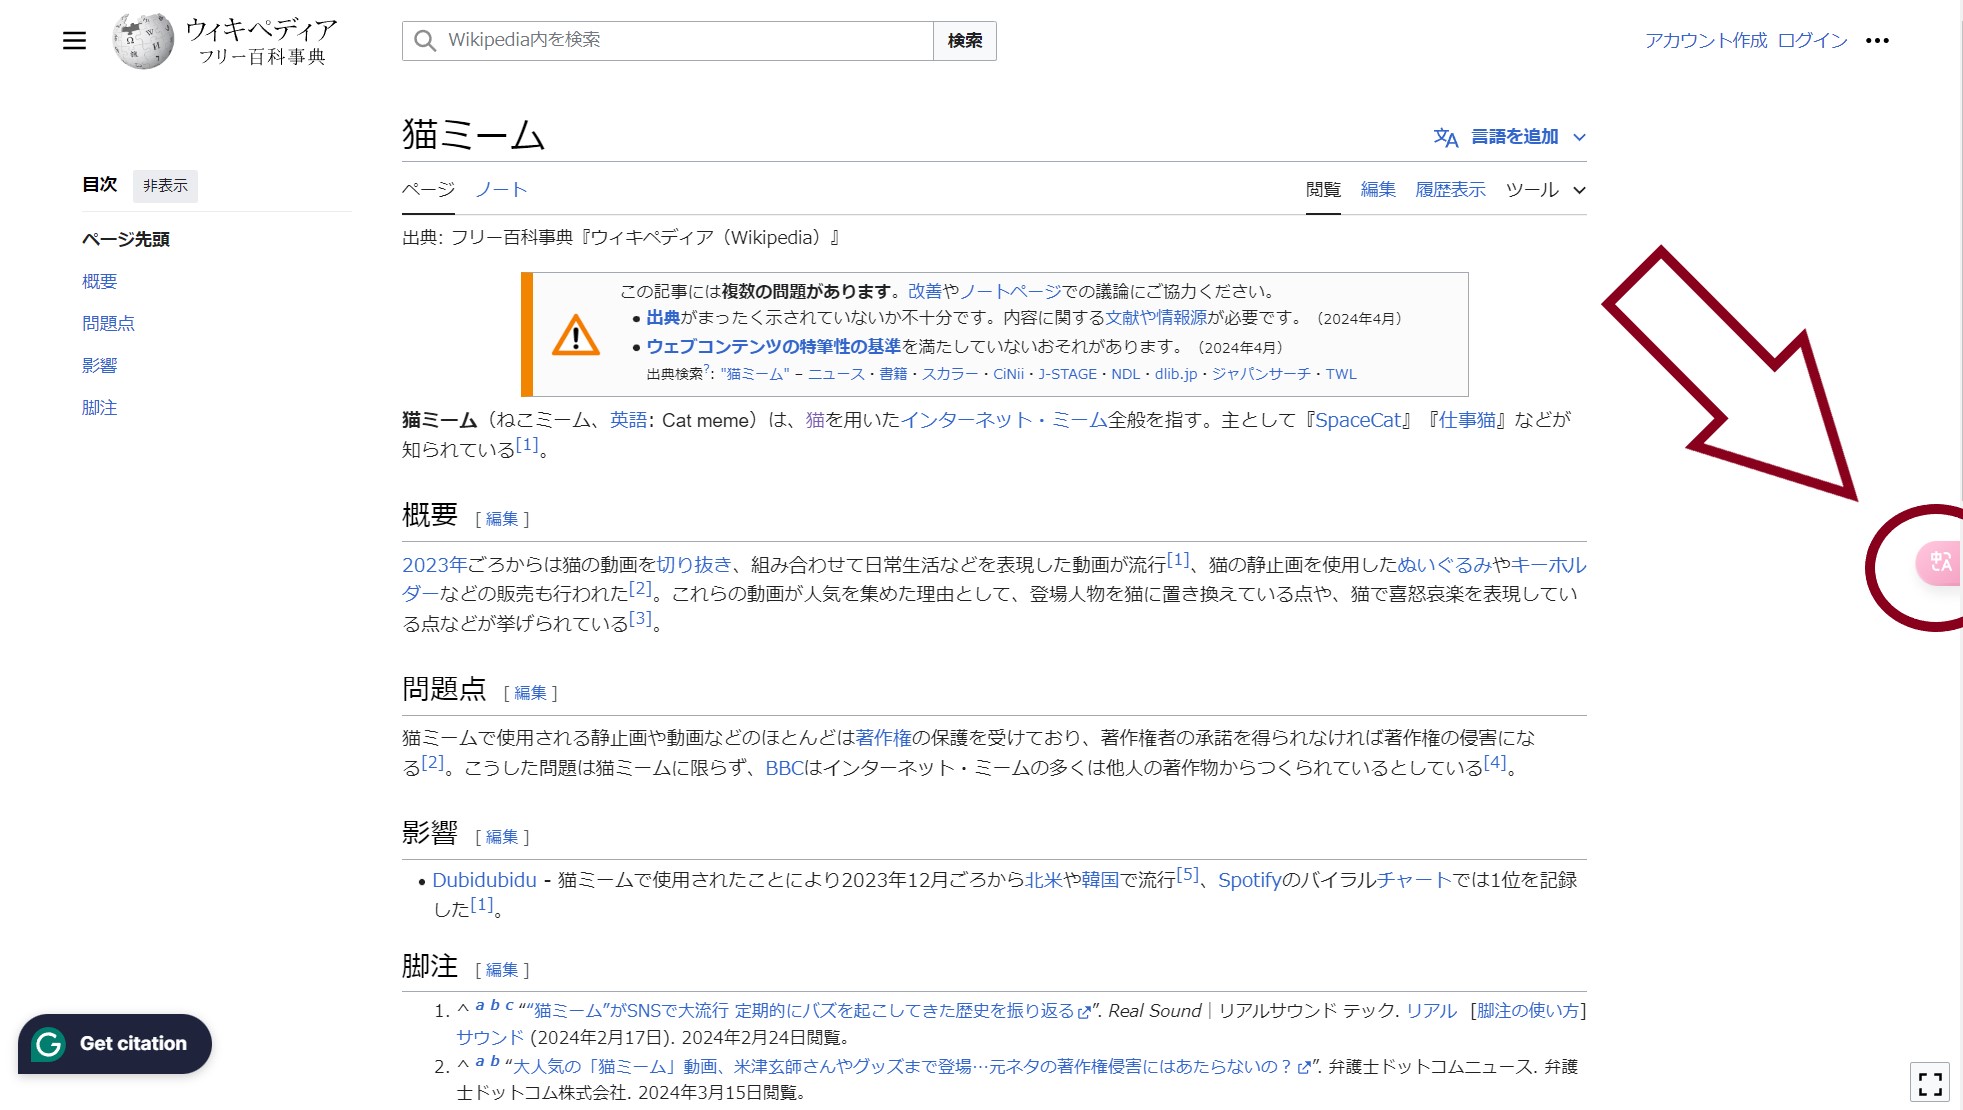
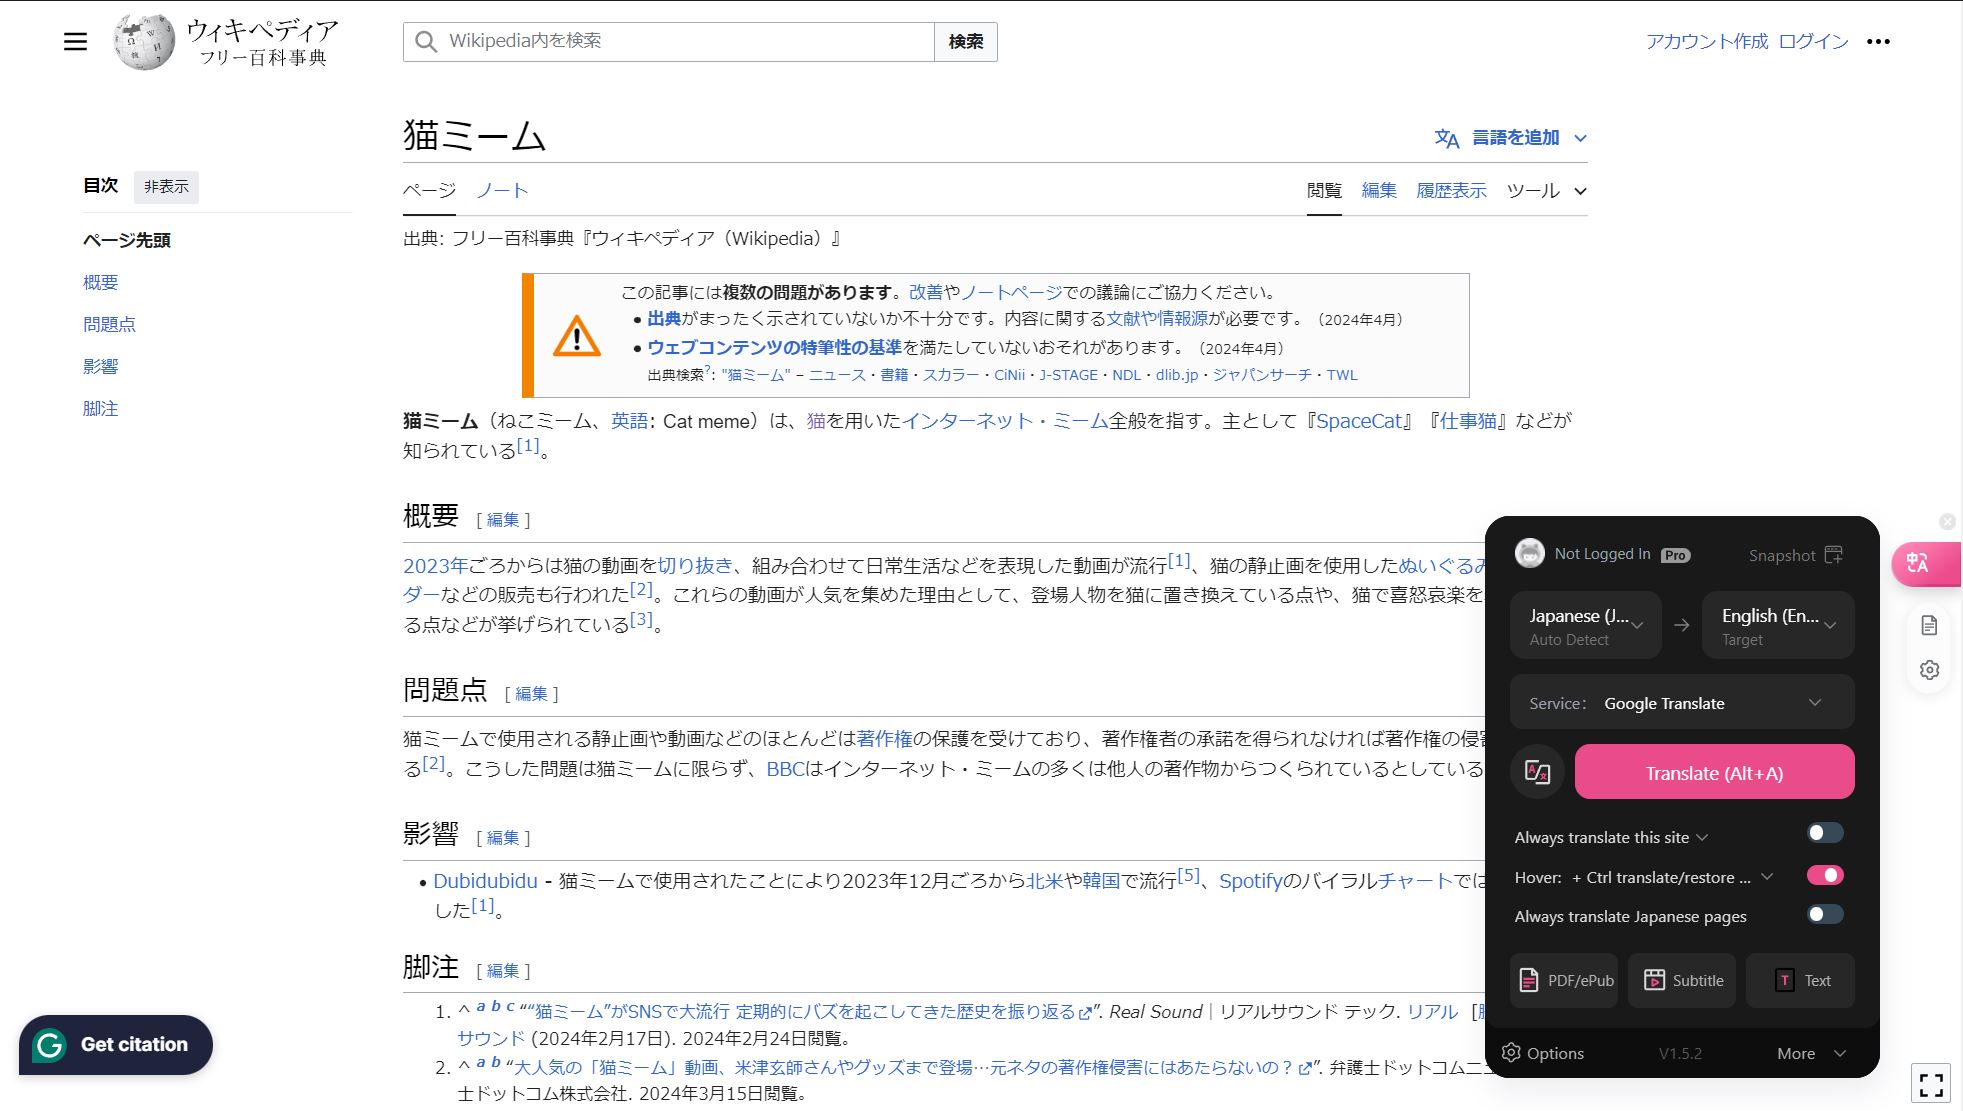
As your reading abilities improve, I recommend only translating the paragraphs you struggle to understand. To translate one paragraph at a time, click on the gear icon under the pink bubble to access your settings, then make sure you have “Hover” enabled and the other two options disabled like in the picture below. Now when you Ctrl + click on a paragraph it will only translate that paragraph. If you are on mobile, it will be a right swipe to translate a single paragraph.
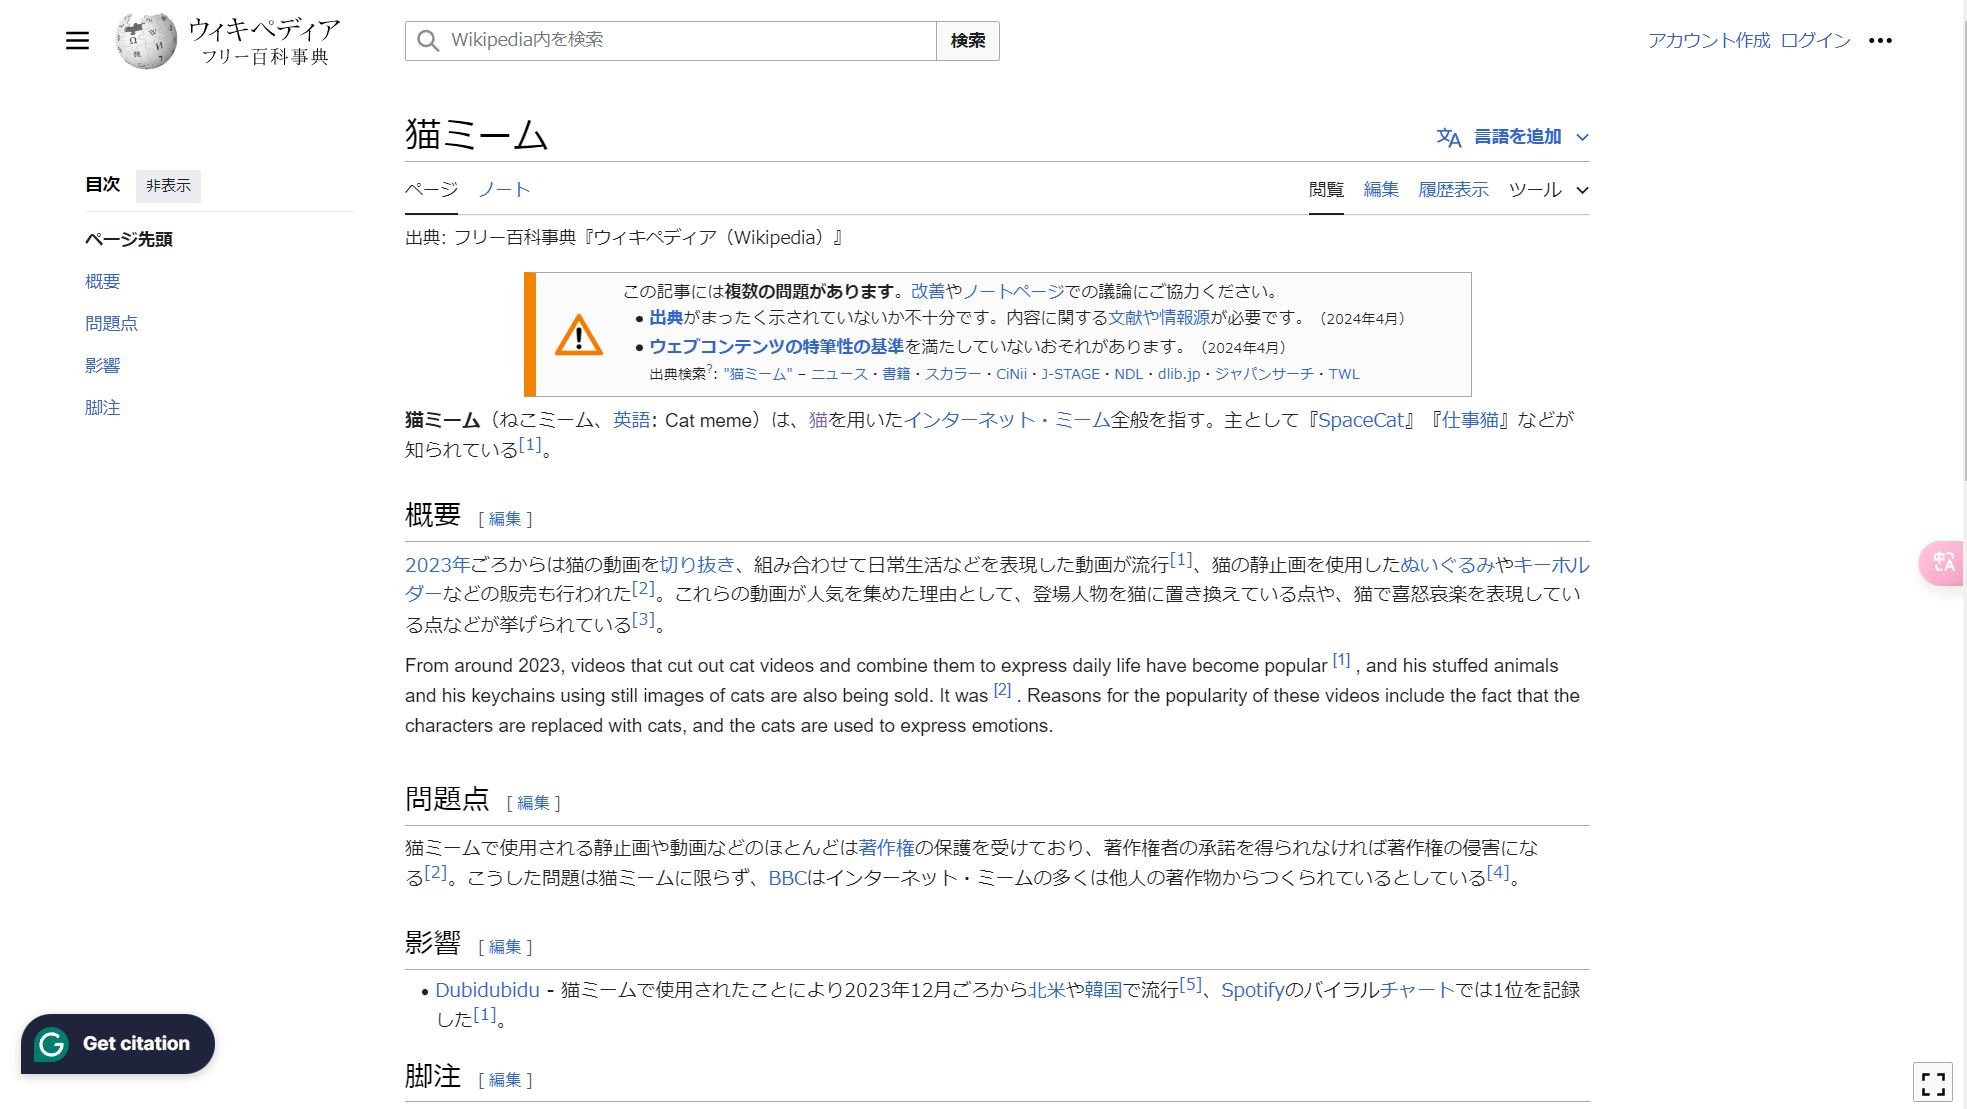
Here is an example where only one paragraph is translated. As your reading abilities improve, you should only use translations as needed and try not to rely on them too heavily.
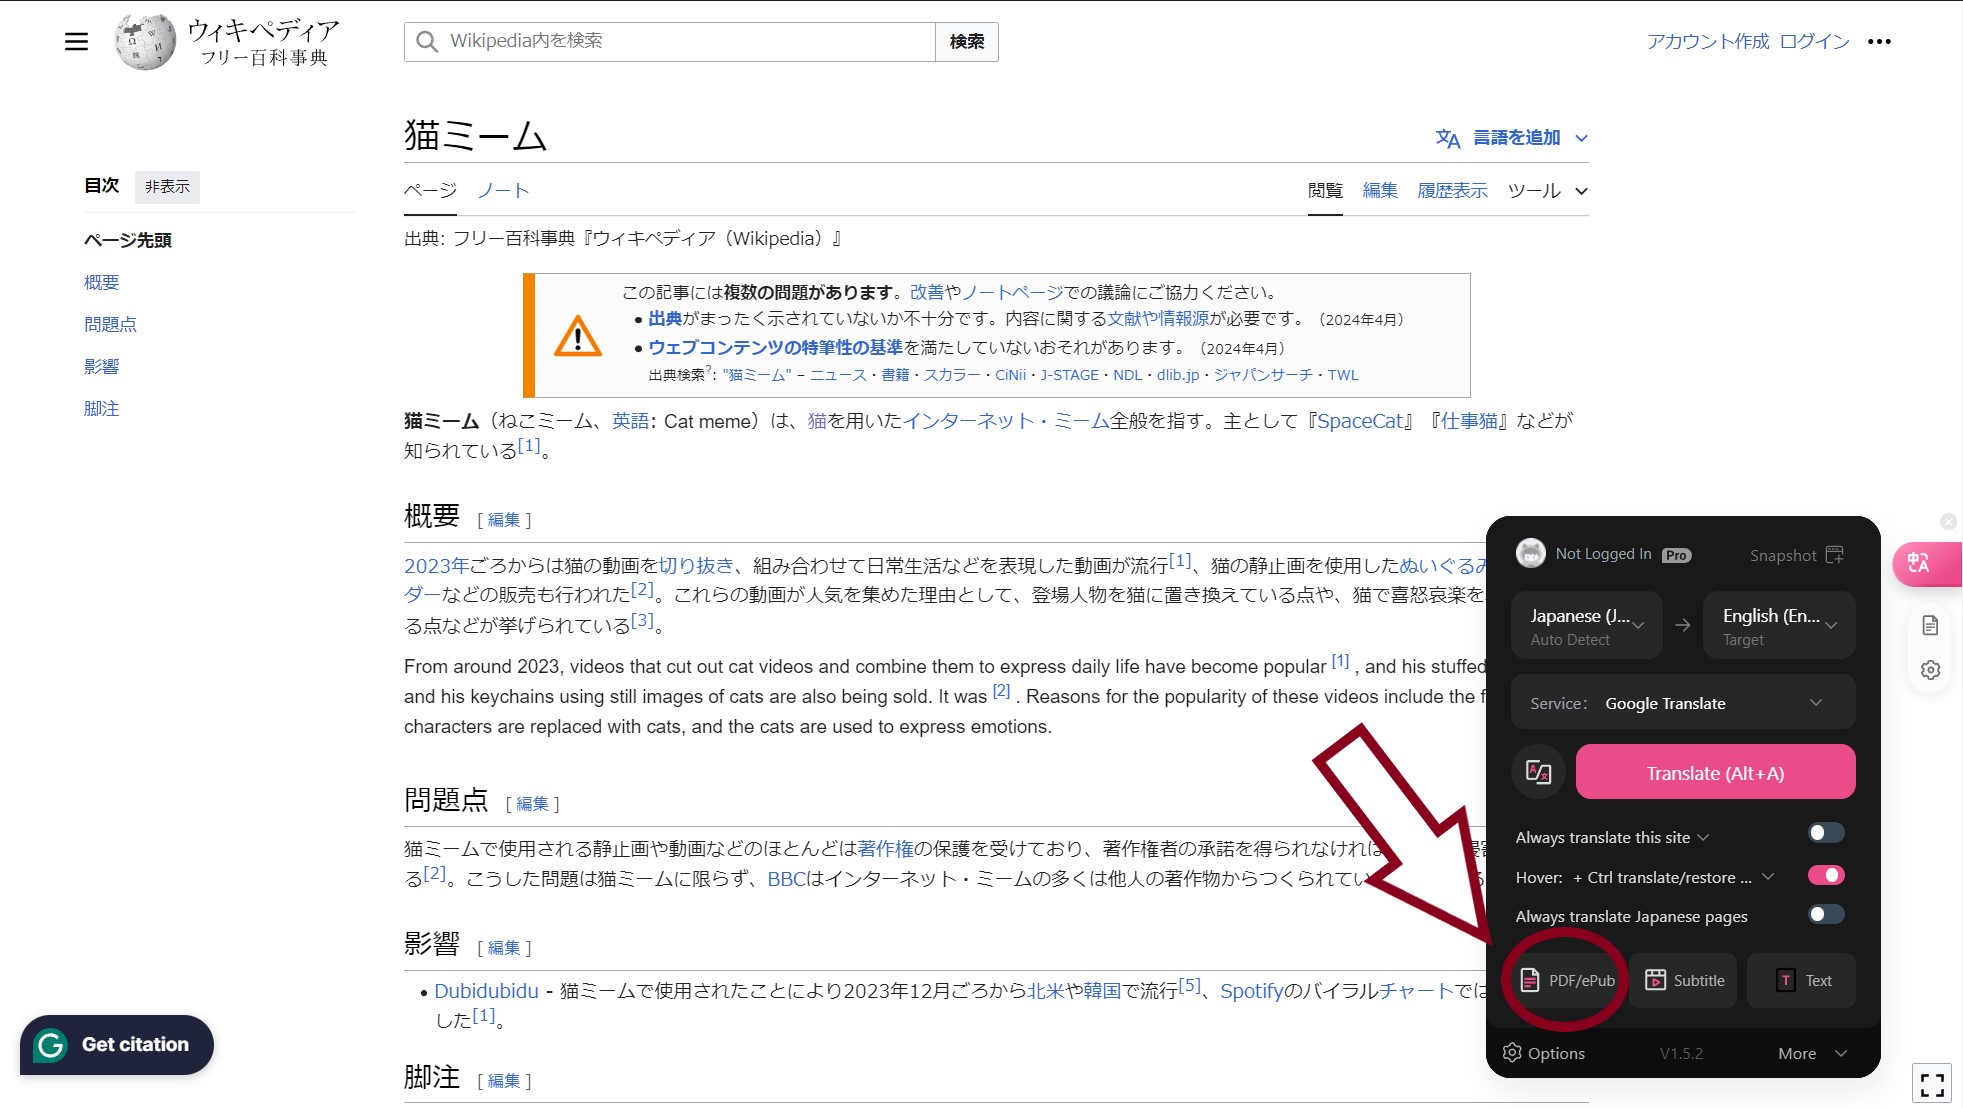
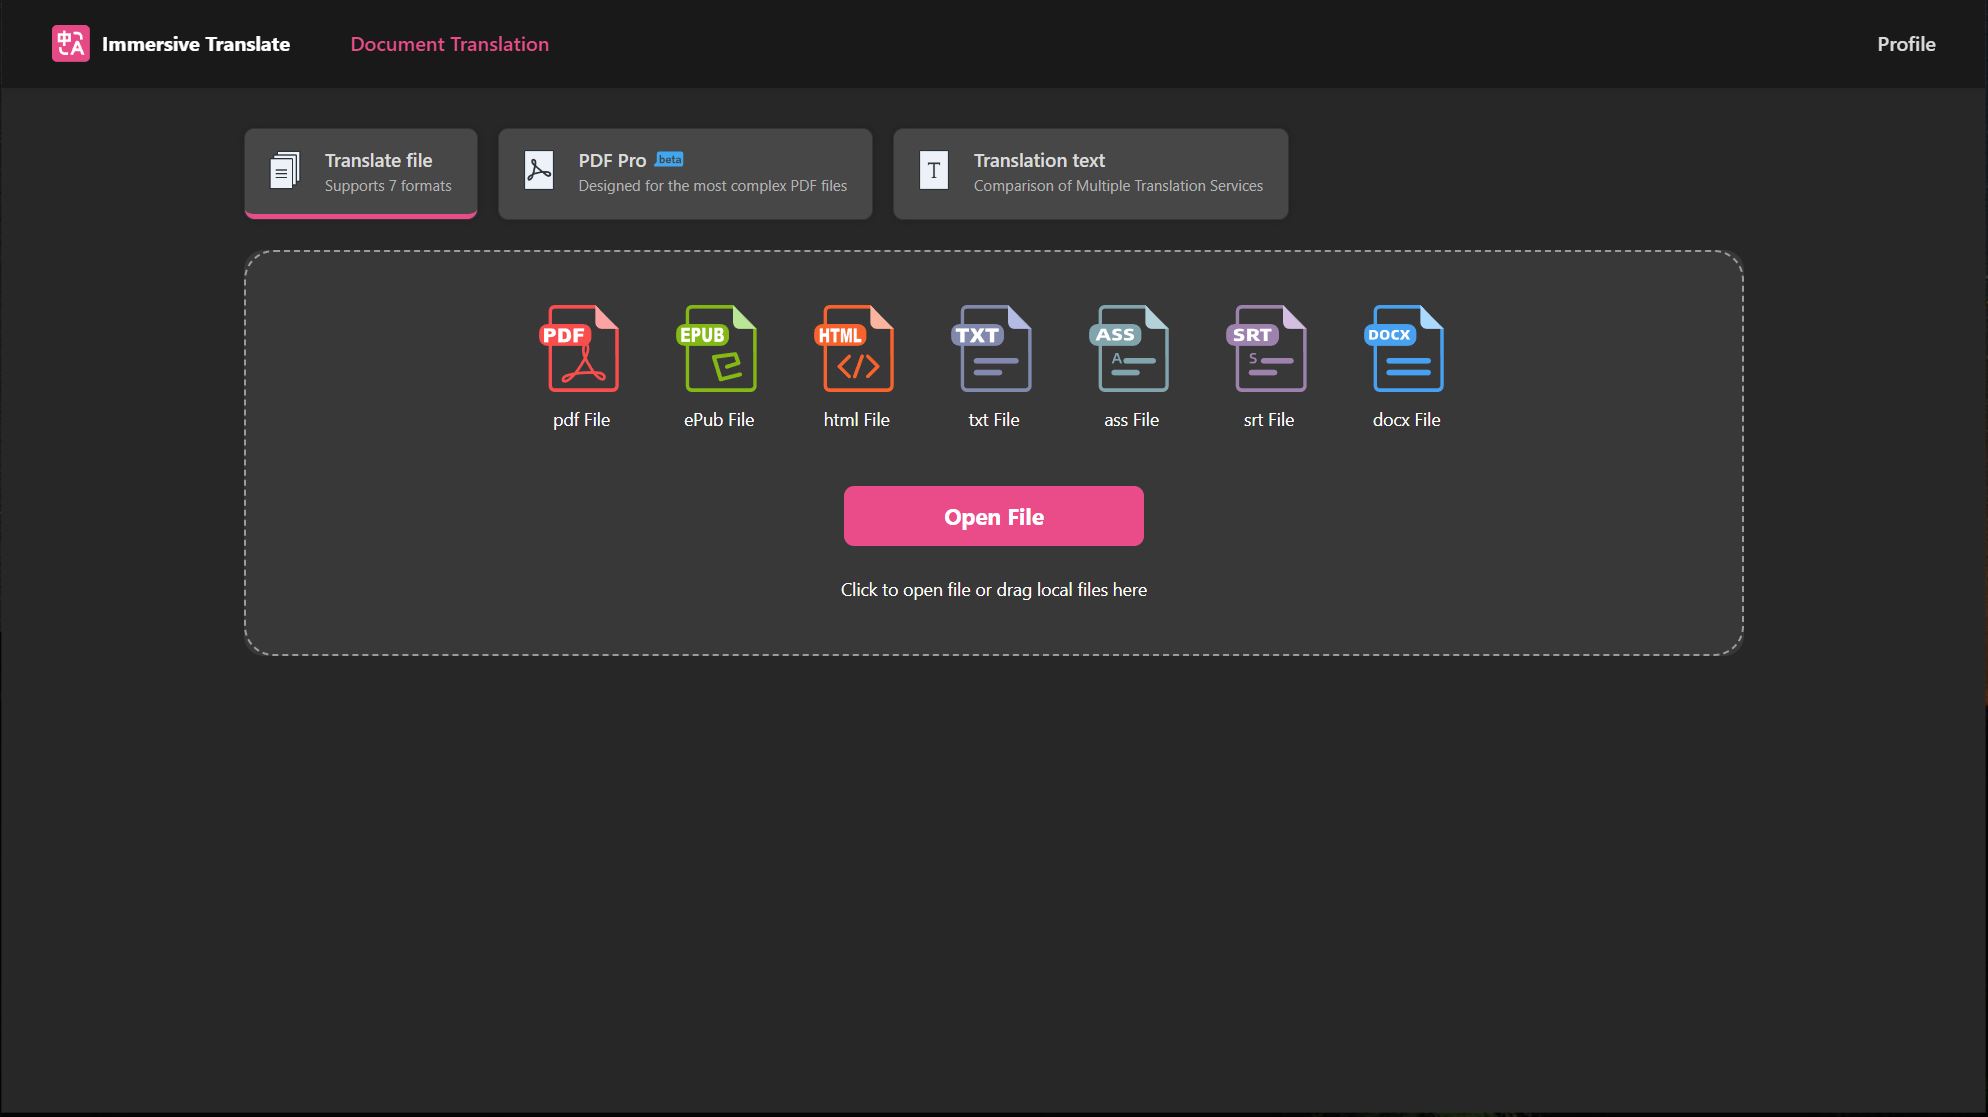
To add translations to PDF or ePub, click on the PDF/ePUB button in the settings.
Now you can upload any Japanese PDF or ePub to which you would like to add translations. I recommend using books or articles you’ve downloaded. Also, I generally prefer to use ePubs since they allow for paragraph-by-paragraph translation. If your book did not come as an epub, you can use a converter to change the format.
Once you’ve selected your document, click on “translate.” It may take a few minutes to prepare and translate your document depending on your internet connection and the size of the document, so be patient. Also, because it’s a machine translation, it won’t always be perfect, so you shouldn’t overly rely on the translation. It’s just there as a way to support your comprehension as you read. You should try to understand the Japanese on your own first.
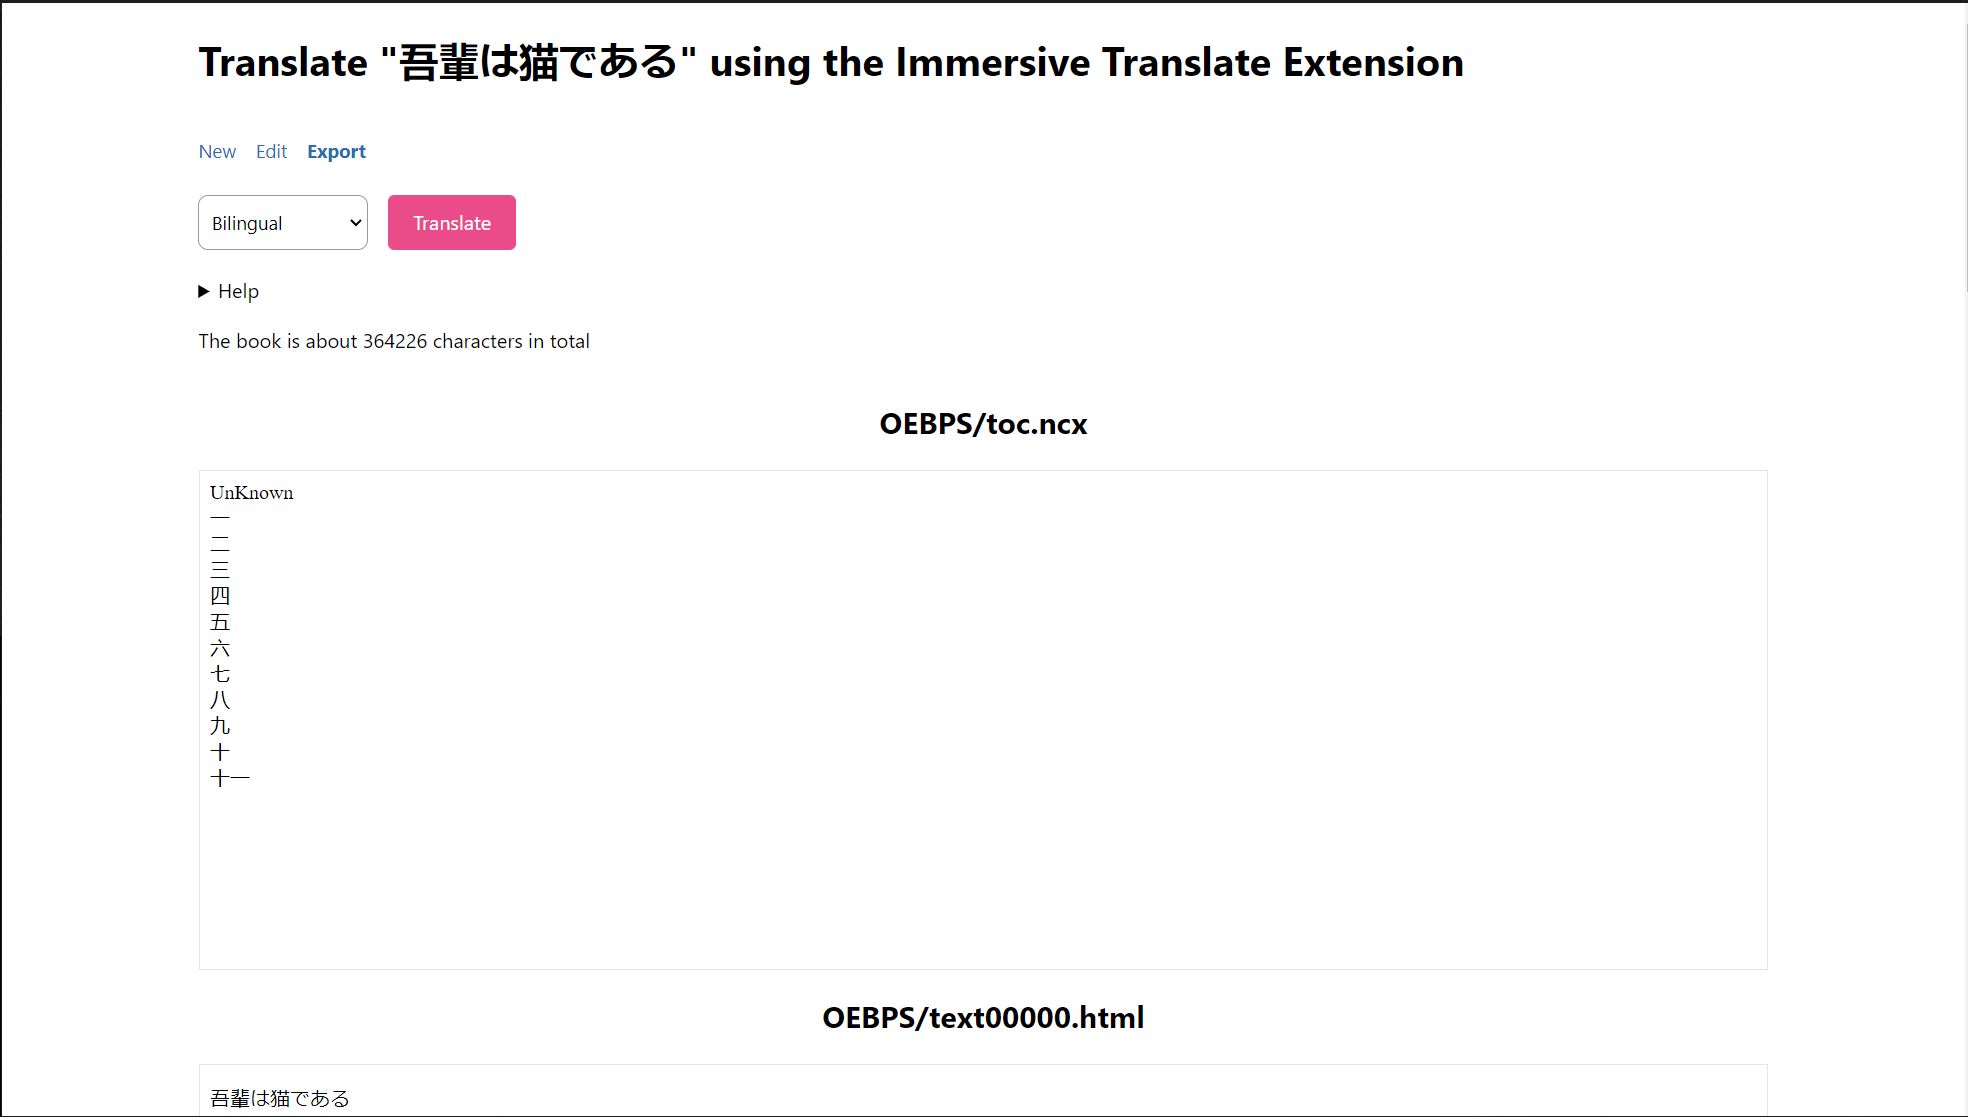
Once your document is done, it will automatically be downloaded to your device. To read the document, you can use any reading program of your choice, but I highly recommend ReadEra if you tend to read on your phone like I do. If you like to read on your laptop, I recommend Aquile Reader.

Japanese texts are usually written from top to bottom in ReadEra, so to change the orientation, go to the settings, then click on “text direction” and select “left to right.”

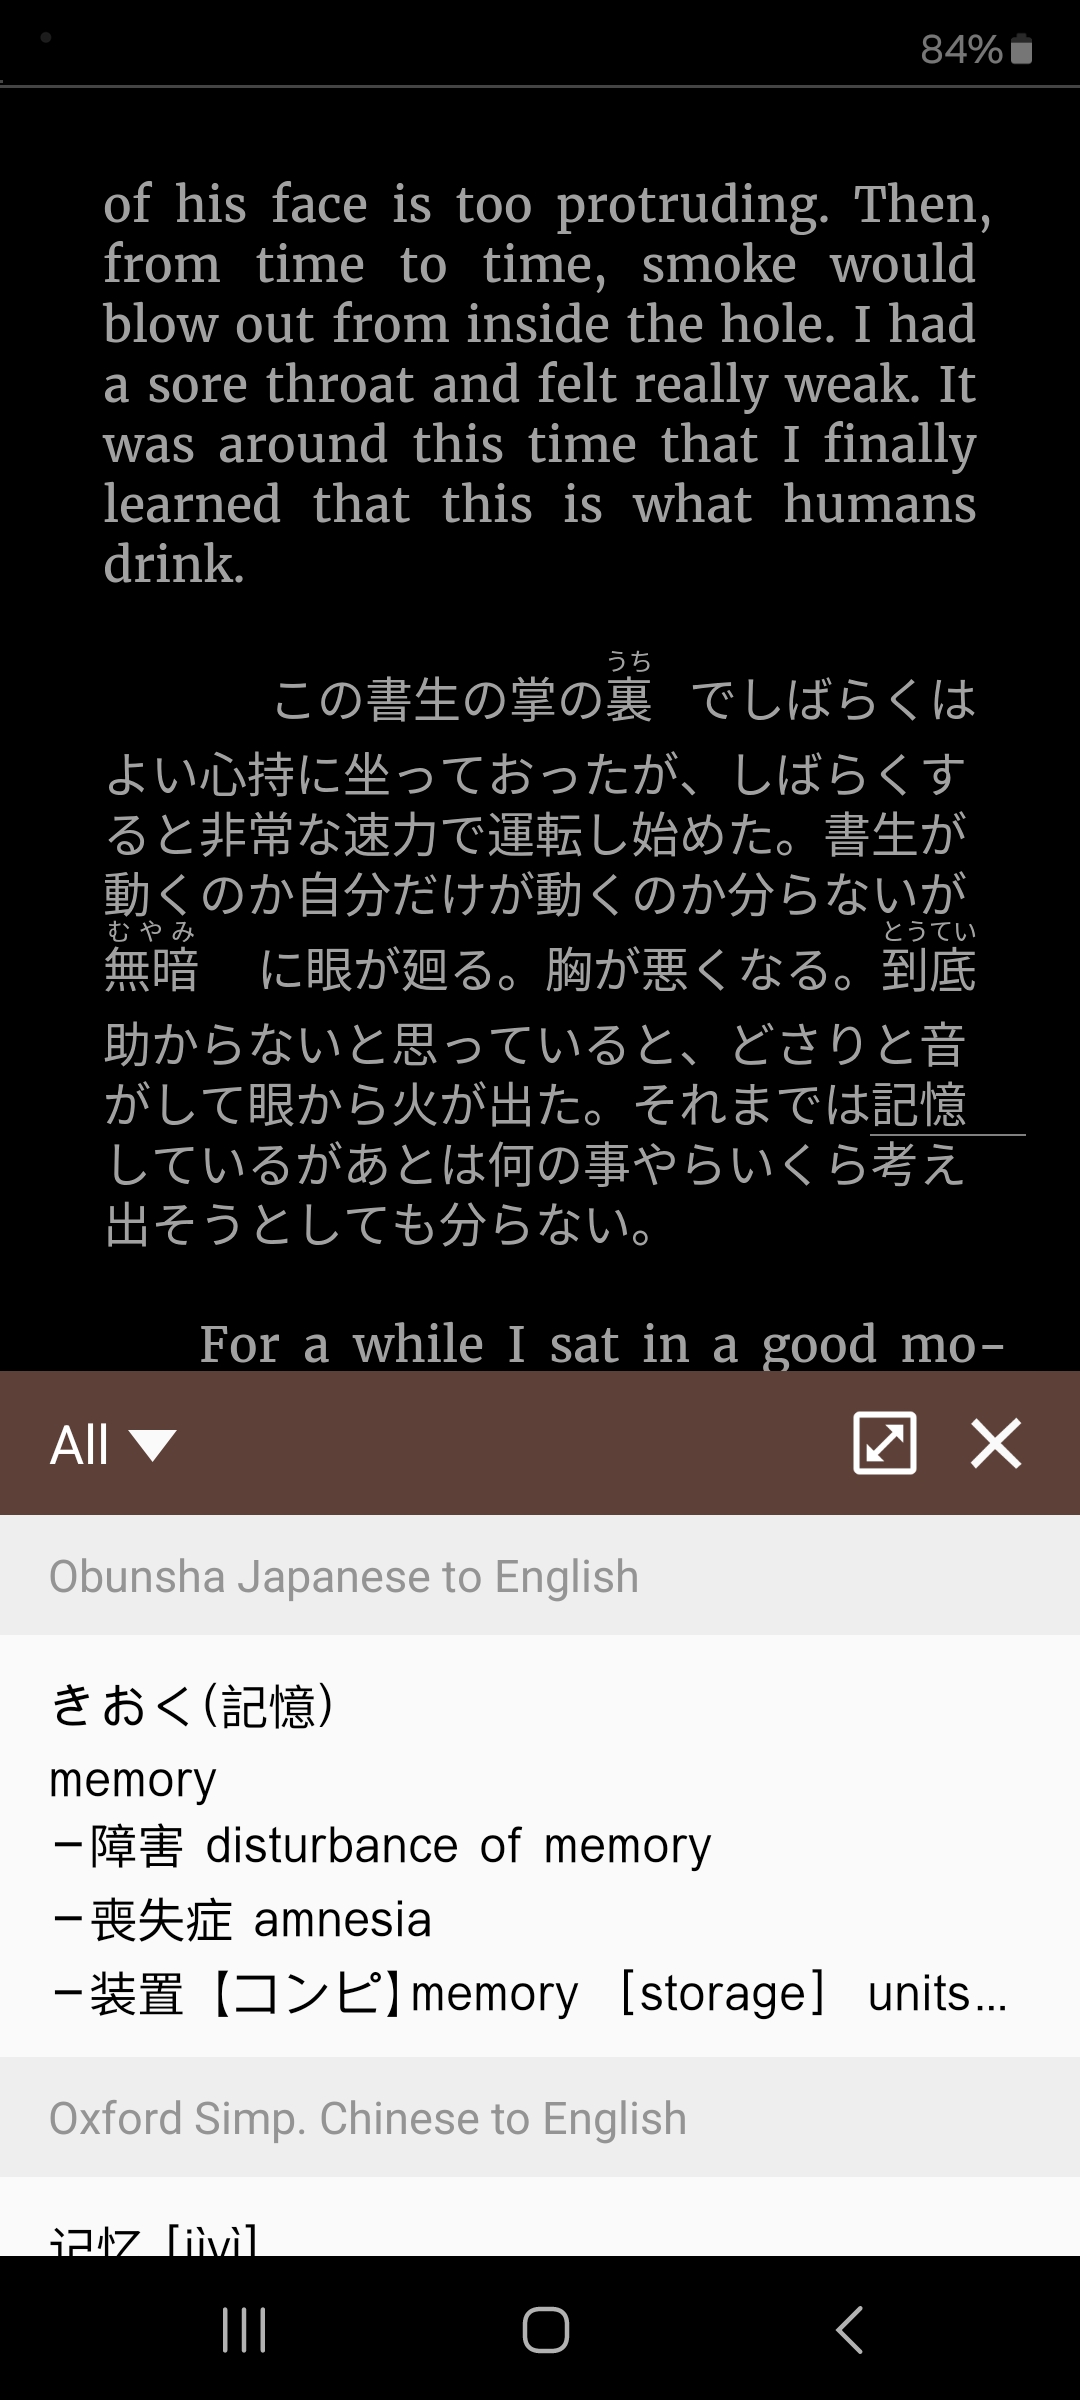
You can also highlight any words or sentences you would like to see the pronunciation or definition of.
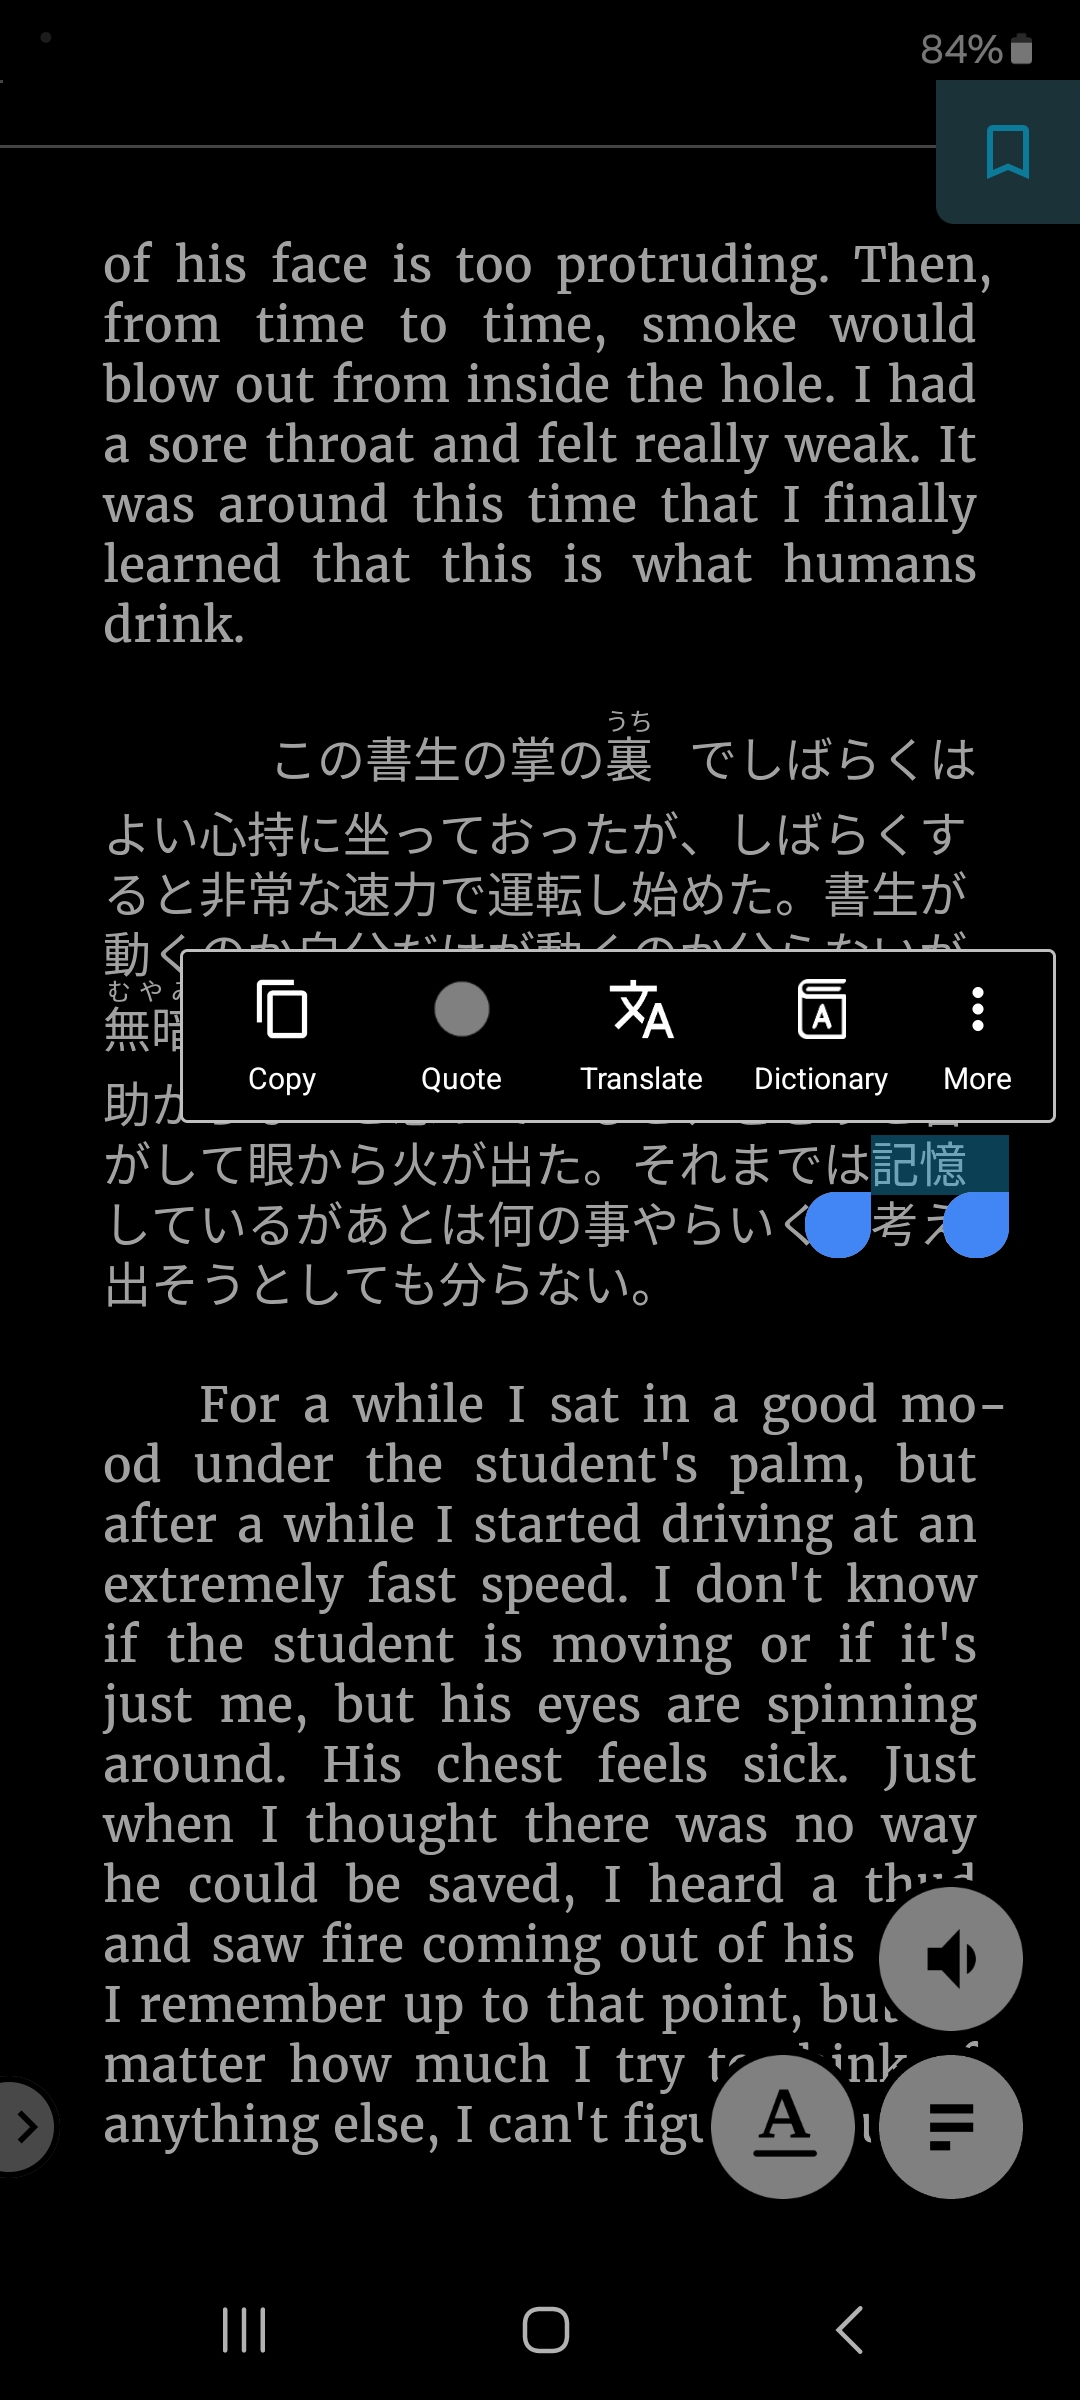
When you use the dictionary option on a single word, the definition will pop up at the bottom of your screen along with the pronunciation in hiragana.
When you use the translation option, Google Translate will give you a full translation with the romaji pronunciation.
Built-in Translator
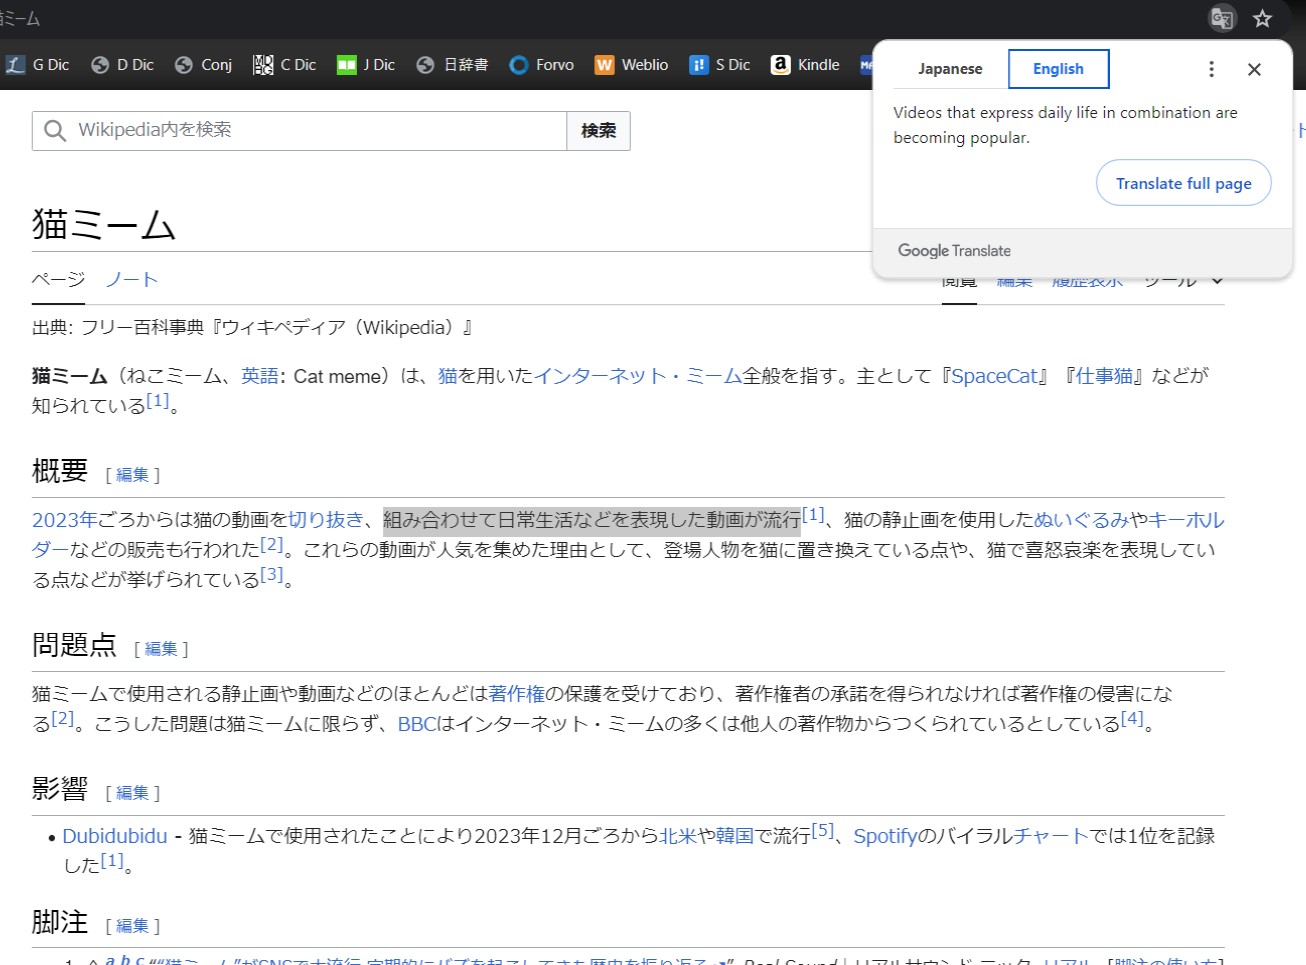
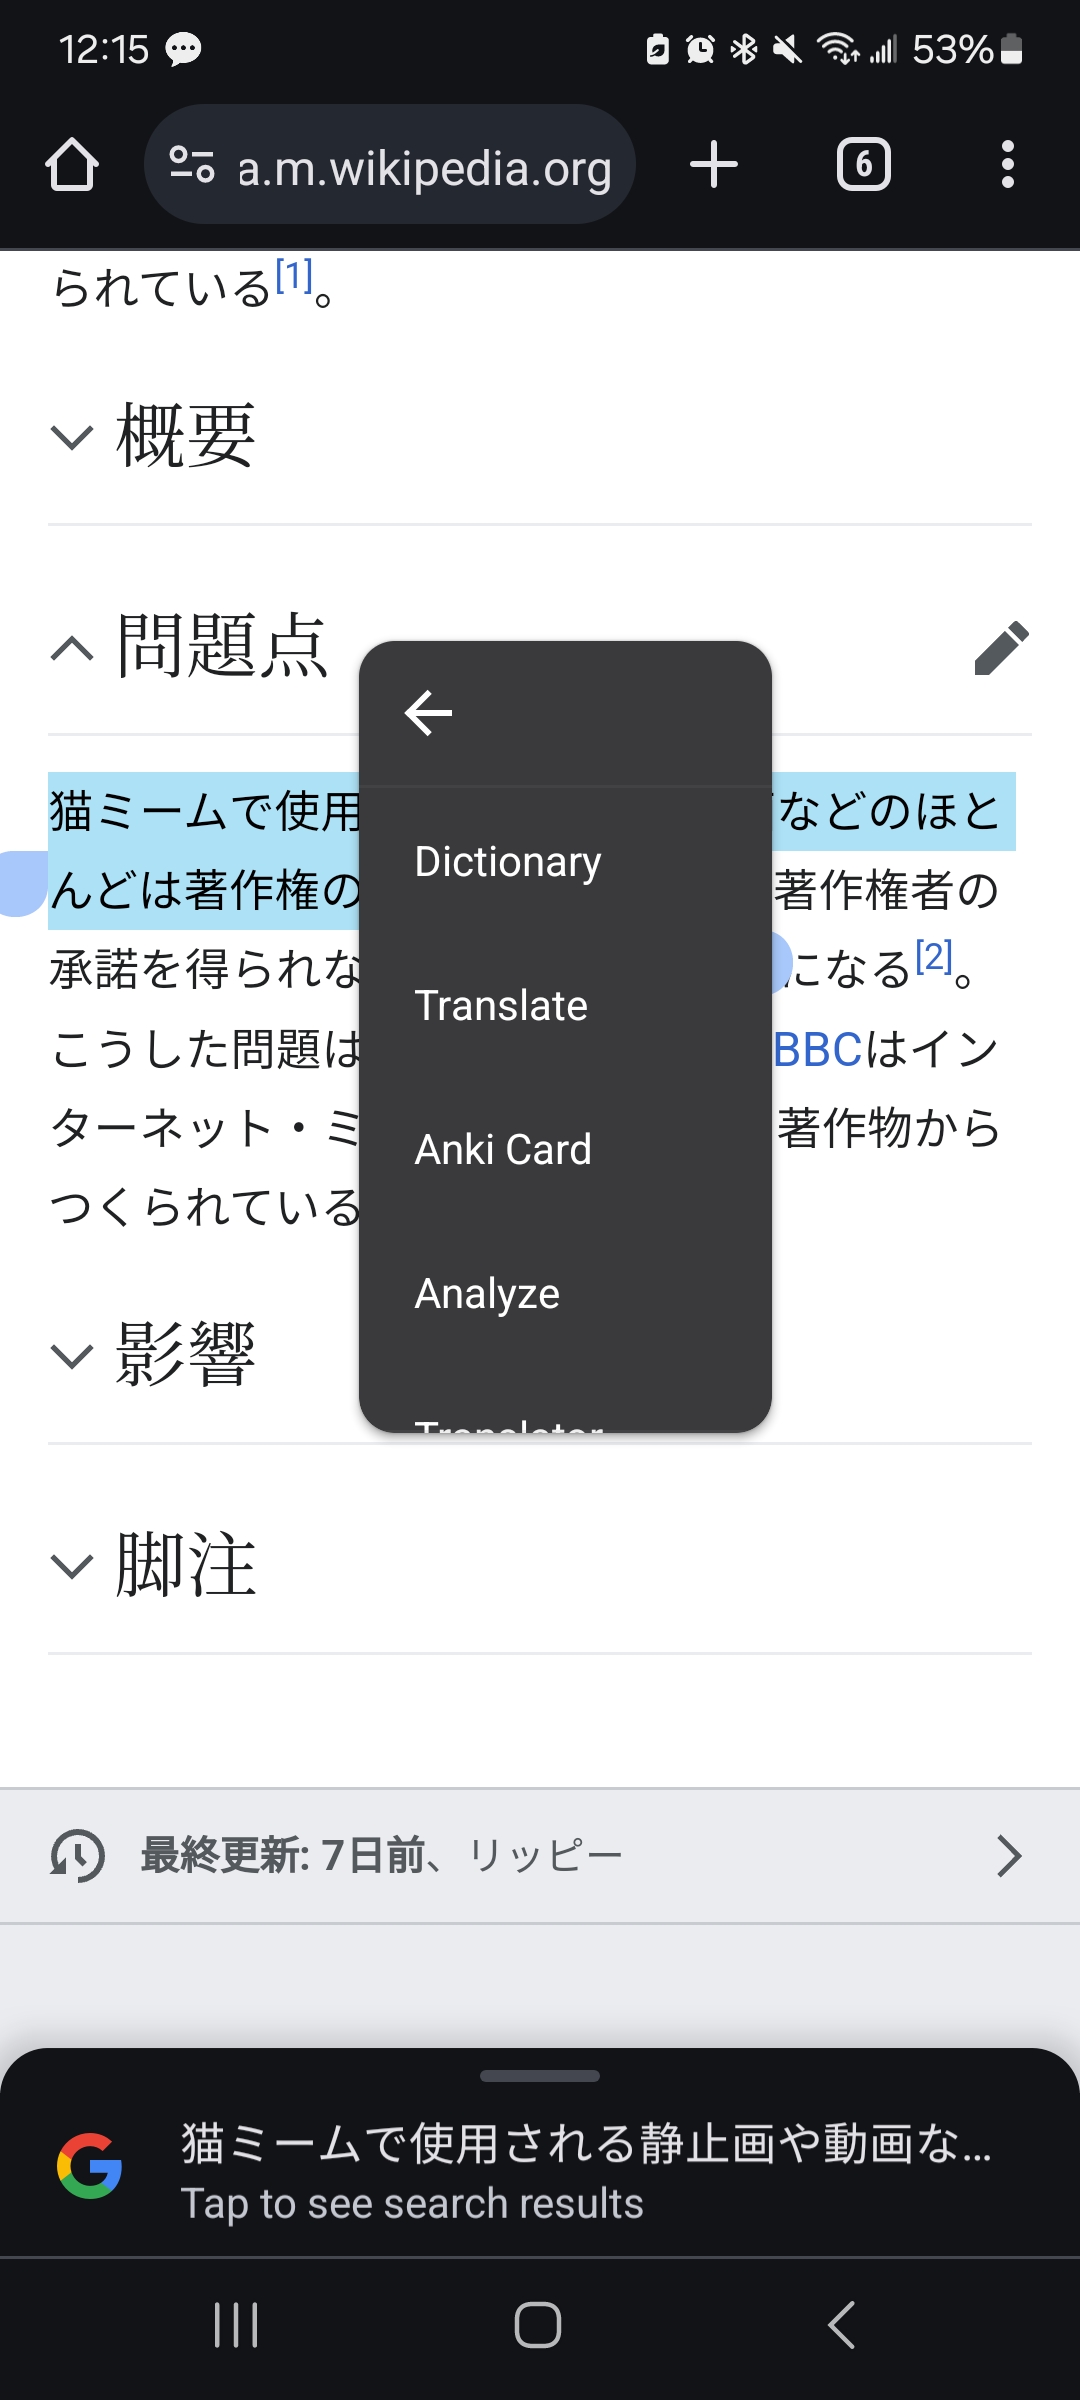
Most browsers have a built-in translator. All you need to do is highlight what you want to translate, right-click, and then select “translate selection to English.” Depending on your browser, it may just say “translate” instead of “translate selection to English.”
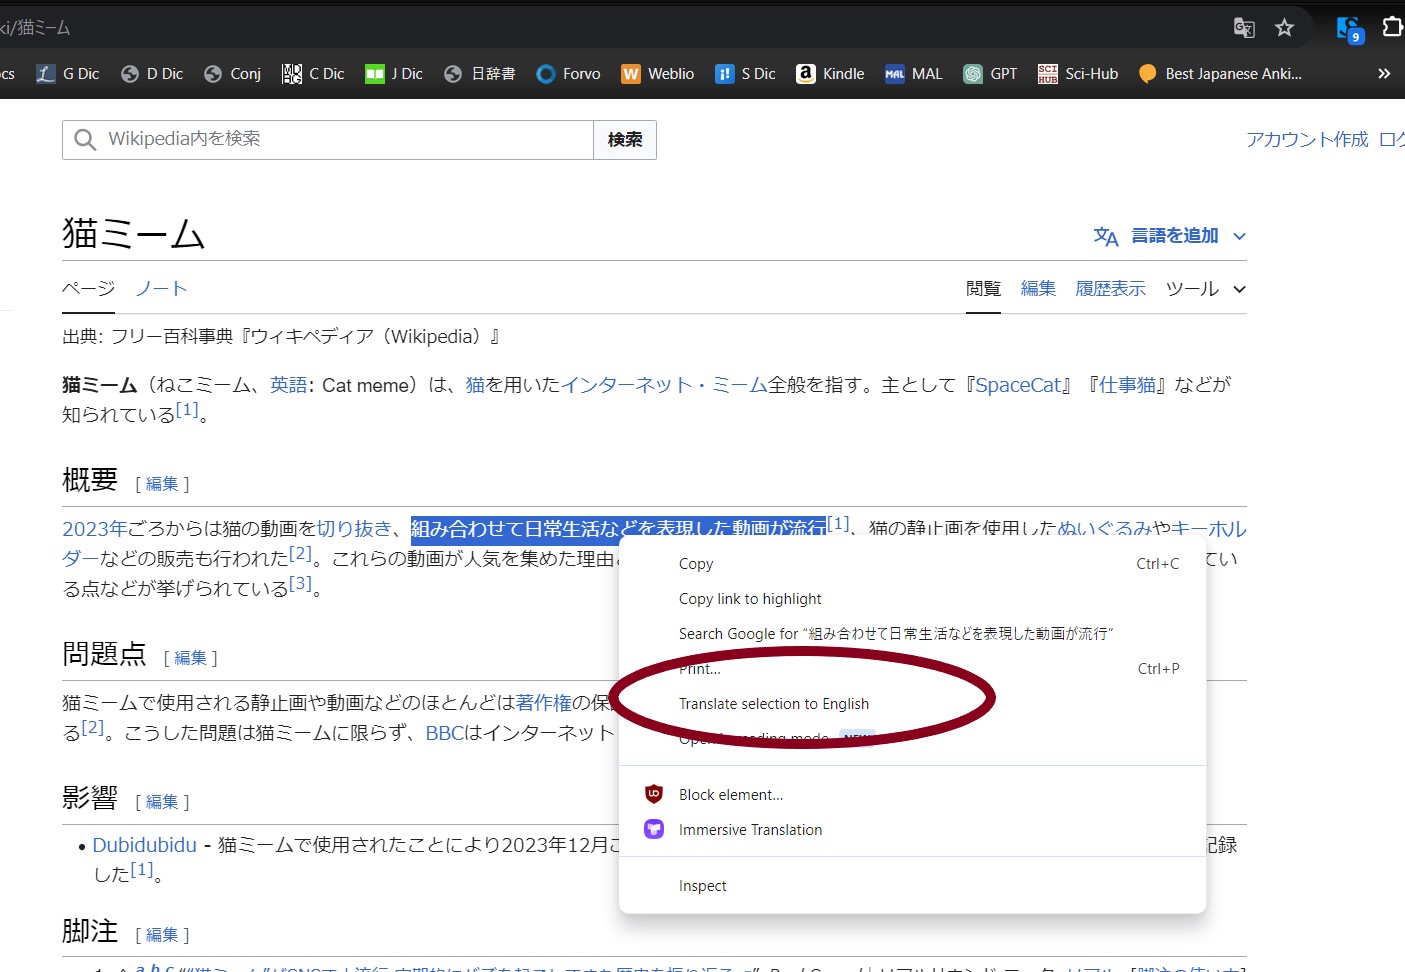
The translation for your sentence should then pop up at the top of your page. Unfortunately, it doesn’t give you the pronunciation, so this method should be used in combination with Yomitan.
Mobile
Android
Built-in Translator
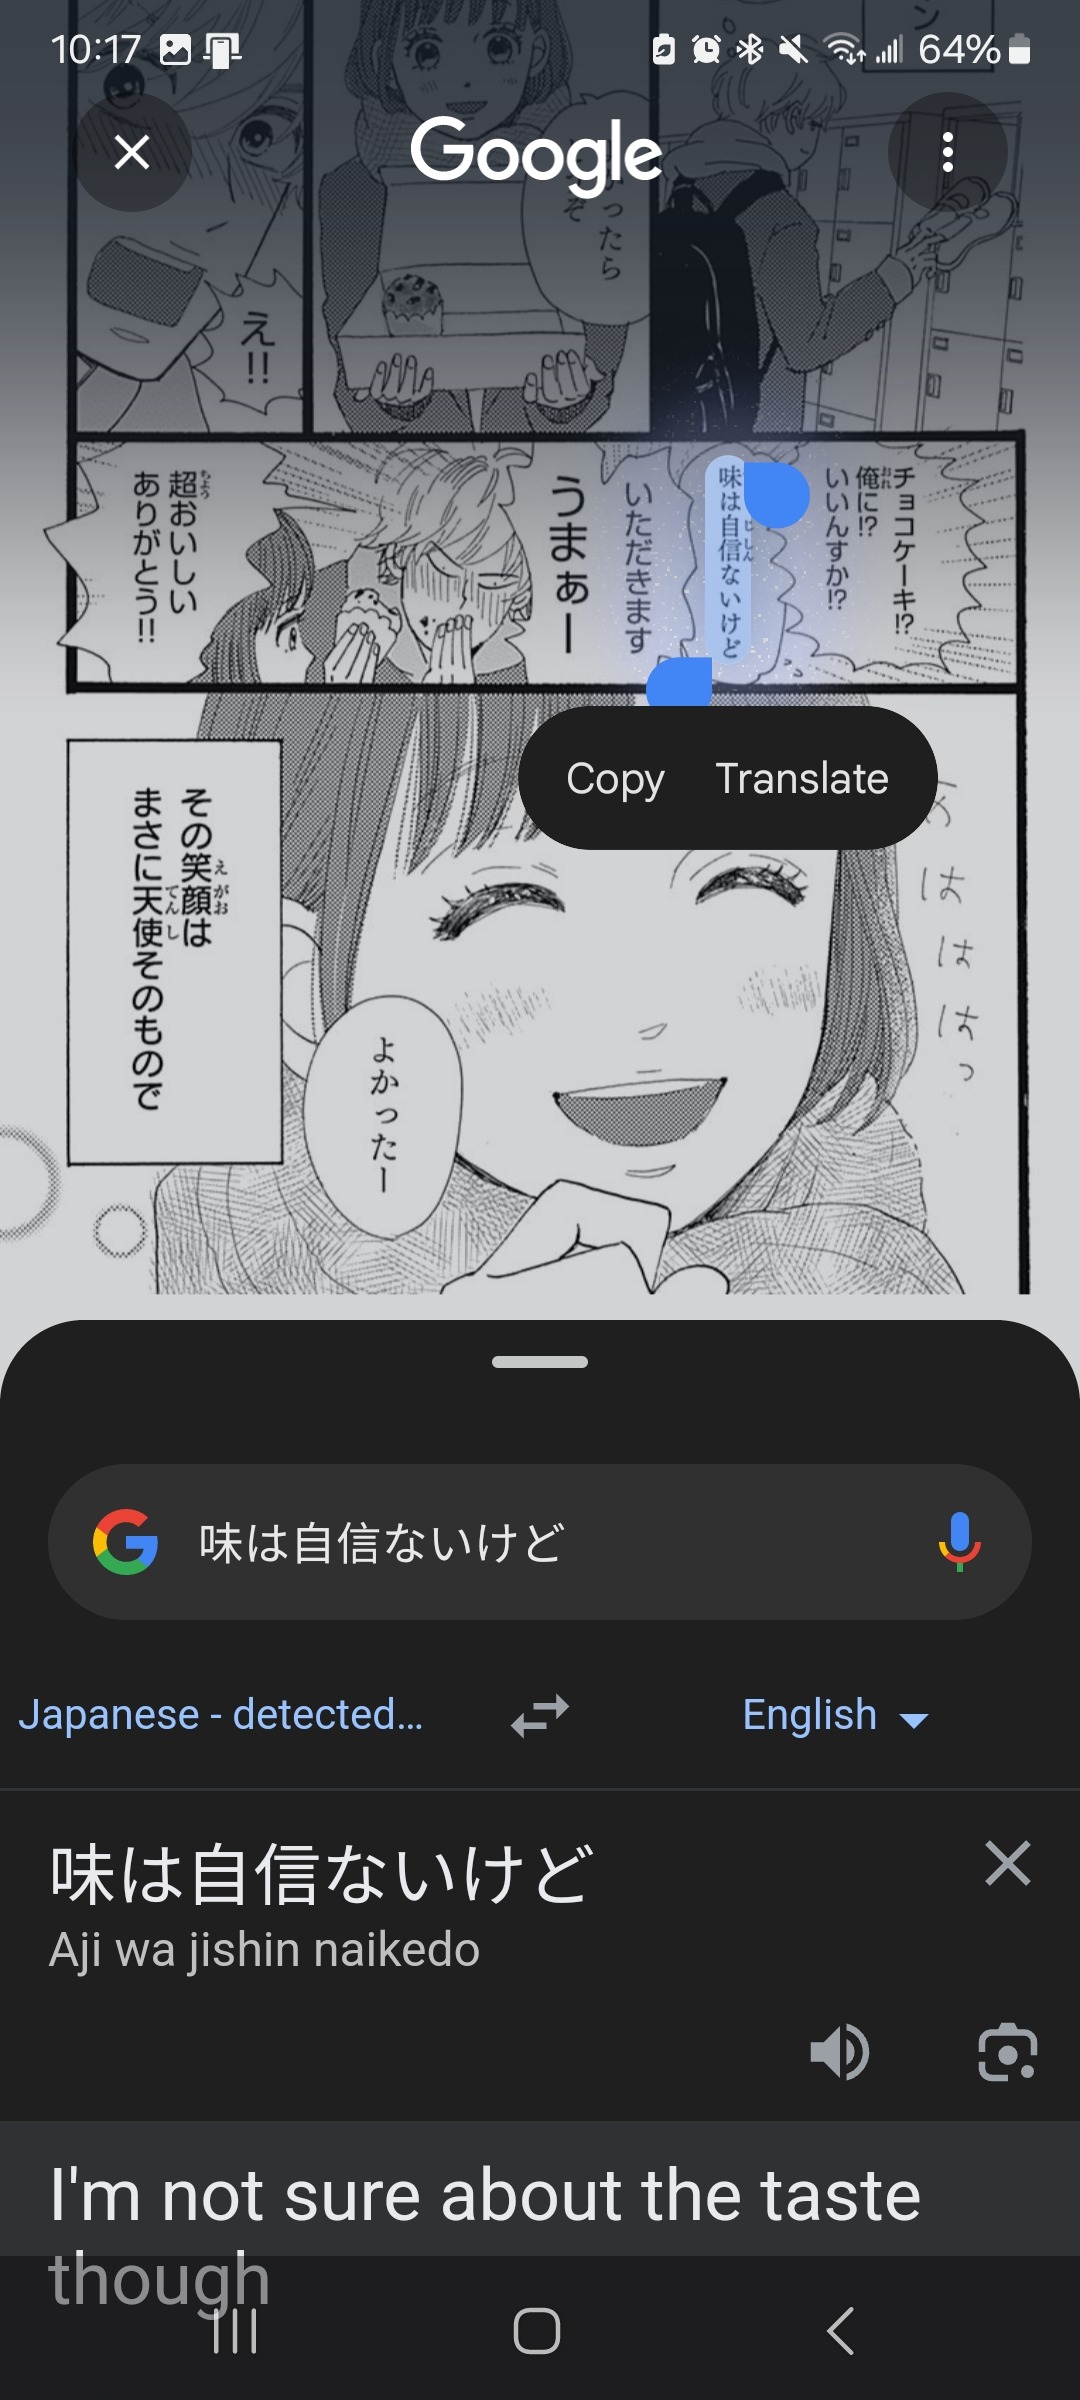
To use the built-in translator on your phone for translating unselectable text, such as that in manga or games, hold down the home button at the bottom of your screen. Note: This may not work on some older Android devices!
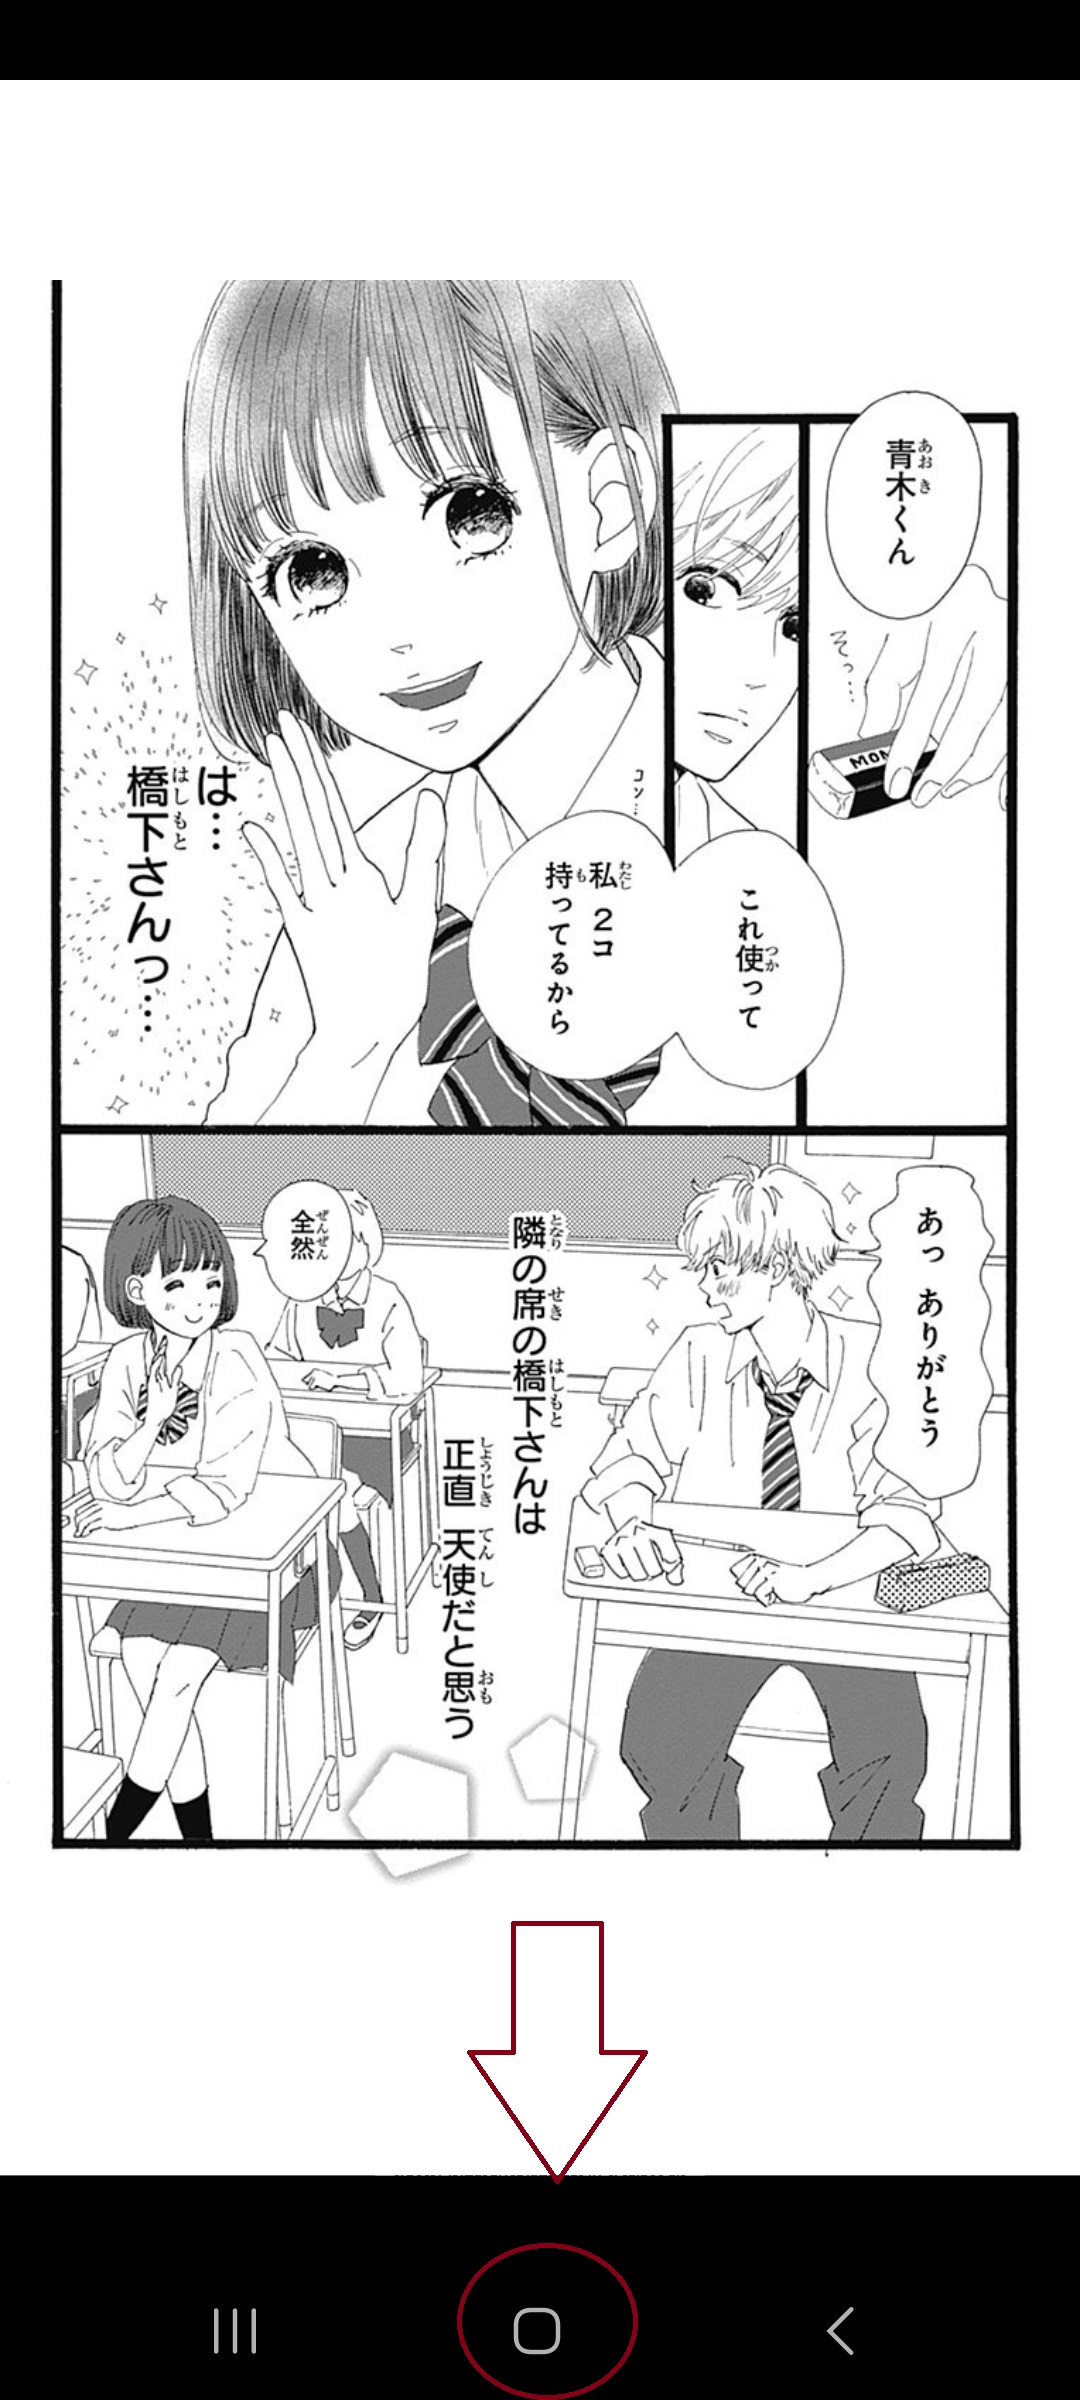
Next, select the translation button that appears in the bottom right corner.

To ensure you only translate what you need, set the translation so it translates from Japanese into Japanese. This will allow you to select specific words and sentences without translating the entire page.
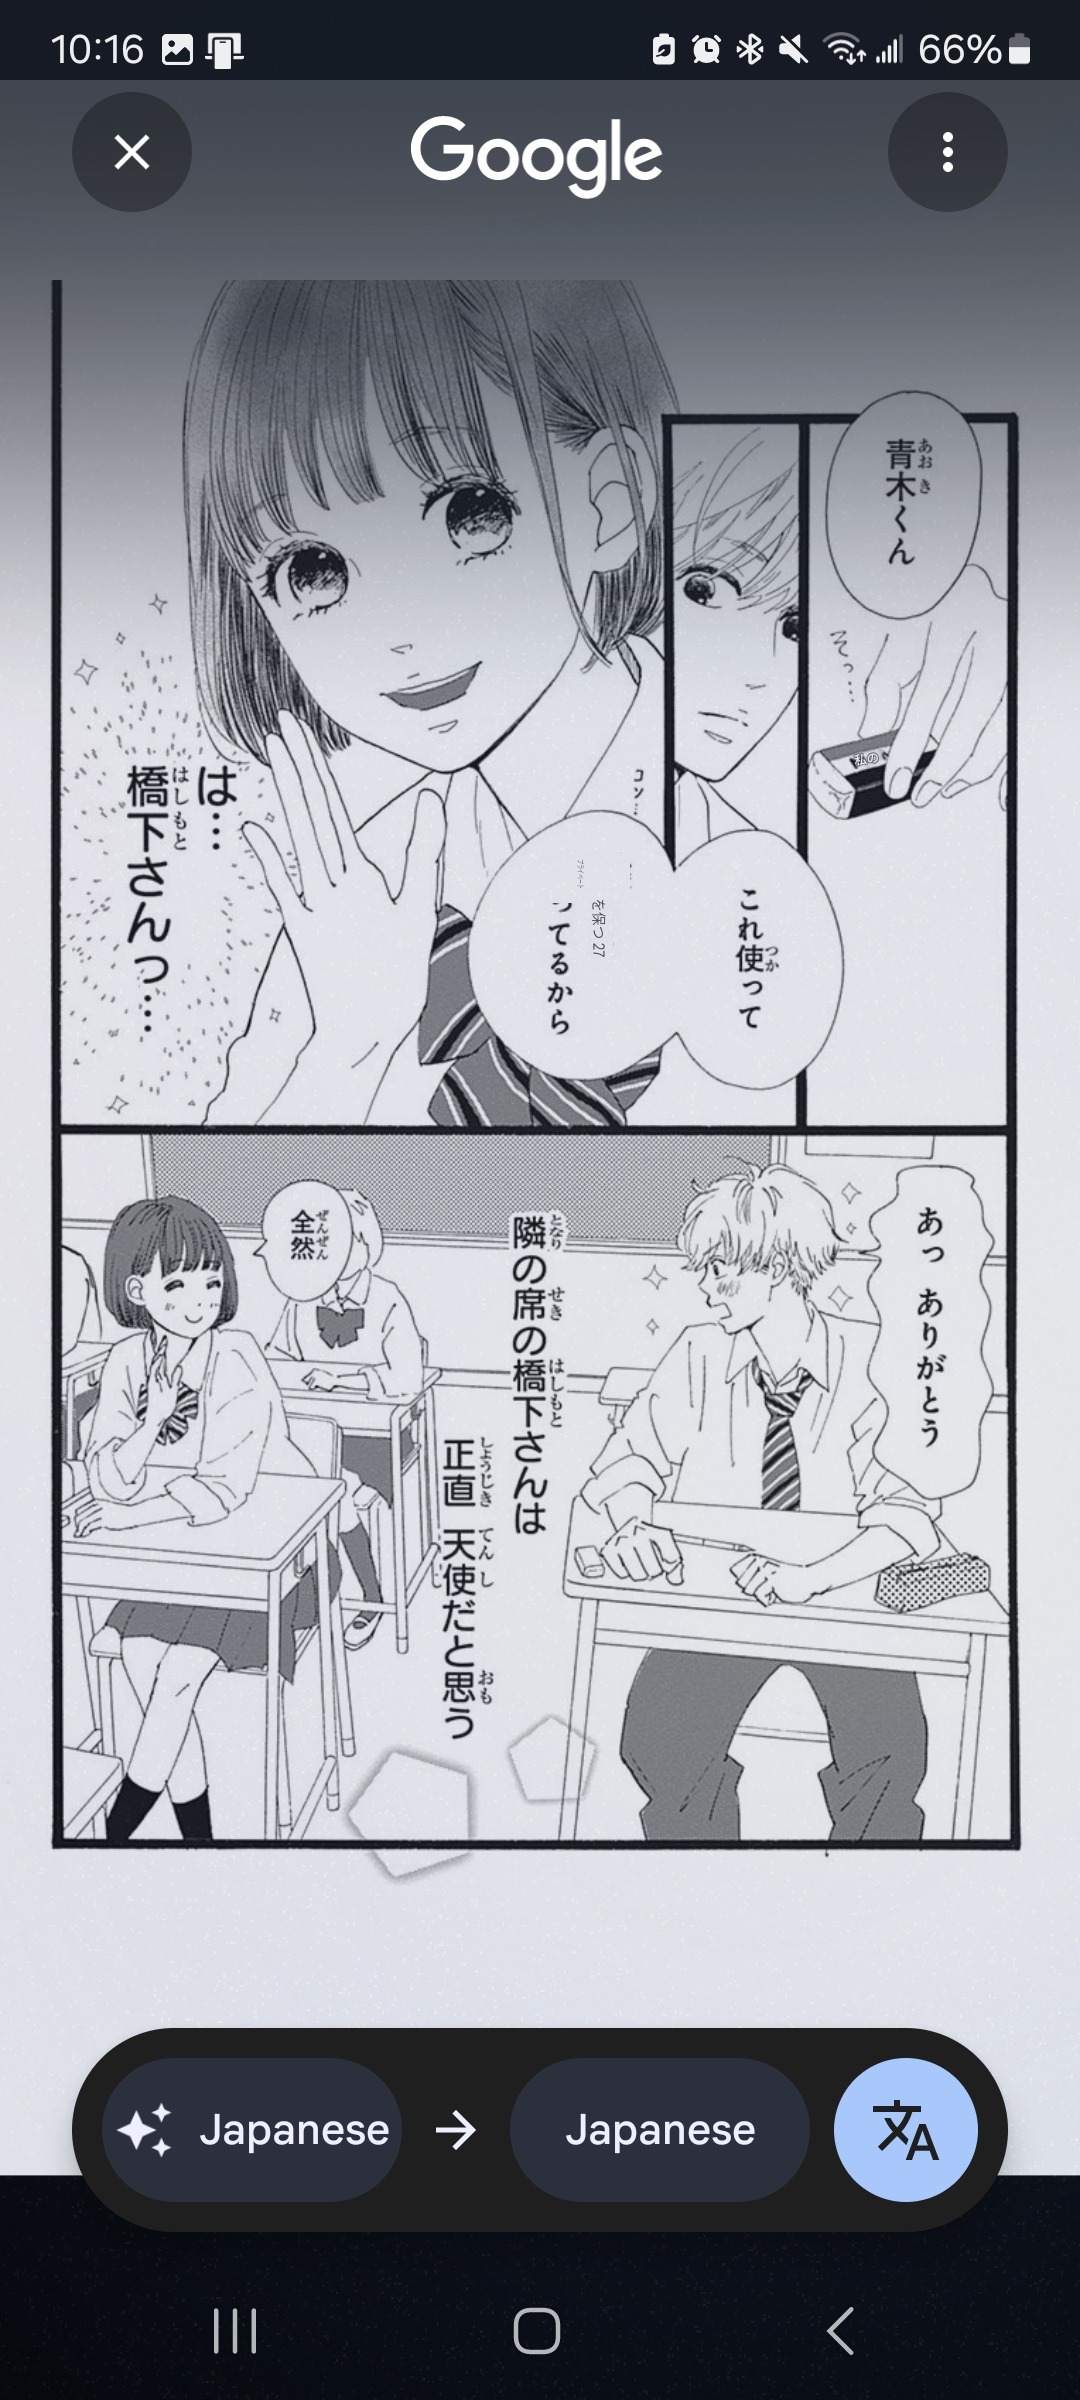
Next, highlight the word you want to translate, and it will automatically pull up the Google search results for that word. If you want the actual translation, click on “Translate.” Keep in mind that you may need to zoom in before activating the translator if the text is small.

You can also select whole sentences to translate them!
To use the built-in translator on your phone for translating articles and text on web pages, simply highlight the text you want to translate, scroll through the options until you see where it says “translate,” and click it.
After you translate the text, you will be able to see the English translation and pronunciation of the Japanese. I usually use this method for single words and only translate full sentences when I can’t understand them at all.
Instant Translate
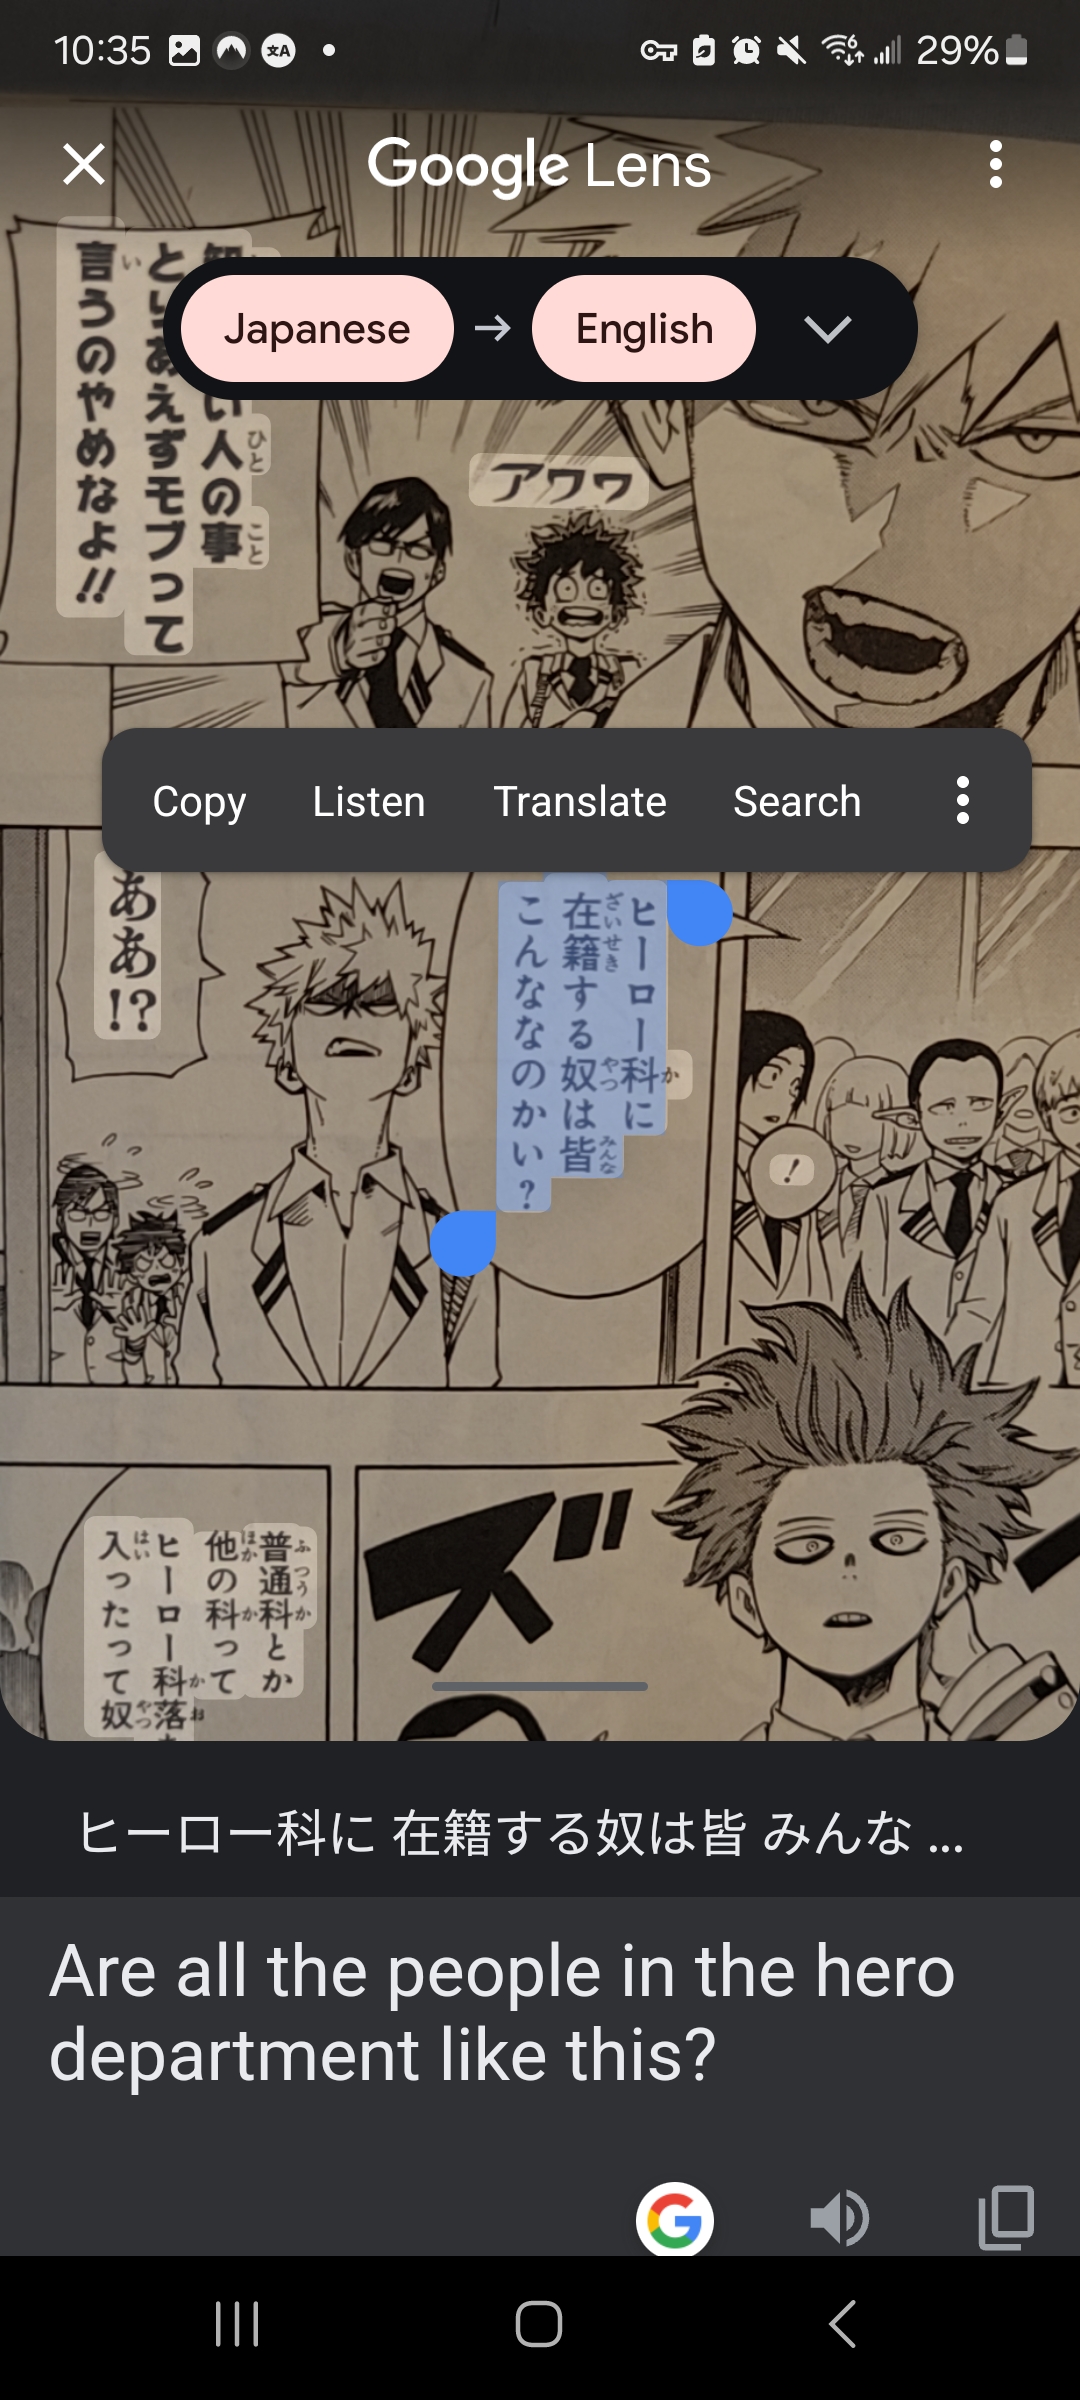
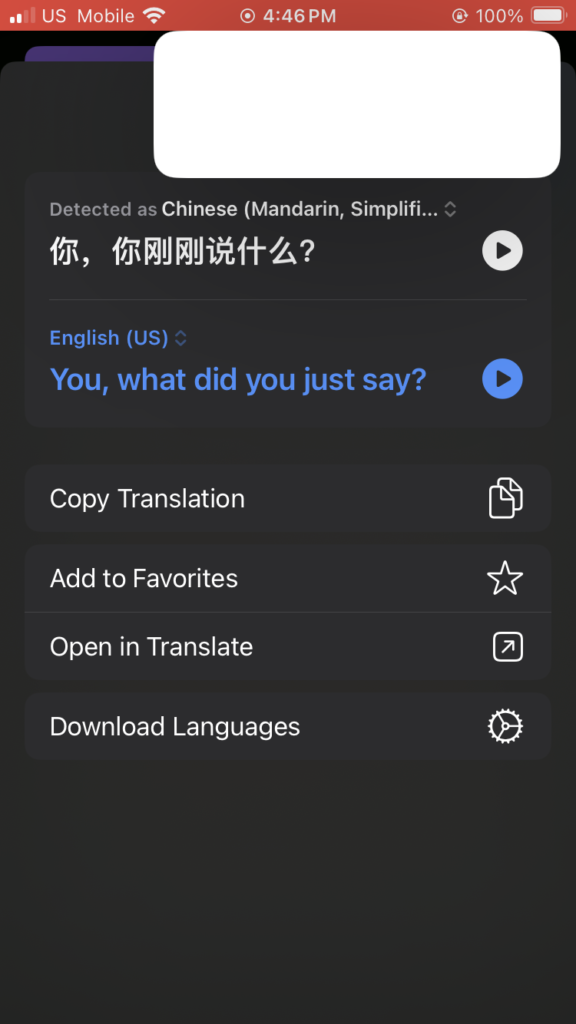
Instant Translate allows you to copy and translate text you normally wouldn’t be able to, such as that in images, apps, and videos. After downloading the app, you can turn it on either by opening the app and pressing the start button or by putting the widget for the app in your instant access bar and turning it on from there. It will then ask for permission to record your screen, which you must say yes to in order to use the app.
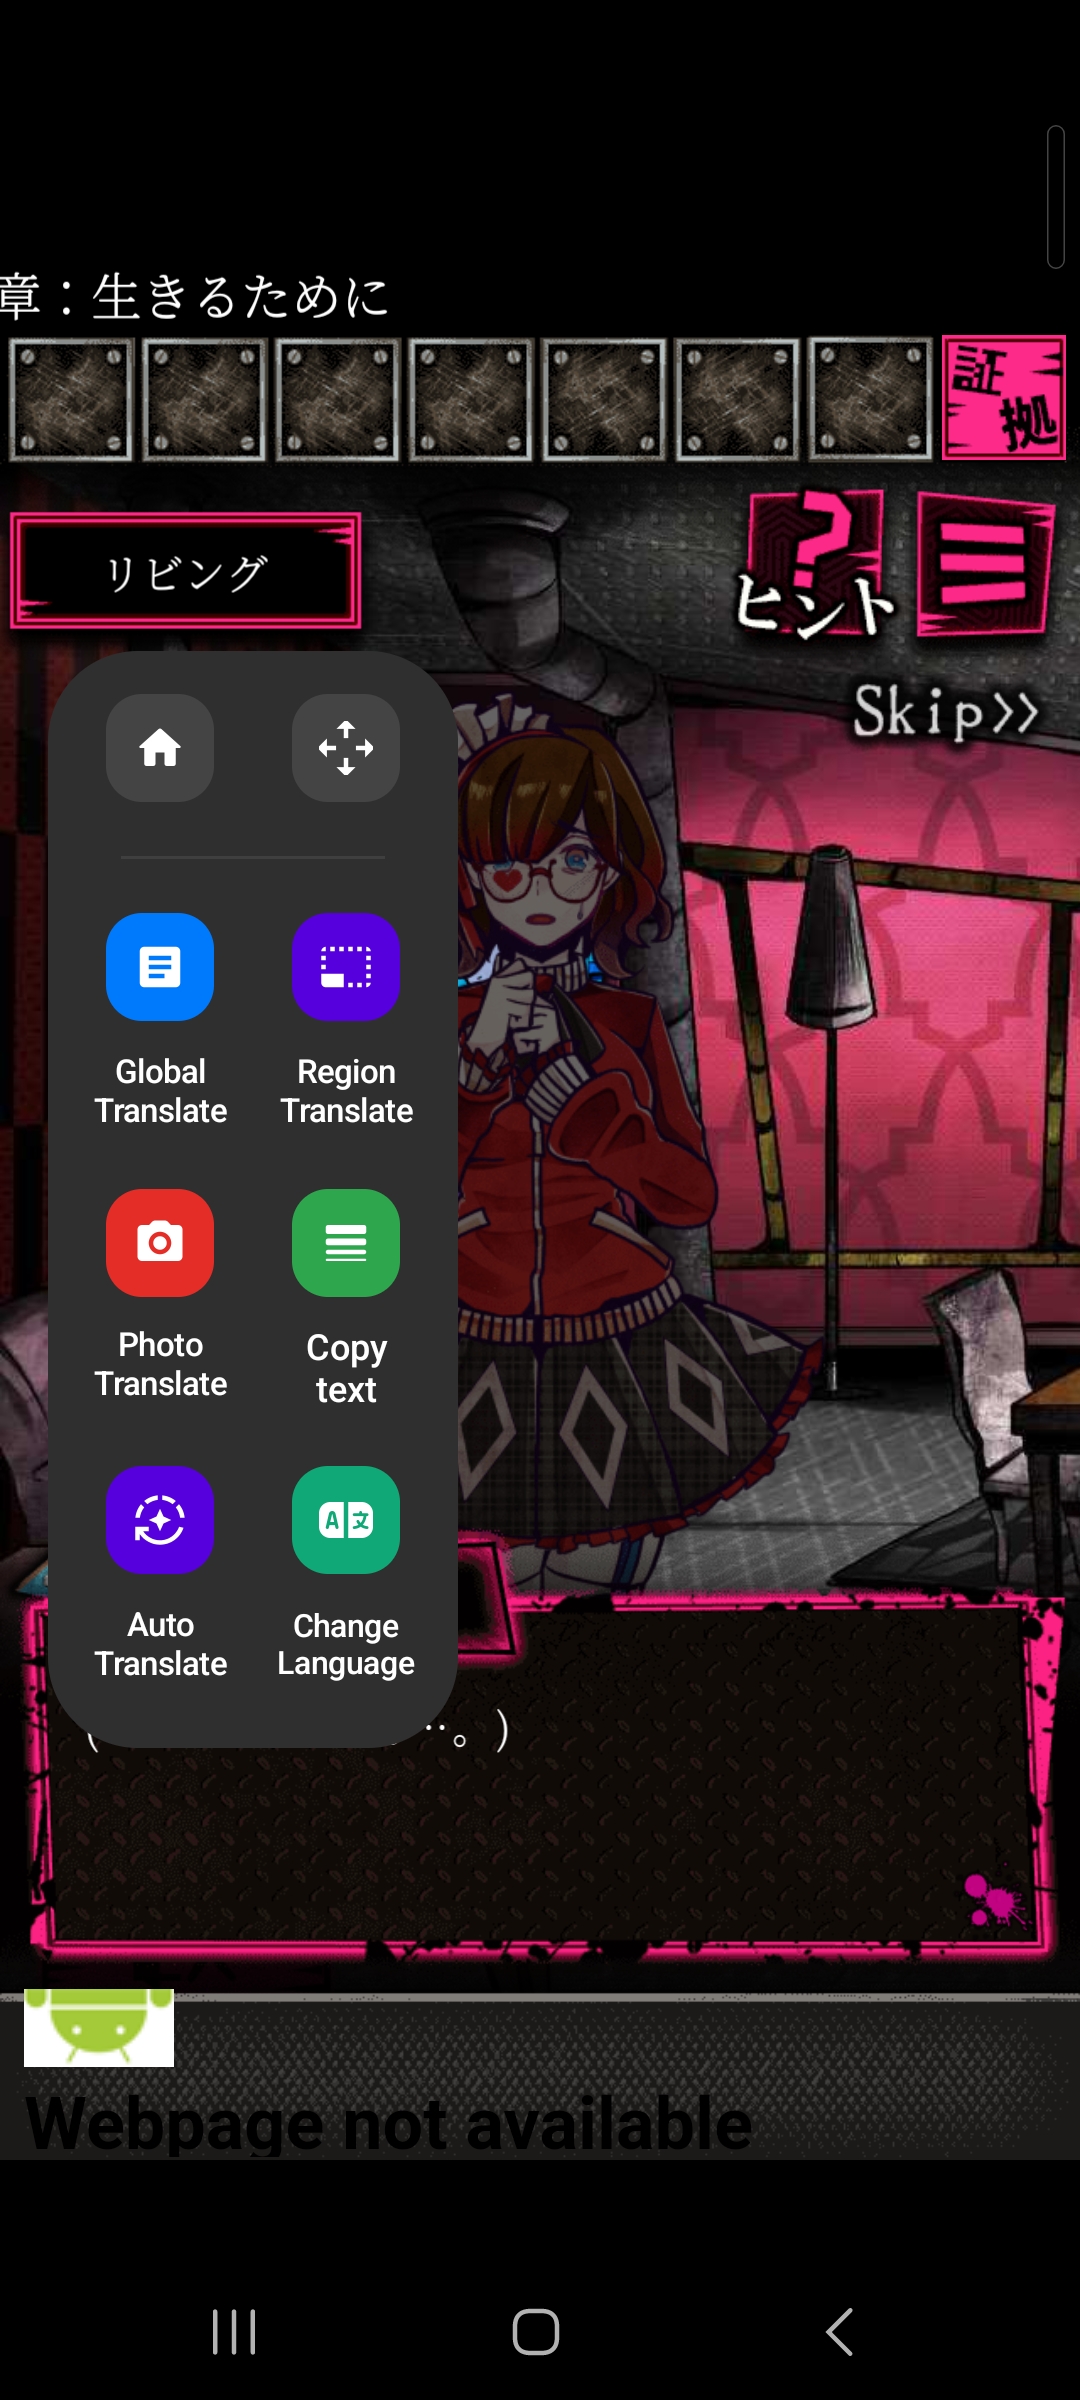
Once the app is running, it will appear as a green circle on your screen. Tap the green circle to open the translate menu. First, go to “change language” and make sure it is set to translate from Japanese into English. You should also download the language packs for both languages by clicking on the download button to the right of the language’s name. Next, to translate Japanese text, you will mostly use “global translate” and “region translate.” Global Translate will translate all the text it can find on your screen, while Region Translate will allow you to select the section of text you want to translate. Region translate is often better at grabbing text than global translate, so I tend to use it more often.
When you use Global Translate, your screen will look like the image below. Tap on the section of text you want to look at more closely, and the translation window will pop up. You can see even more detail if you click on the expand button, which is the two arrows on the bottom right. You should look at what you’re translating in more detail because the translator won’t always get everything 100% right, especially for a language like Japanese. This doesn’t matter as much if you’re mostly using it to look up words and for quick translations. If you’re using the translator to translate every sentence of what you’re reading, you need to switch to reading something easier.
When you expand the translate window, you will see more options. The first button will break down the sentence into pieces. You can click on any of these words to get more details, including pronunciation, translations, and etymology. The next button is for copying the text. You may want to copy the text into a different app, such as a Japanese-English dictionary or Anki, to make flashcards. The other two buttons allow you to listen to the sentence and search it on Google, respectively.
When you click on a word, it will take you to the page below. Close the Chinese information by tapping the little arrow on the left side of Chinese. Now you can see the Japanese information for this word. For a noun, you will see the pronunciation, pitch accent, kanji meanings, and definition.
For words that have multiple forms, such as adjectives and verbs, the information won’t be so straightforward. Instead, it will give a breakdown based on the kanji. You will see the meaning of the kanji as well as several examples of its onyomi and kunyomi readings.
IOS
Built-in OCR and Translator
IOS has powerful built-in OCR and translation features that allow you to easily select a word and translate it even if it’s part of an image or normally unselectable text. All you have to do is highlight a word and tap “translate” in the pop-up menu. In this pop-up menu, you can also copy the word if you would like to move it to another app, like Japanese or Anki, to make flashcards.

After pressing “translate,” it will then show you a translation. You can also listen to the pronunciation of the word or sentence you have selected.
Manabi
Manabi is an e-reader and Japanese study app that can assist you with reading Japanese articles and novels. While some of its features are behind a paywall, the free version of the app still allows you to read articles and documents of your choice and has all of the features you need.

When you first open the app, you will see your stats for how much you have studied with the app. Beneath that, you will see an area where you can upload your own files into the app. I recommend mostly using the app for reading novels or articles that you upload yourself.
You can also scroll down a little farther to see Japanese texts provided by the app. This is useful if you are looking for something easier or are not sure what to read.
When you open the reader, it will look like the image below. The reading mode can be changed in the settings by tapping the gear icon in the upper-right corner if you don’t like how it looks. You can also see a word’s definition and reading by tapping on it.
iTranscreen
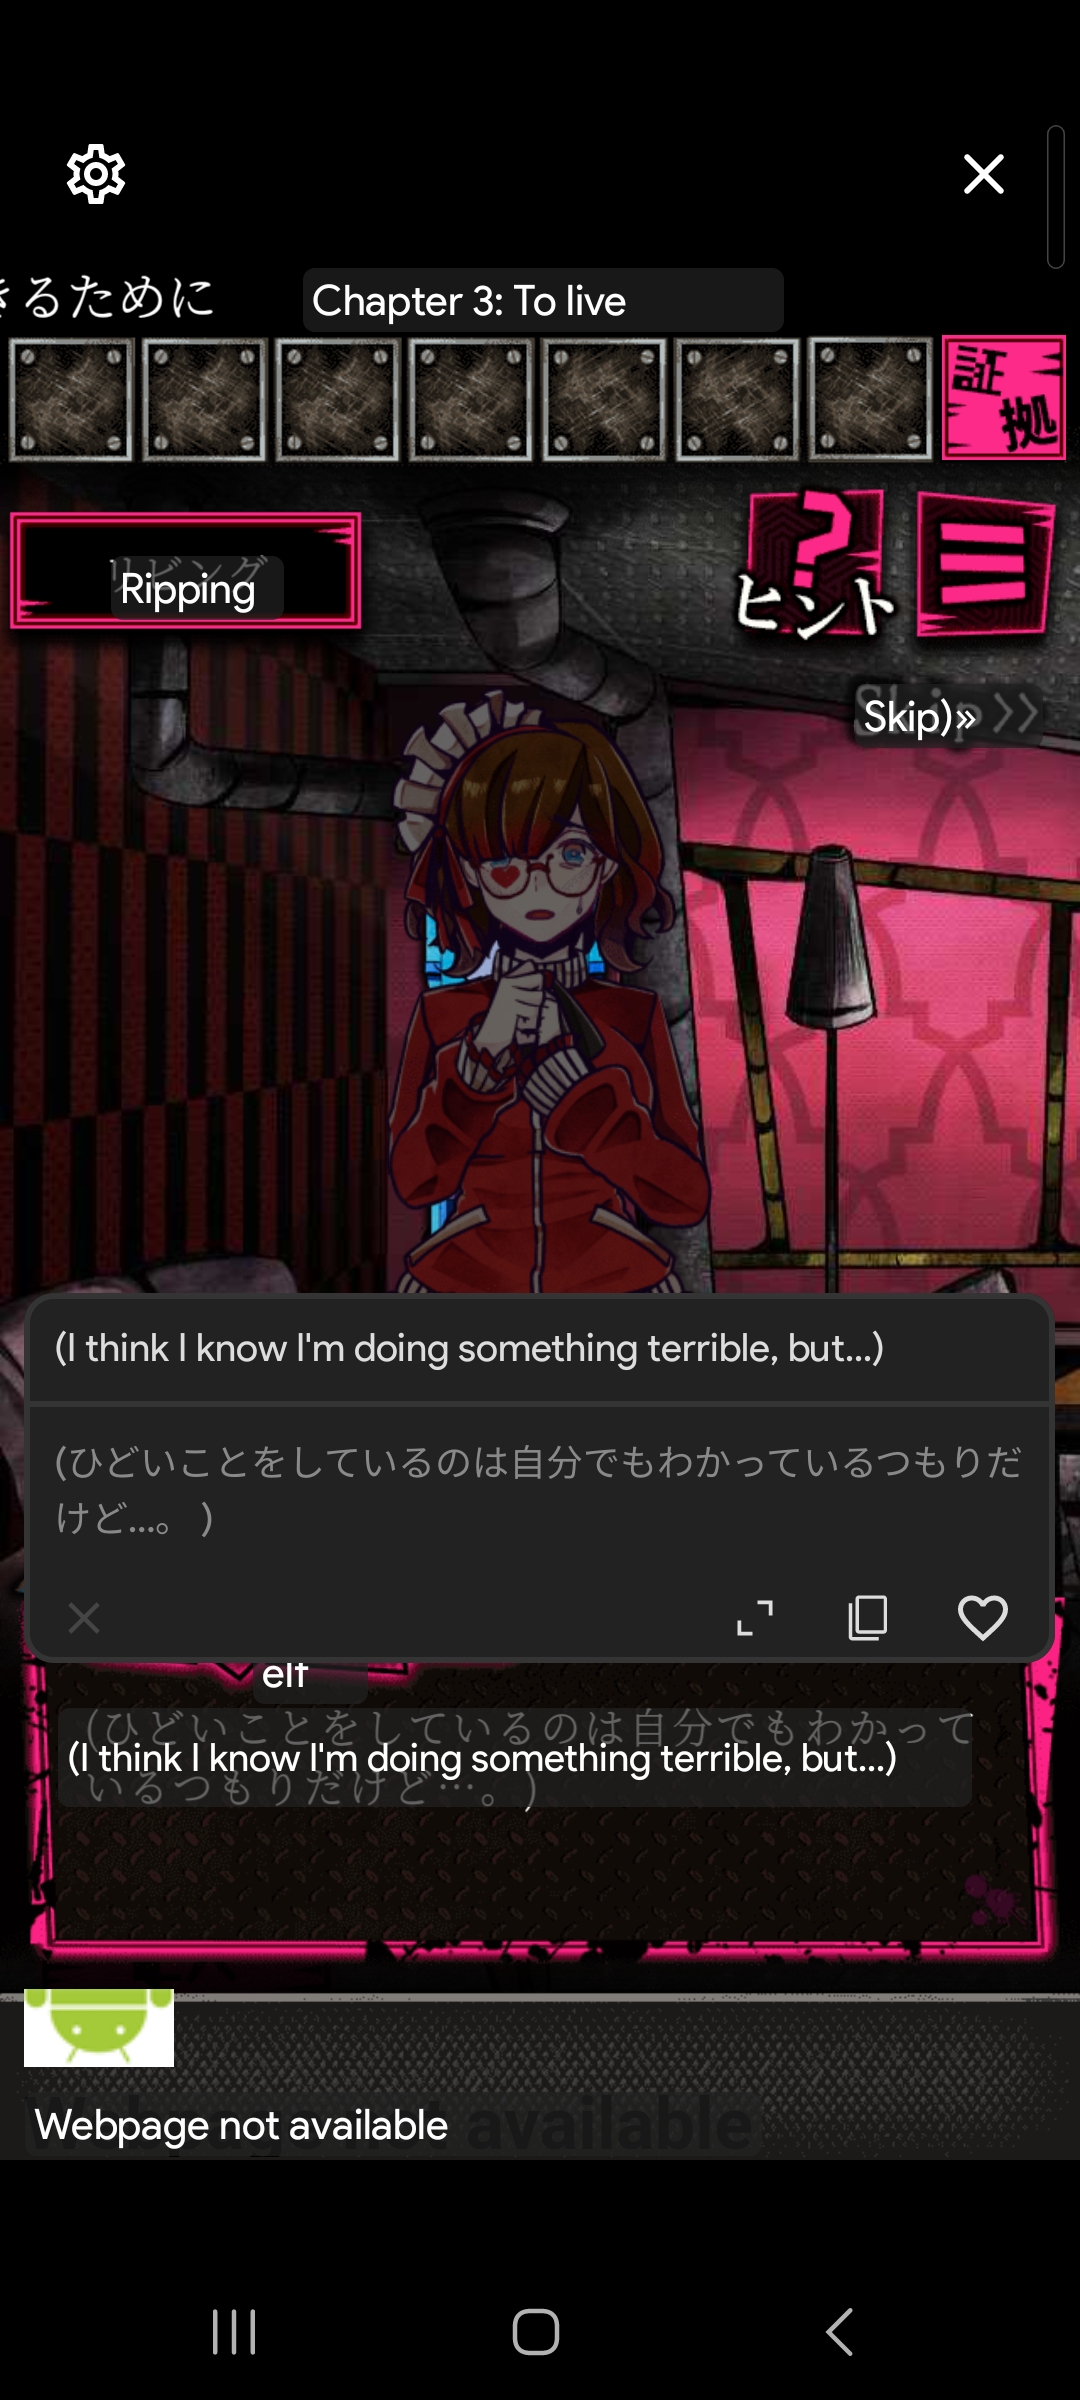
Unfortunately, not all apps work with the built-in OCR. In some apps, especially games, there is no way to copy or translate text. This is where iTranscreen can be very helpful. It allows you to translate text you normally wouldn’t be able to translate.
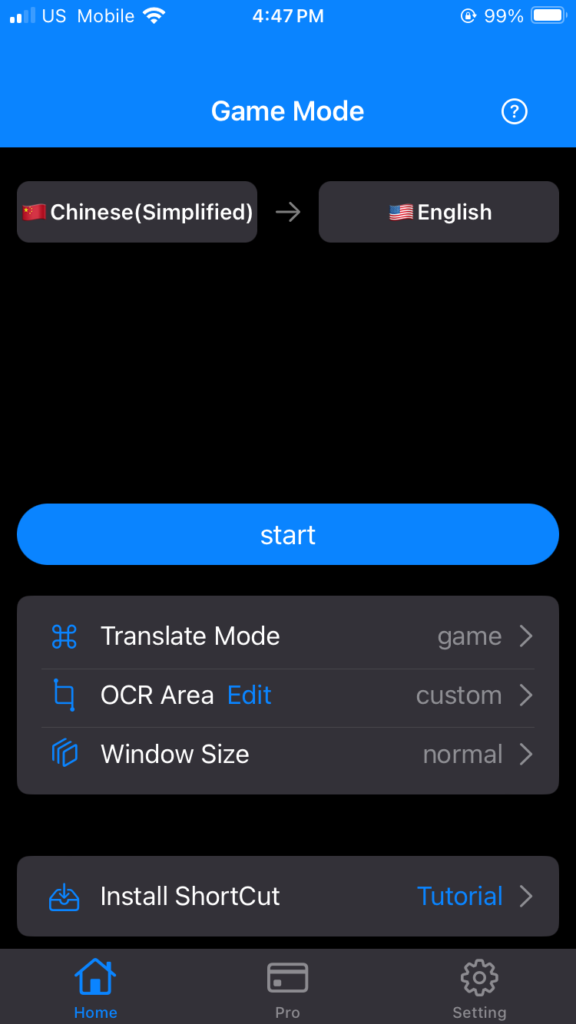
I’ve found the app is most effective when you use it in game mode. Just make sure it’s set to translate from Japanese into English, then press “start.” You should then see a pop-up that you can use to select the text you want to translate.
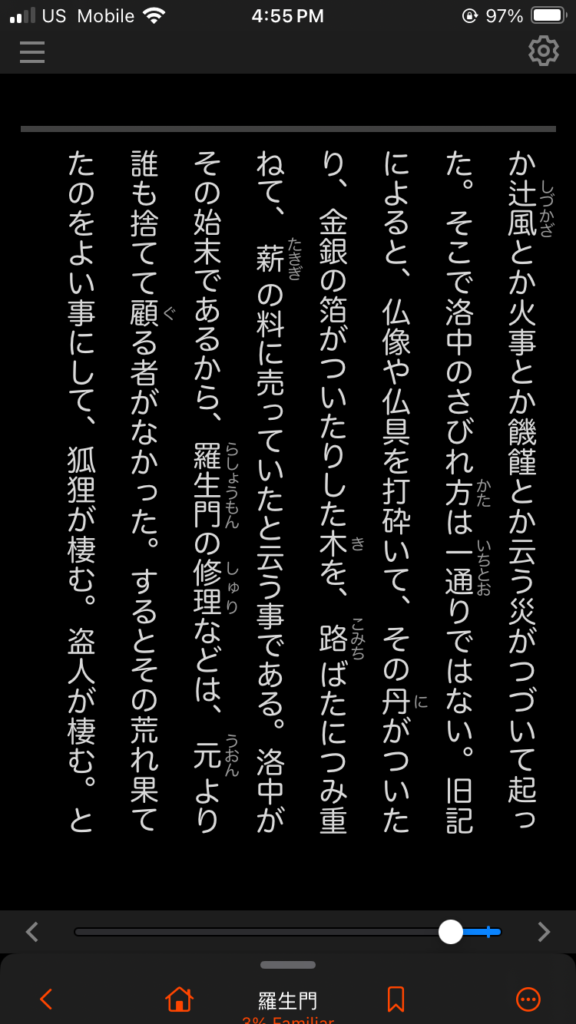
Paper Books
Google Translate
With the OCR capabilities of Google Translate, you can easily take a picture of a word or sentence you don’t understand and quickly get the translation and pronunciation. Start by opening Google Translate and pressing the camera button in the bottom right corner.
Next, take a picture of what you want to translate, then at the top of your screen, make sure you have it set to “show original text.” Showing the original text is very important for learners because it will allow you to copy words and select just the sections you want to translate. Also, the OCR is more likely to mess up the translation if you don’t manually select the text.
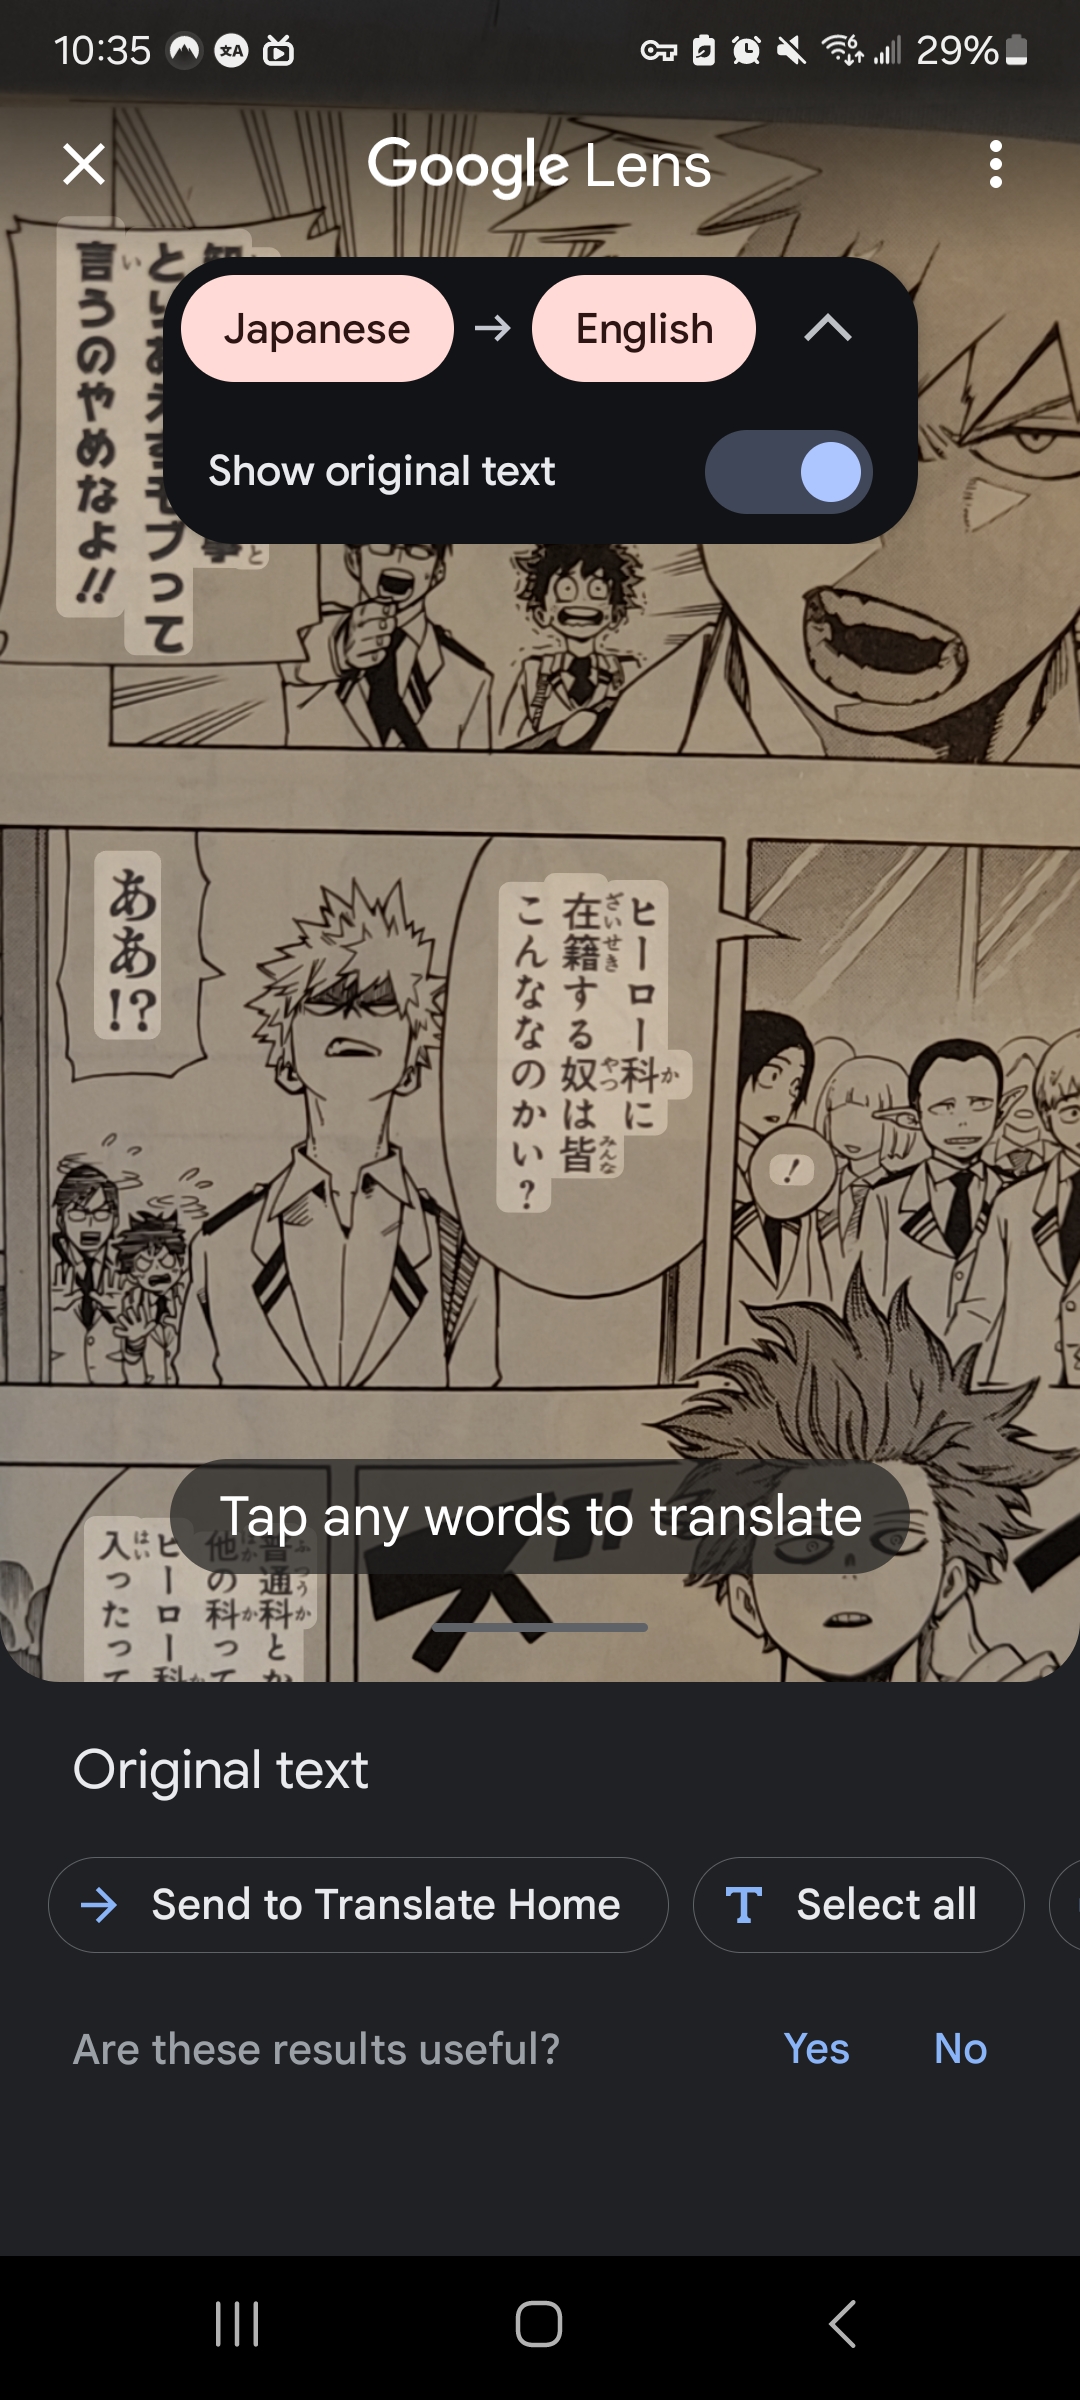
Next, highlight the word or sentence you want to translate, and it will automatically show you a translation. If you would like to make flashcards out of the words or sentences, you can then copy them into Anki or your Japanese-English dictionary of choice.