
How to Study With Anki
You will use Anki most heavily at the beginner level since this is where the most direct memorization takes place. You should use it as a tool to increase your comprehension, and mostly focus on cards where you translate German to English. As you progress, flashcards should take up less and less of your study time. If you find that your flashcards have piled up, don’t worry. You don’t need to do all of your reviews every single day. Anki is fully adjustable for a reason. For optimal retention, you should have only a few new cards each day and unlimited reviews. However, it all depends on what you find comfortable and can manage. If doing many reviews is boring, reduce it. If you can’t remember 10 words at once, reduce it. Play around with Anki a bit to see how you like to study. If you don’t want to spend the time making your own cards, I have a deck of 10,000 of the most common German words with audio and example sentences perfect for building up your vocabulary! It’s called the German Practice Vocabulary deck, and you can find it linked below!
How to Set Up Anki
Anki on PC
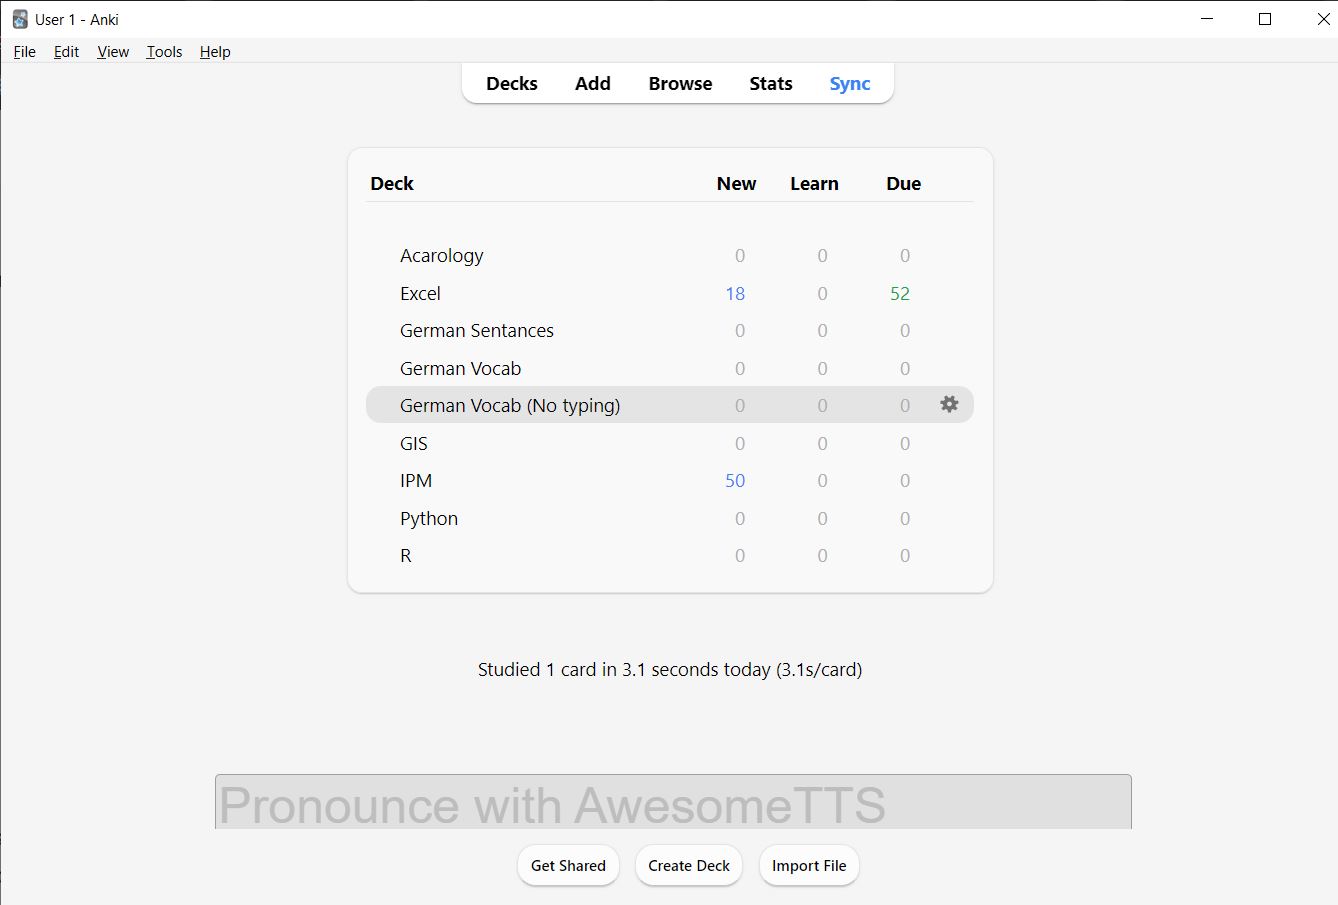
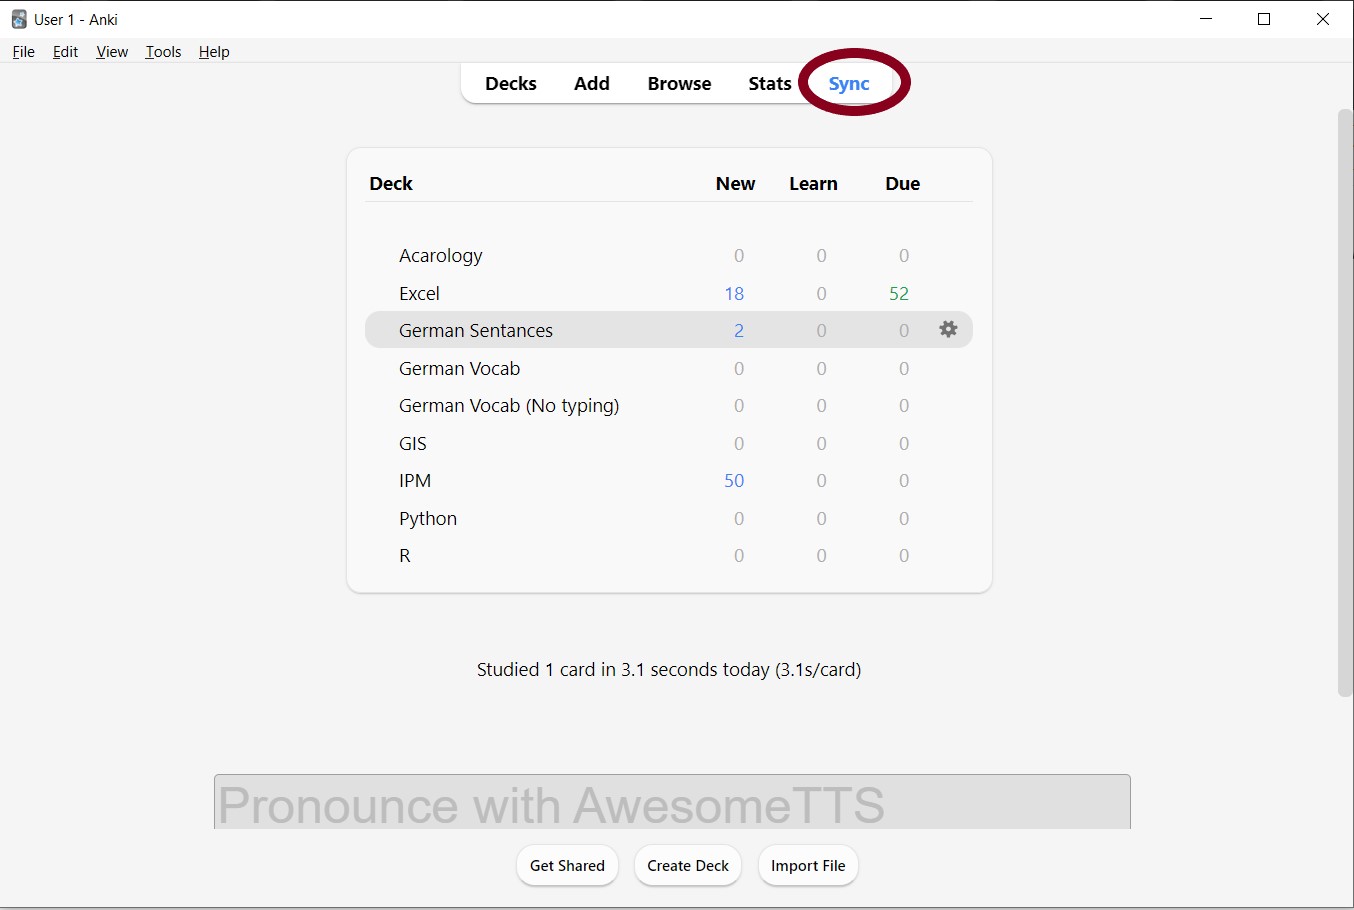
After you have downloaded and opened Anki, it will display this page. Yours won’t have any decks or the pronunciation bar, but the options will be the same.
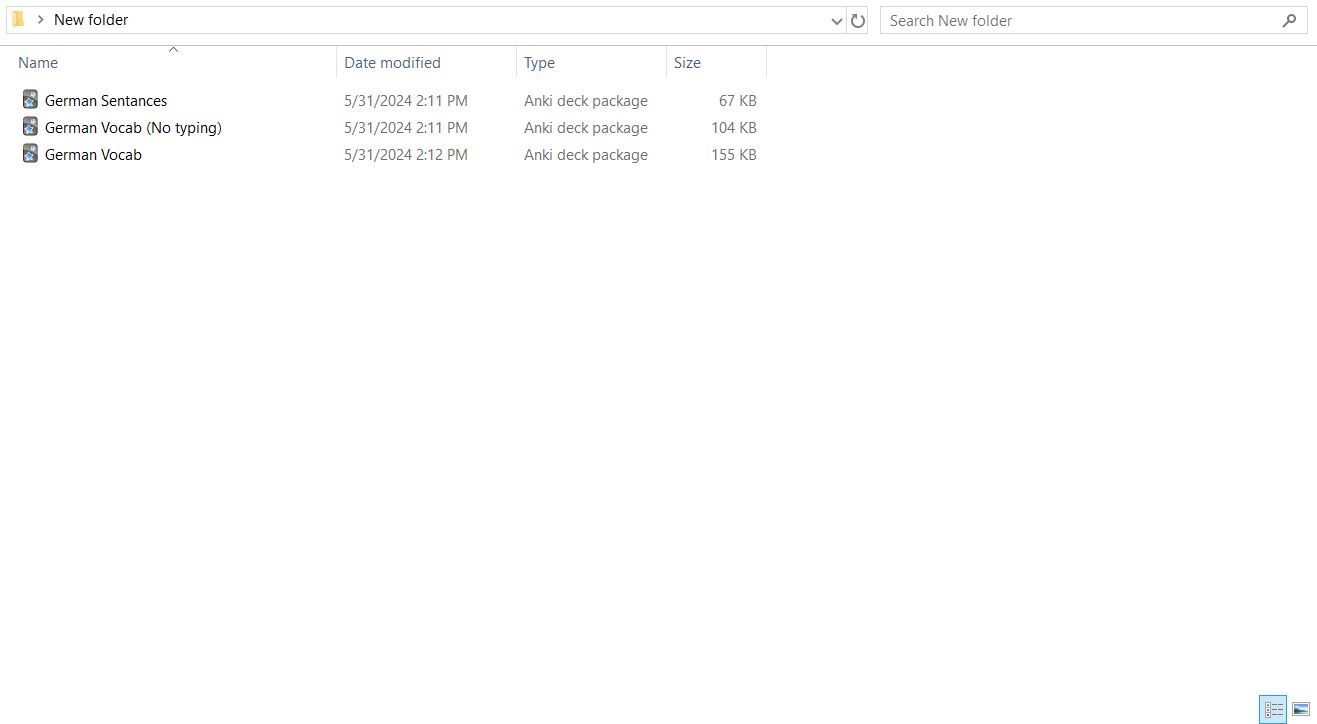
Anki decks will end in .apkg. They can easily be transferred and shared as independent files. To add downloaded decks to Anki, simply double-click on the deck you want to add. The decks linked below are the ones used in the German Language Pathway. They will be explained in more depth later.
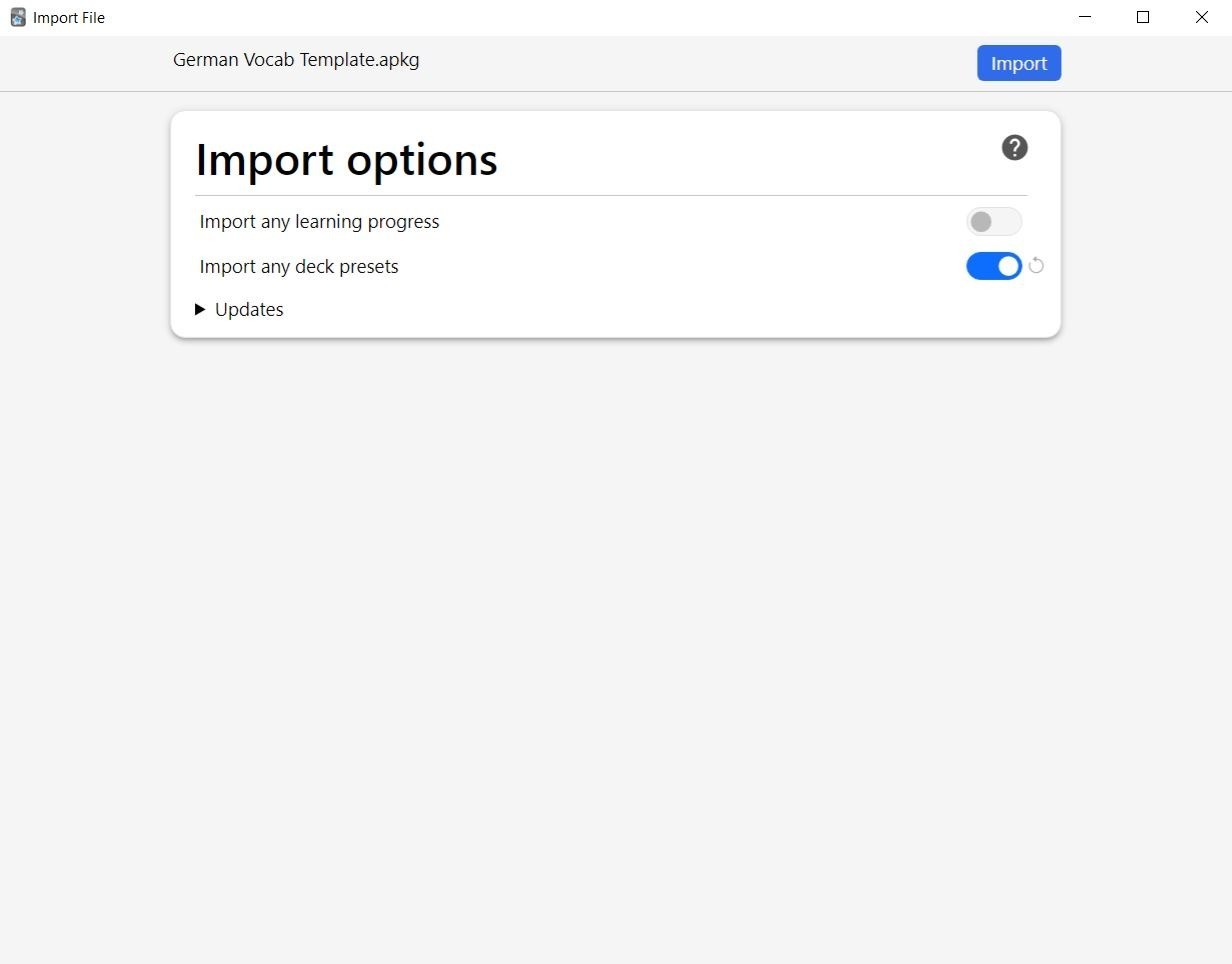
When you import a deck, it will ask you if you want to import learning progress or deck presets. Usually, you do not want to import learning progress as someone else’s progress won’t help you. However, you will likely want to import deck presets. This is how many new cards and reviews you will see each day as well as other settings specific to this deck. If you prefer to use your own presets, then you can leave the option off. When you’re done, click “Import” at the top of the screen.
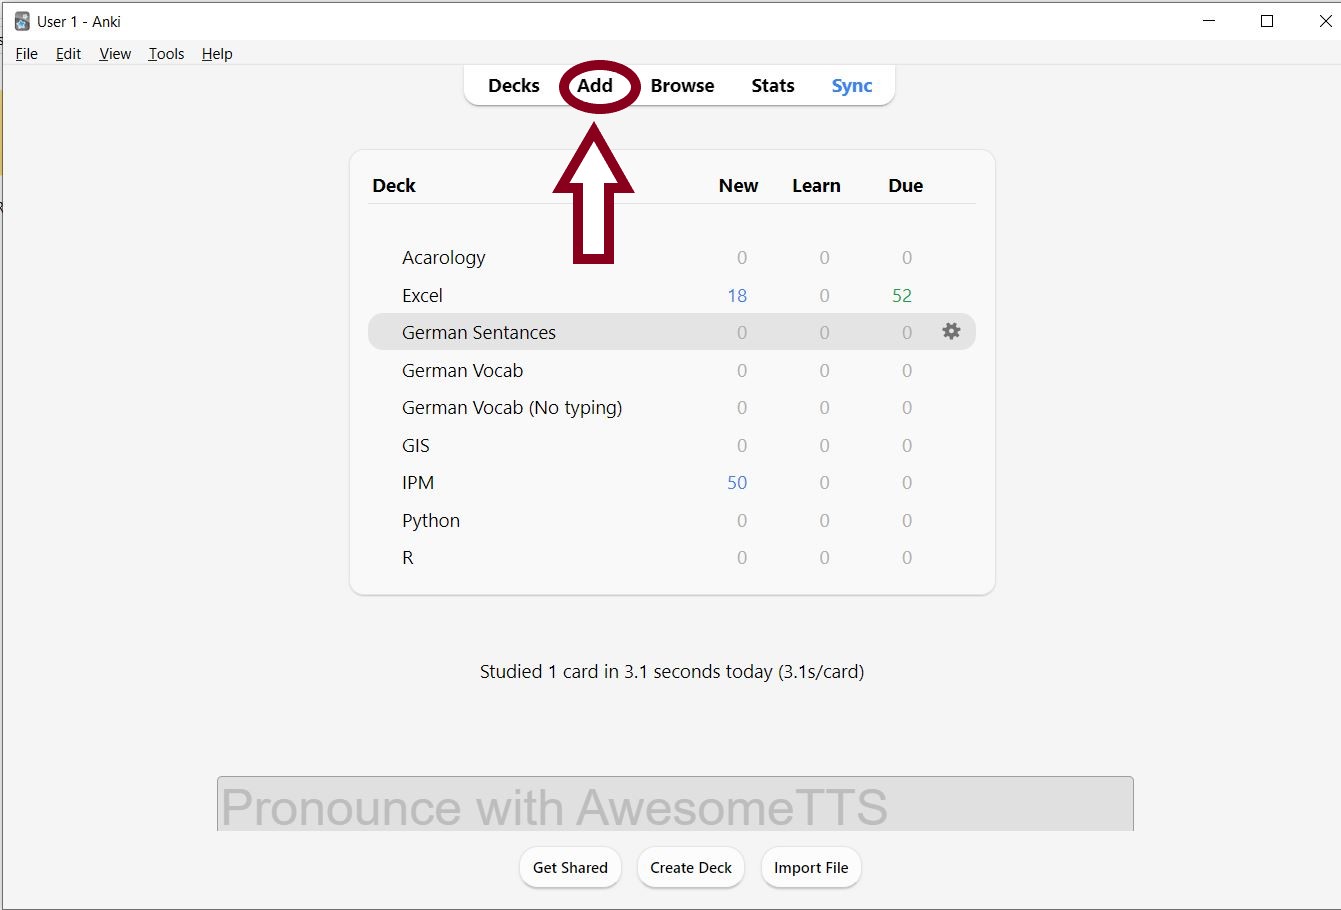
To add new individual cards to a deck, first click on the deck you want to add the new card to, then press “add” on the toolbar at the top of the screen. In the image below, the new card will go into the German Sentences deck.
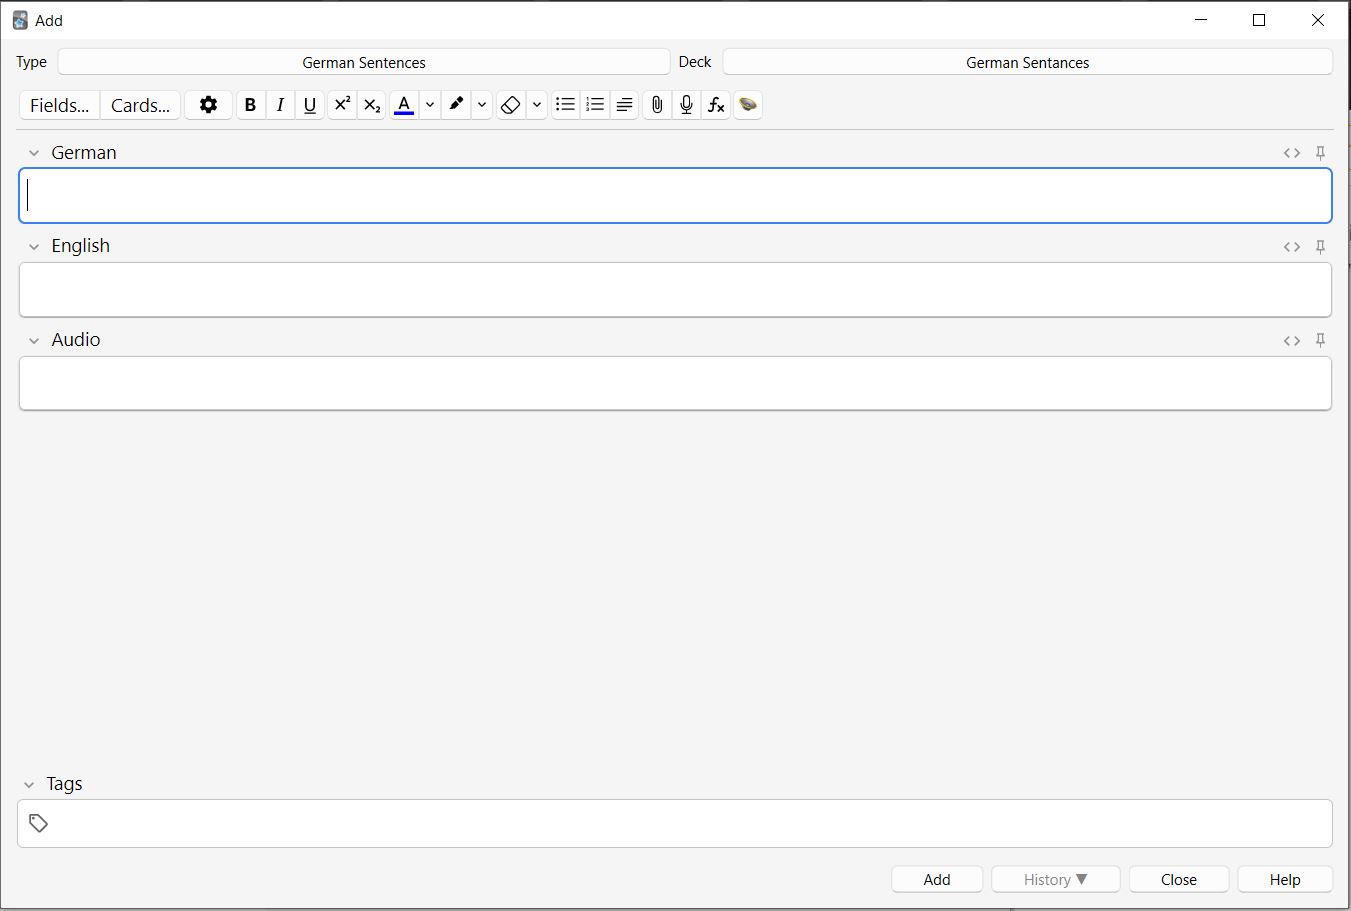
This is where you enter the information to make a new card. At the top of the screen, you can change the type (this changes the fields and how the card looks when finished) or the deck. The fields are pretty self-explanatory and should be filled out according to how they are labeled. Once you click add, the card will automatically be added to its respective deck. It’s easiest to add audio later after the card has been created, and I’ll show you how to do that later in tips. When you’re done adding cards, click “close” in the bottom right corner.
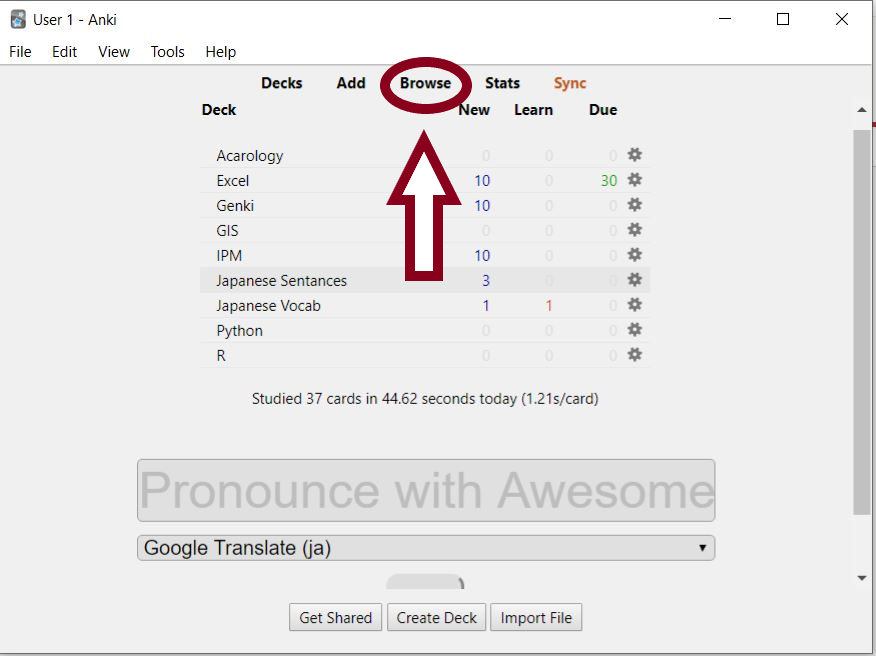
To see all the cards in your deck, click on “browse” from the main screen.
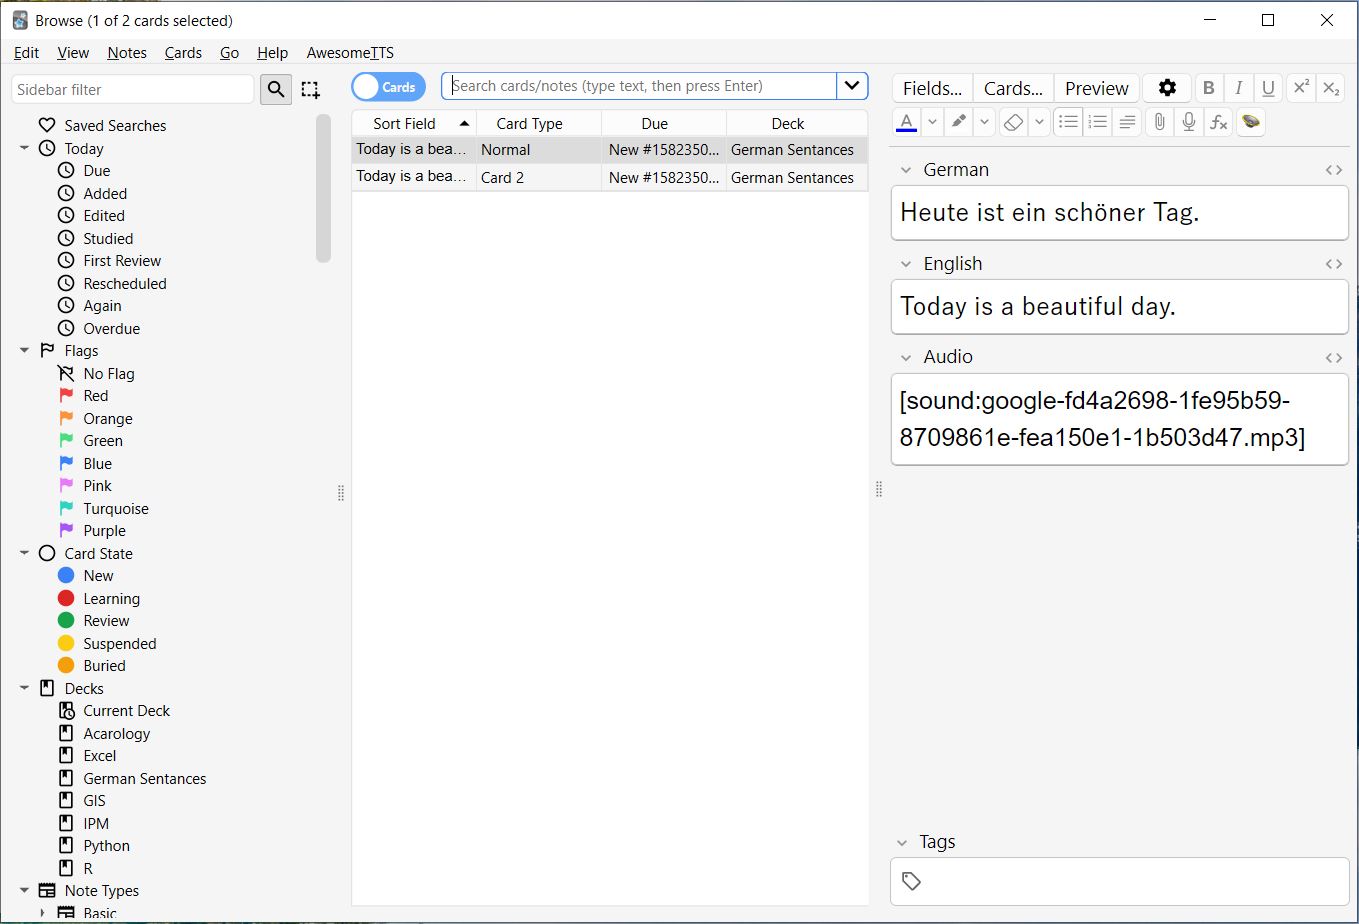
Here in browse you can sort through and edit your cards. To search for a specific keyword, type it in the top search bar. You can also sort cards by deck, tag, or state in the left column. To edit a card, simply click on it. The browse menu can be a little tricky to navigate at first, so I recommend just looking around to see where everything is. As you look through it more, it will become more familiar.
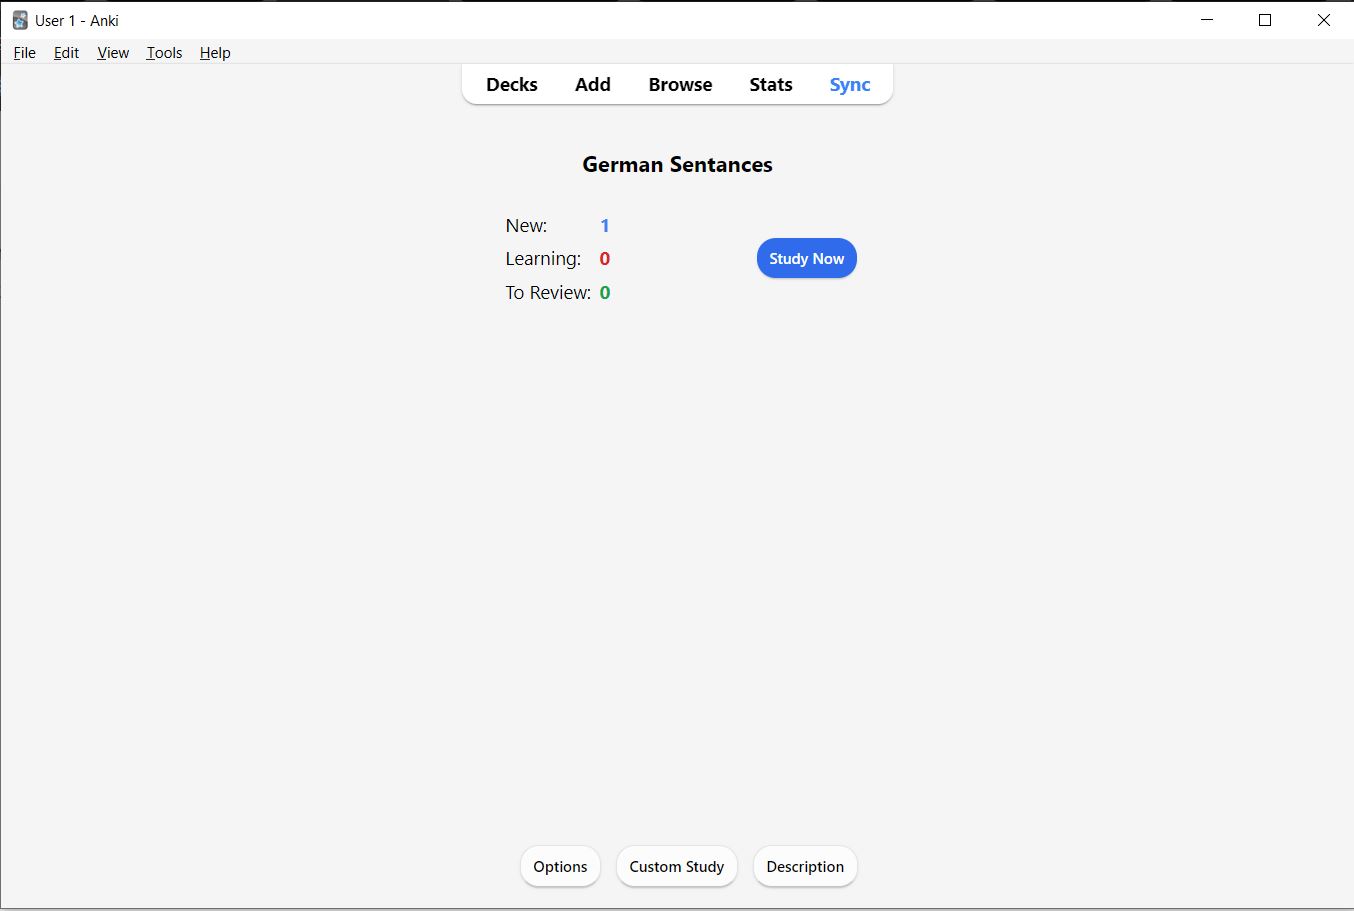
Back in the main menu, click on a deck to open it.
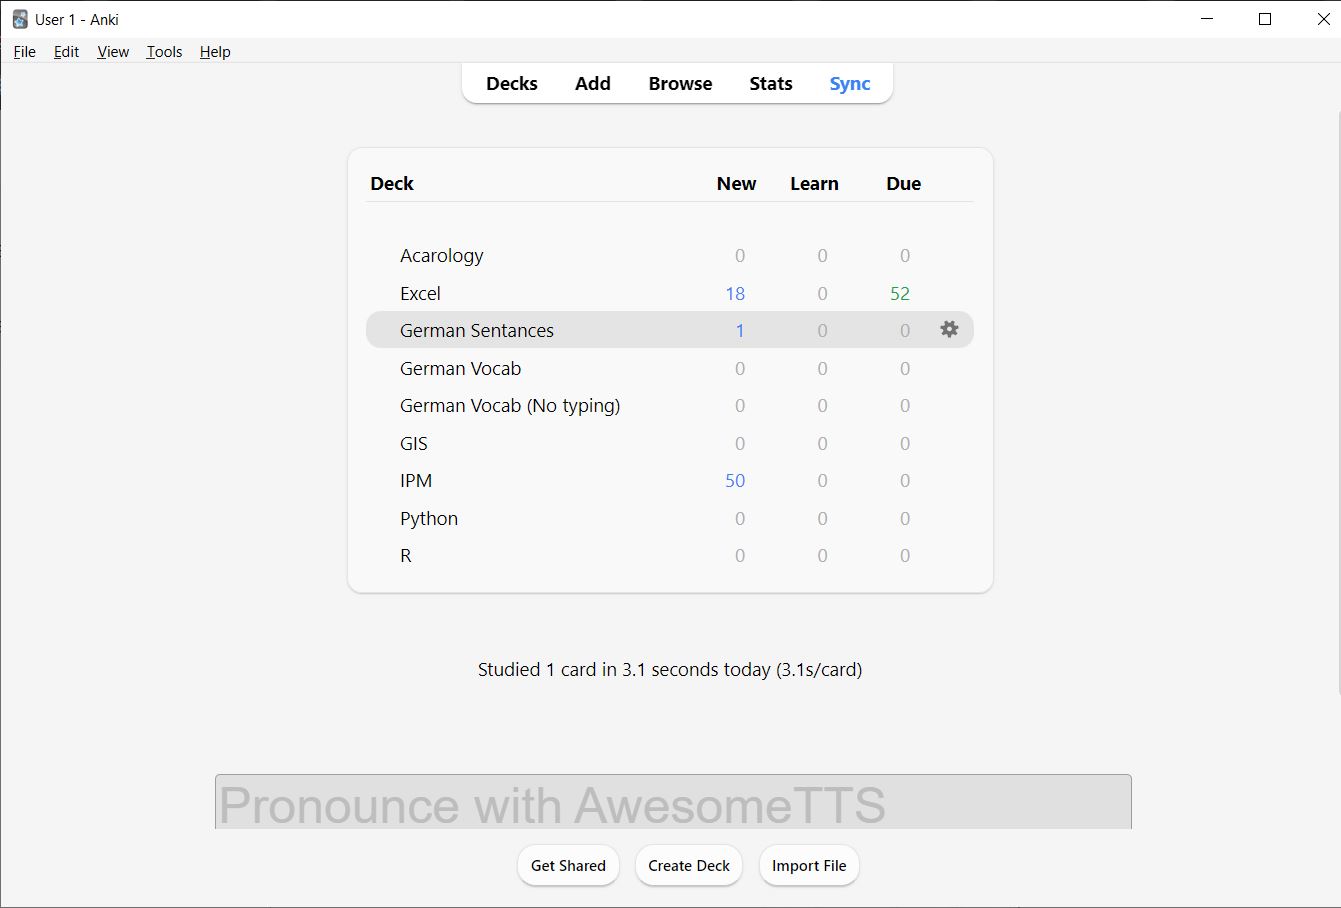
You’ll be presented with a few options when you open a deck. The one you’ll use the most is “study now.” However, we’re going to look at “options” on the bottom left side of the screen first.
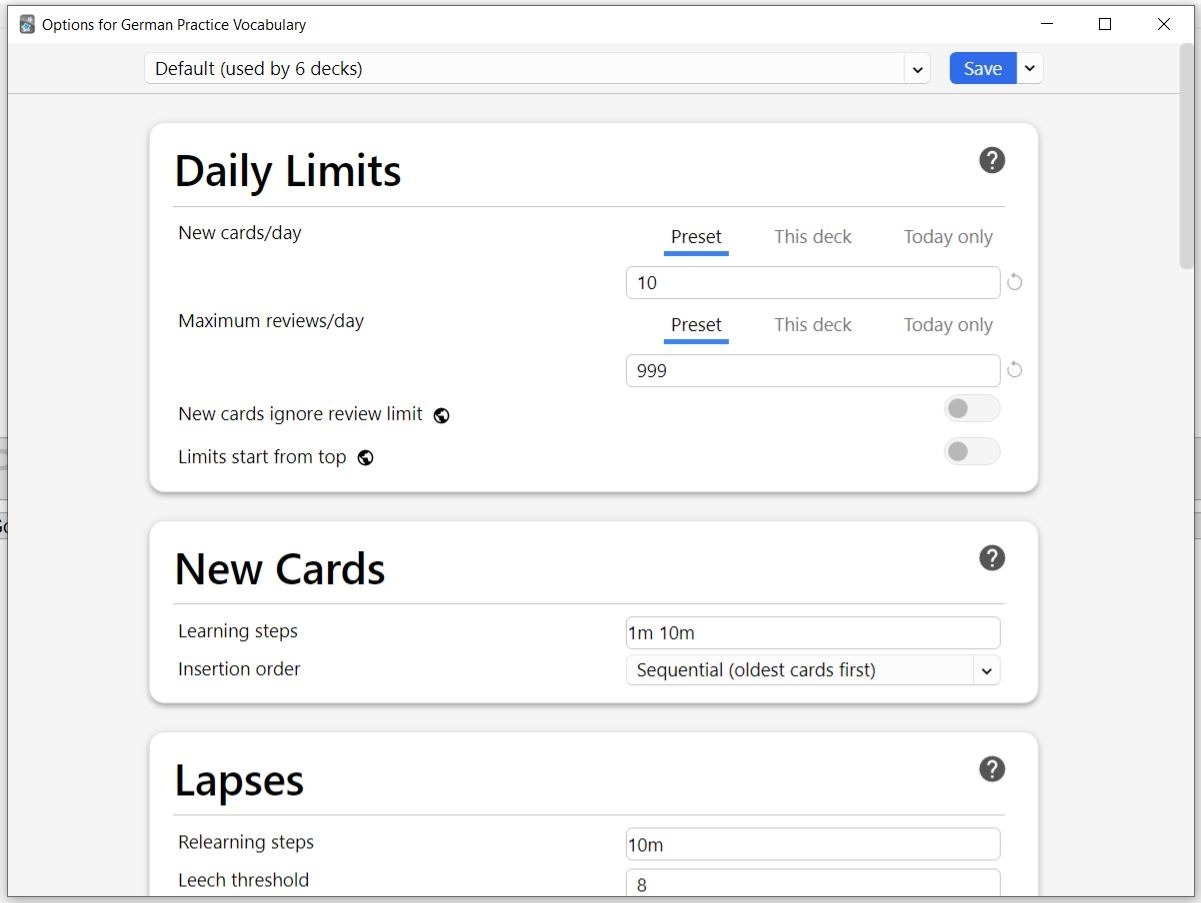
The options menu is where you select how many new cards you see each day and how many reviews you have each day. What you set this to will depend on how you like to learn. For optimal retention, you should have a low number of new cards a day and unlimited reviews.
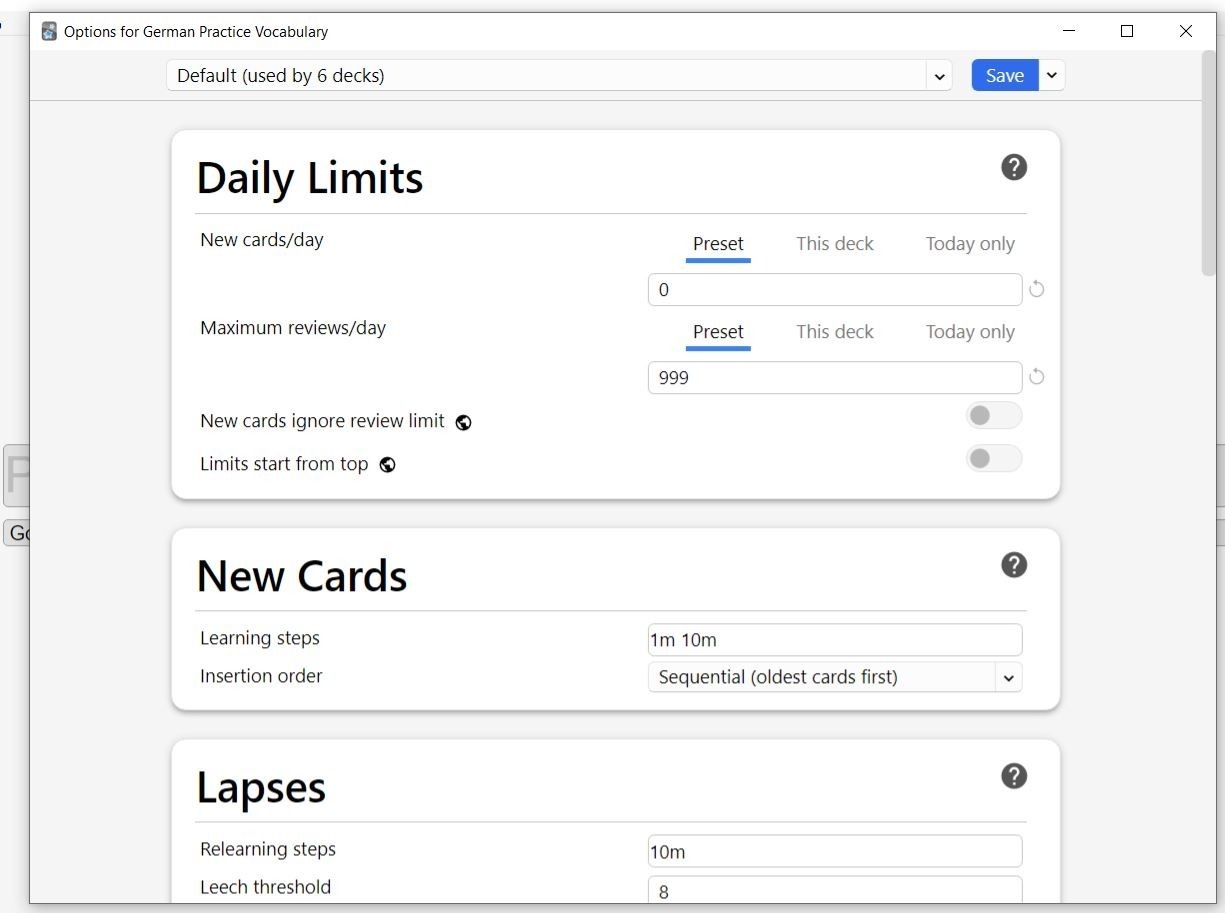
If you miss a few days and have a lot of reviews, don’t panic. Just set your new cards per day to zero and slowly work your way through your reviews as you have time. Don’t overdo it or you’ll get burnt out. Anki is just a memorization tool. You don’t need to stick to it exactly, just do cards as you have time.
The way I personally use Anki is not the most optimal for memorization. I don’t like doing all my reviews every day and prefer to be exposed to more new material, so I set my reviews lower than recommended. I also turn on “new cards ignore review limit,” so I see new cards every day. I’m not trying to remember every single word and sentence perfectly, I just want to review them a few times, so I can recognize these vocabulary words when I come across them later. I find that as long as I’m regularly getting exposure from native sources in combination with Anki, I am able to build a strong foundational vocabulary without spending long amounts of time reviewing flashcards. Typically, I am to spend about 20-30 minutes on Anki a day when I first start a language, then I decrease that over time to as low as 10 minutes a day.

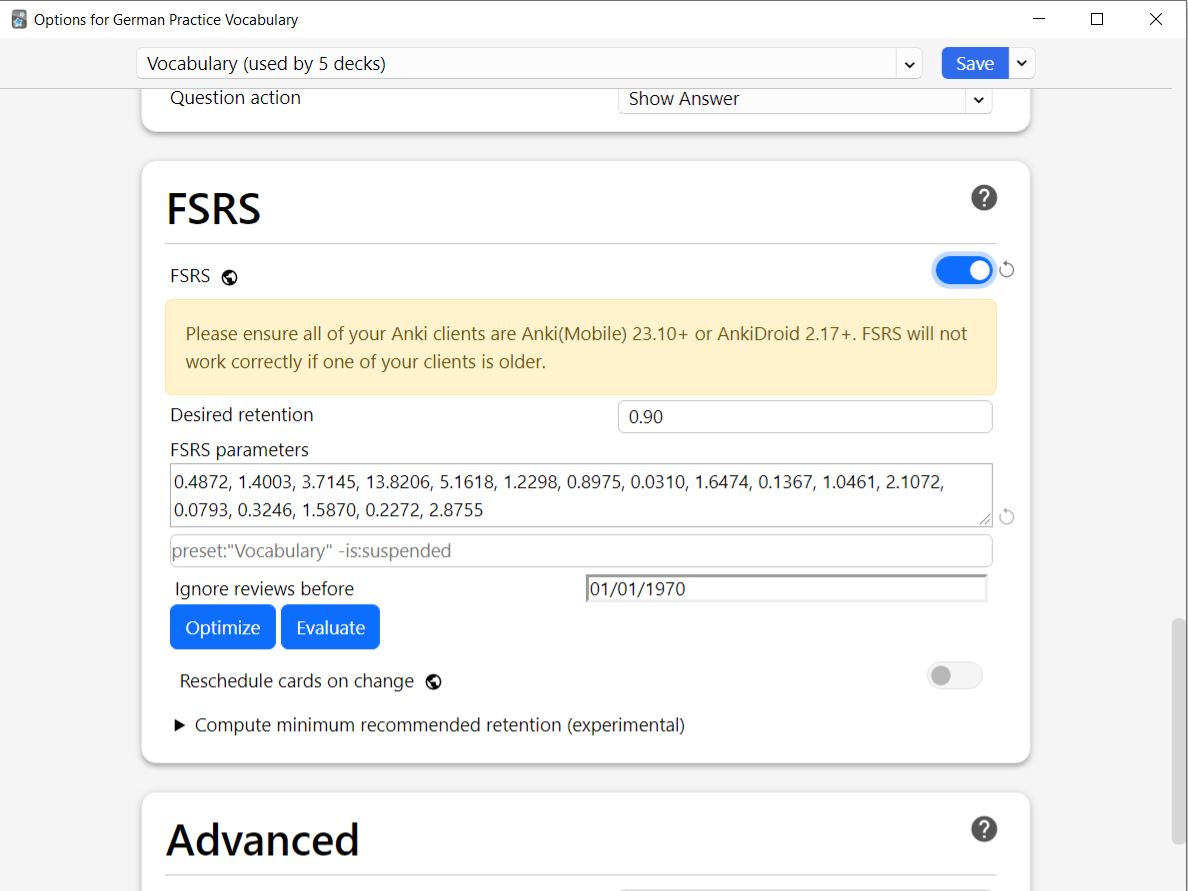
If you scroll down a little farther in the options, you will see the option to enable FSRS. FSRS is a new algorithm that tracks how you learn and optimizes when you see review cards. If you have a newer version of Anki installed, I highly recommend turning this setting on. When you first turn on FSRS, it will present you with the default study intervals, but the longer you study with Anki and the more reviews you do, the more it will adapt to you. The default study retention is 0.9, which means the algorithm will space out your reviews so you remember about 90% of the cards. You can change this to whatever you like, but it’s not recommended to go below 0.85.
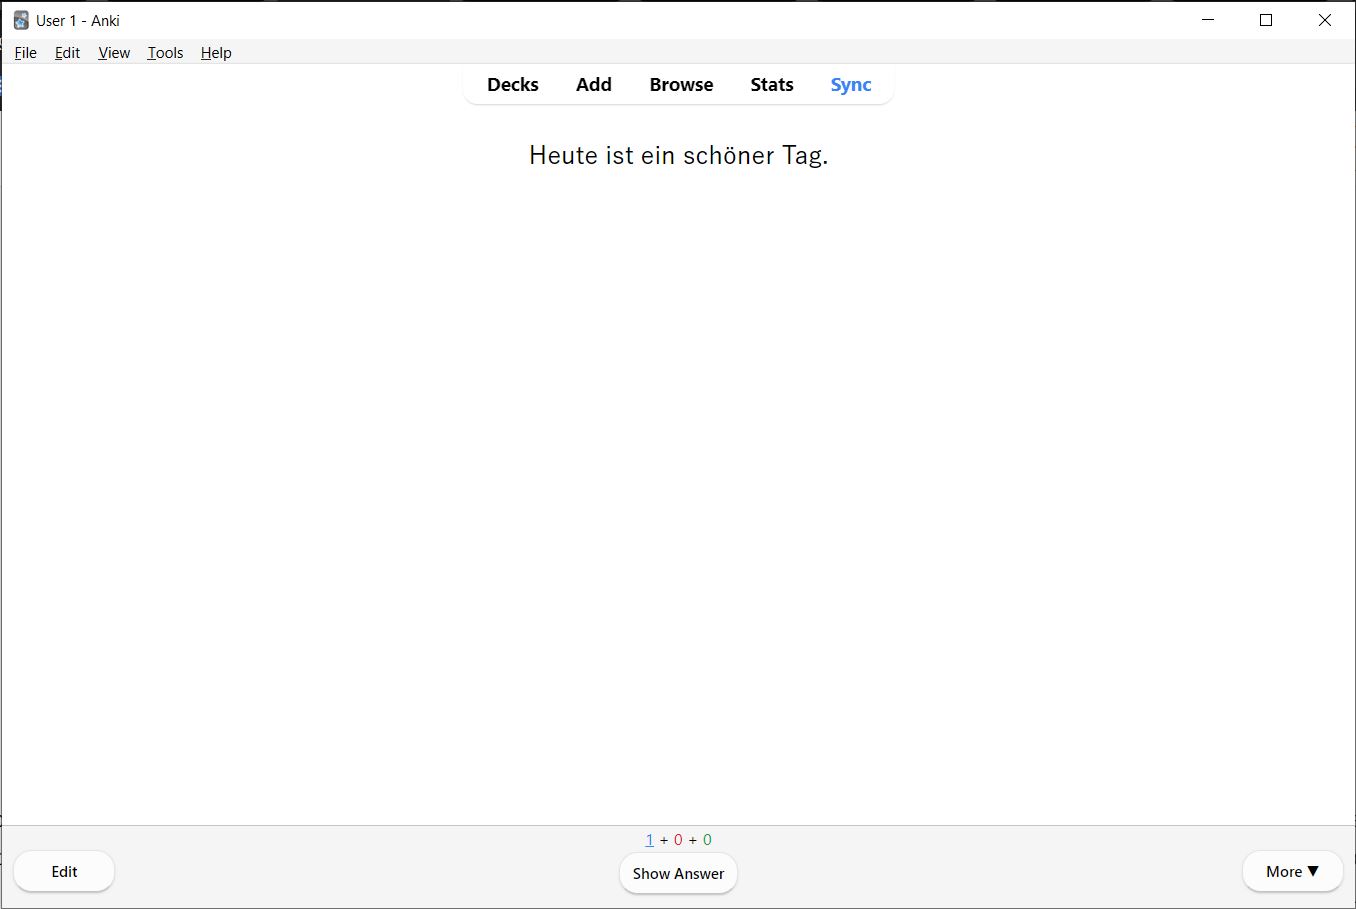
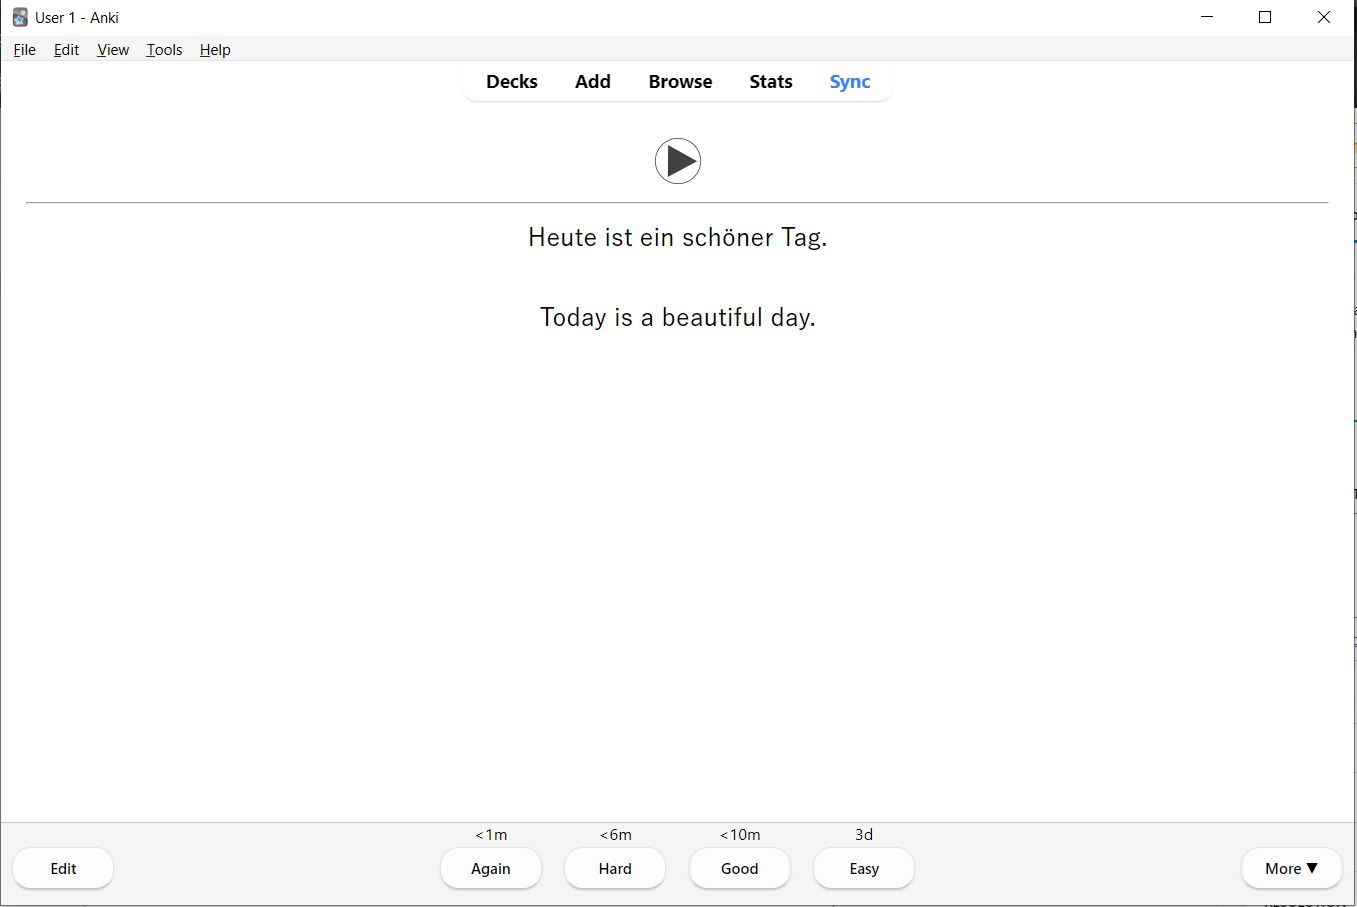
After you have selected how many cards you want to study every day, go back and select “study now.” Your flashcards will now appear in study mode. In the center of the screen, you’ll see the flashcard prompt. In this case, it is a German sentence, so your goal is to read and understand the sentence. At the bottom of the screen in the left corner, you’ll see “edit.” This allows you to change the individual card you are currently looking at. In the center at the bottom of the screen, you’ll see three numbers. The blue number is the number of new cards, the red number is the number of cards you are currently studying, and the green number is the number of reviews. When you are ready to see the answer, press “show answer.”
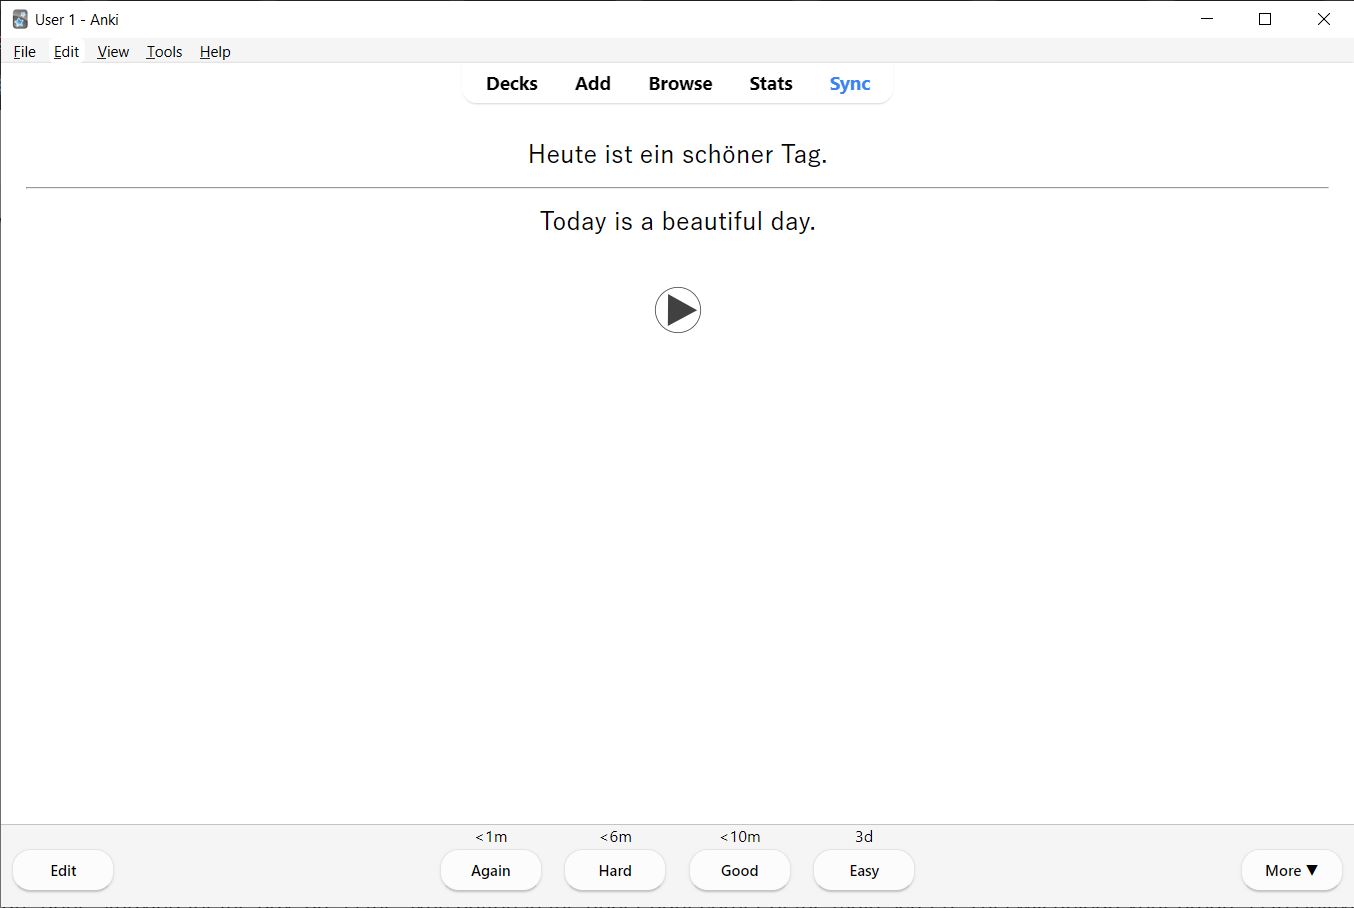
Once the card is flipped over, you will grade yourself. How you grade yourself will dictate when you see this card next. In this case, if you couldn’t read the card at all, you would press “again.” If you could understand it a little but not fully, you would press “hard.” If you could understand and read it, but it took some time, you would press “good.” If you can easily read and understand it, press “easy.” You will learn how to grade yourself over time. If stuck between two levels, choose the lower one. For example, if you’re not sure if you should choose “hard” or “good,” choose “hard.”
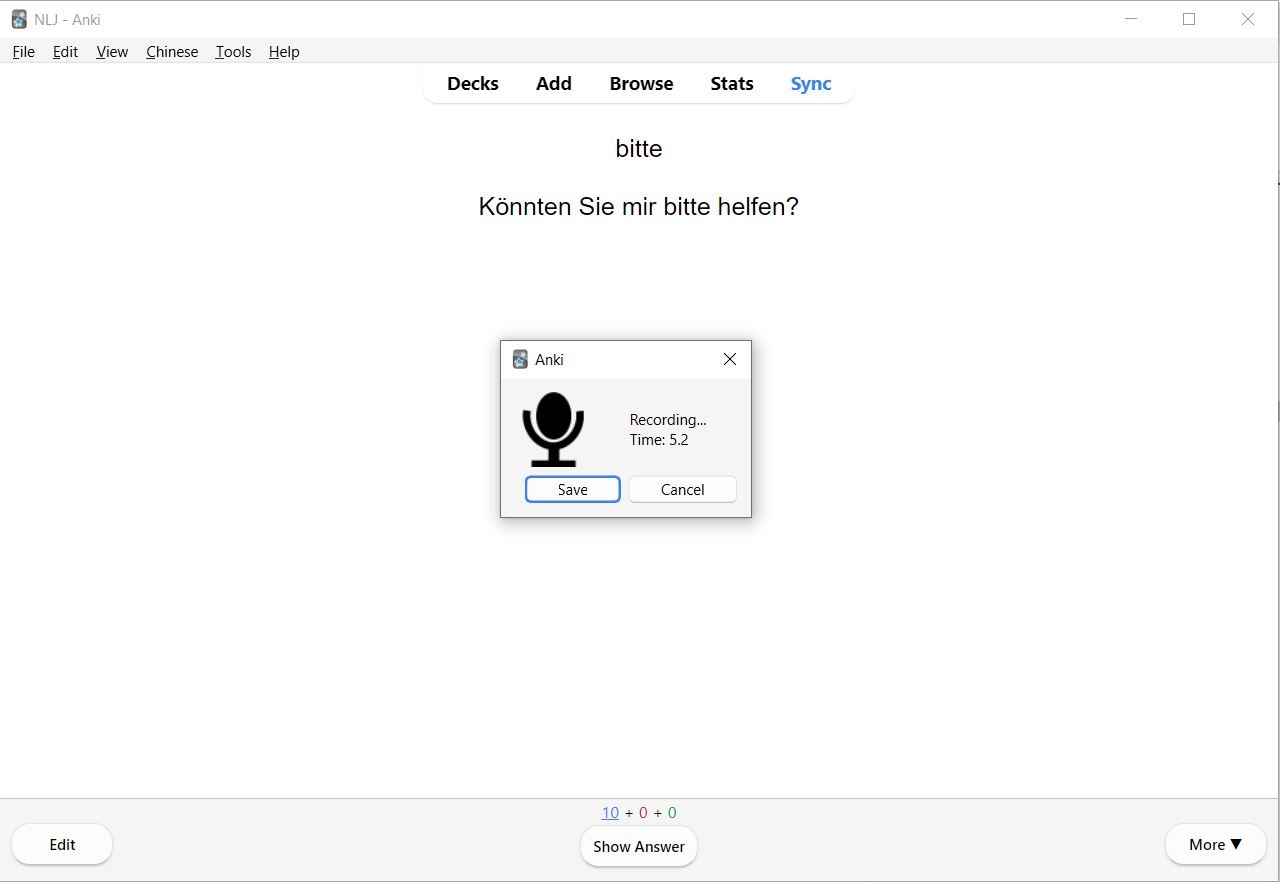
If you would like to get more out of your Anki sessions, you can use Anki’s built-in recording feature to record your voice and compare it to the flashcard audio. When I study, I will read the word and sentence out loud before flipping over the card, then compare my pronunciation and tones to the card audio. To use this feature on a computer press “Shift+v” to record and “v” to listen back to the recording. You can also find this option in the “more” menu in the bottom right corner.
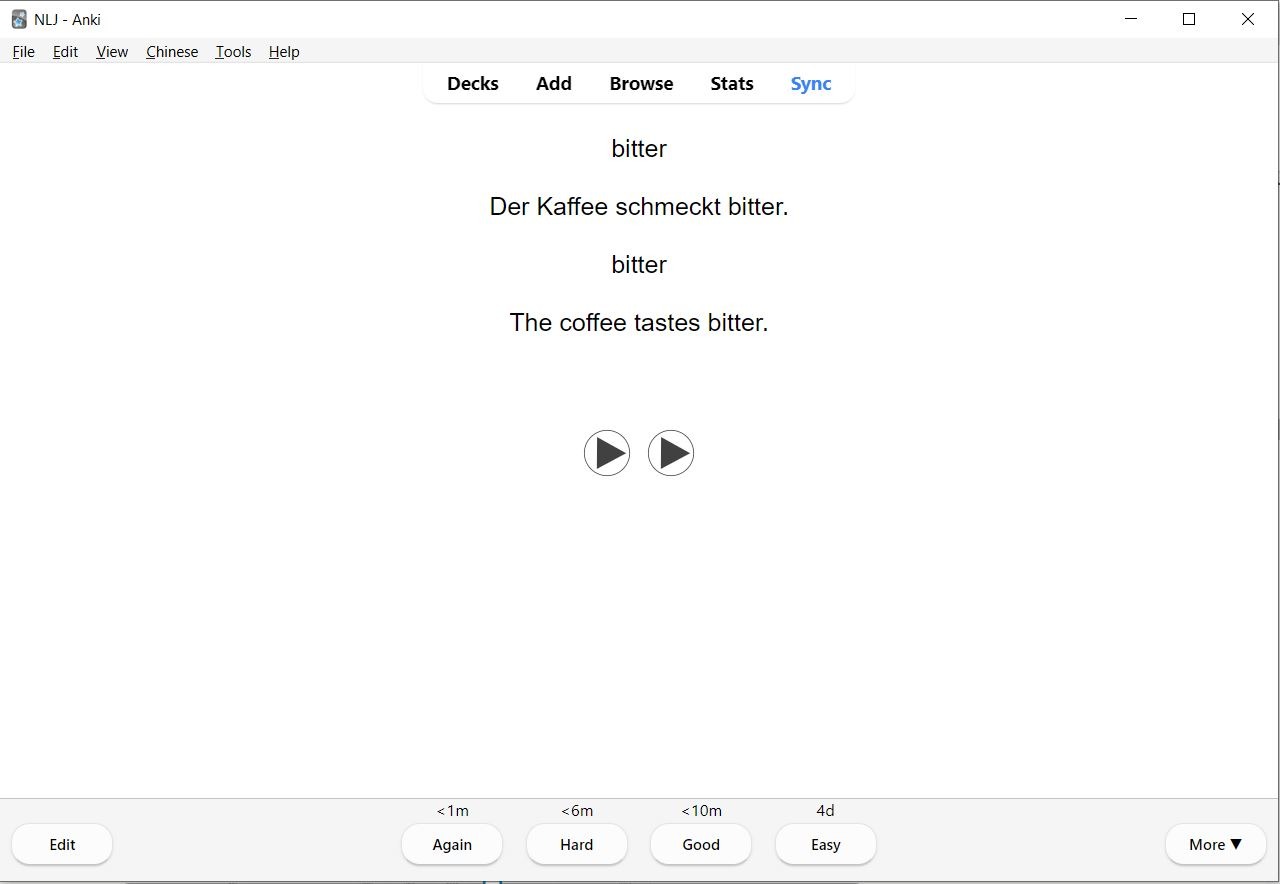
Another way to get more out of your flashcards is to use the sentences as prompts for your own sentence creation. For example, I can take the sentence on the card below and switch out different words in the sentence to change the meaning. I can change the adjective describing the coffee to sweet. “Der Kaffee schmeckt süß.” “The coffee tastes sweet.” I can also change what tastes bitter. “Der Tee schmeckt bitter.” “The tea tastes bitter.” Creating your own sentences will reinforce the words and patterns you’ve learned, as well as improve your recall time and speaking ability. If you would like to challenge yourself, try to come up with a new sentence for each flashcard you review. If you’re not sure if a sentence you created is correct, you can always ask ChatGPT or use a website like HiNative.
When you are done studying for the day, press the sync button in the upper right corner of the main screen. This will upload your progress to AnkiWeb so you can save your progress and study on other devices. Sync will also automatically be activated every time you open or close Anki.
Anki on Mobile
On Android Anki is free, but on IOS, the Anki app is about $25. If this is too expensive for you, you can use AnkiWeb, which is the free browser-based version of Anki. AnkiWeb is limited in its capability to create cards, so using a computer to create and edit decks or importing premade decks is best. However, if you are using premade decks, AnkiWeb works perfectly!
Once you download the Anki app, you will open it to see this page, but you won’t have any decks yet.
If you already have an Anki account with Anki decks, press the sync button to sign into your account and see your existing decks.
If you need to add an Anki deck, press the three dots in the upper right corner.
Next, press import to select the Anki deck you want to study from your phone’s documents.
The decks below are part of the German Language Pathway and will be explained in more depth later. You can use one of them to practice importing a deck.
If you press the plus sign in the bottom right corner, you will see a menu where you can create new cards and decks. From this menu, you can also add community decks by selecting “get shared decks.”
When you press “add,” the add new card screen will pop up. You can change the card type and deck at the top of the screen. Fill out the sections of the card accordingly, and when you’re done, press the checkmark in the upper right corner. Audio can not be added on mobile and must be added on a computer. See tips for more information.
To alter a deck, go back to the main screen, and long press on the deck you want to change. From here you can add new cards, browse current cards, or rename the deck, but first go to “deck options.”
The options menu is where you select how many new cards you see each day and how many reviews you have each day. What you set this to will depend on how you like to learn. For optimal retention, you should have a low number of new cards a day and unlimited reviews.
If you miss a few days and have a lot of reviews, don’t panic. Just set your new cards per day to zero and slowly work your way through your reviews as you have time. Don’t overdo it or you’ll get burnt out. Anki is just a memorization tool. You don’t need to stick to it exactly, just do cards as you have time.
The way I personally use Anki is not the most optimal for memorization. I don’t like doing all my reviews every day and prefer to be exposed to more new material, so I set my reviews lower than recommended. I also turn on “new cards ignore review limit,” so I see new cards every day. I’m not trying to remember every single word and sentence perfectly, I just want to review them a few times, so I can recognize these vocabulary words when I come across them later. I find that as long as I’m regularly getting exposure from native sources in combination with Anki, I am able to build a strong foundational vocabulary without spending long amounts of time reviewing flashcards. Typically, I am to spend about 20-30 minutes on Anki a day when I first start a language, then I decrease that over time to as low as 10 minutes a day.
If you scroll down a little farther in the options, you will see the option to enable FSRS. FSRS is a new algorithm that tracks how you learn and optimizes when you see review cards. If you have a newer version of Anki installed, I highly recommend turning this setting on. When you first turn on FSRS, it will present you with the default study intervals, but the longer you study with Anki and the more reviews you do, the more it will adapt to you. The default study retention is 0.9, which means the algorithm will space out your reviews so you remember about 90% of the cards. You can change this to whatever you like, but it’s not recommended to go below 0.85.
To start studying your flashcards, single click on a deck on the main screen. Below is what a flashcard looks like. You will answer in your head or out loud then press the show answer button. To edit a card, click the three dots in the upper right corner. The numbers in the upper left corner show how many new cards, current cards, and review cards you still have for the day.
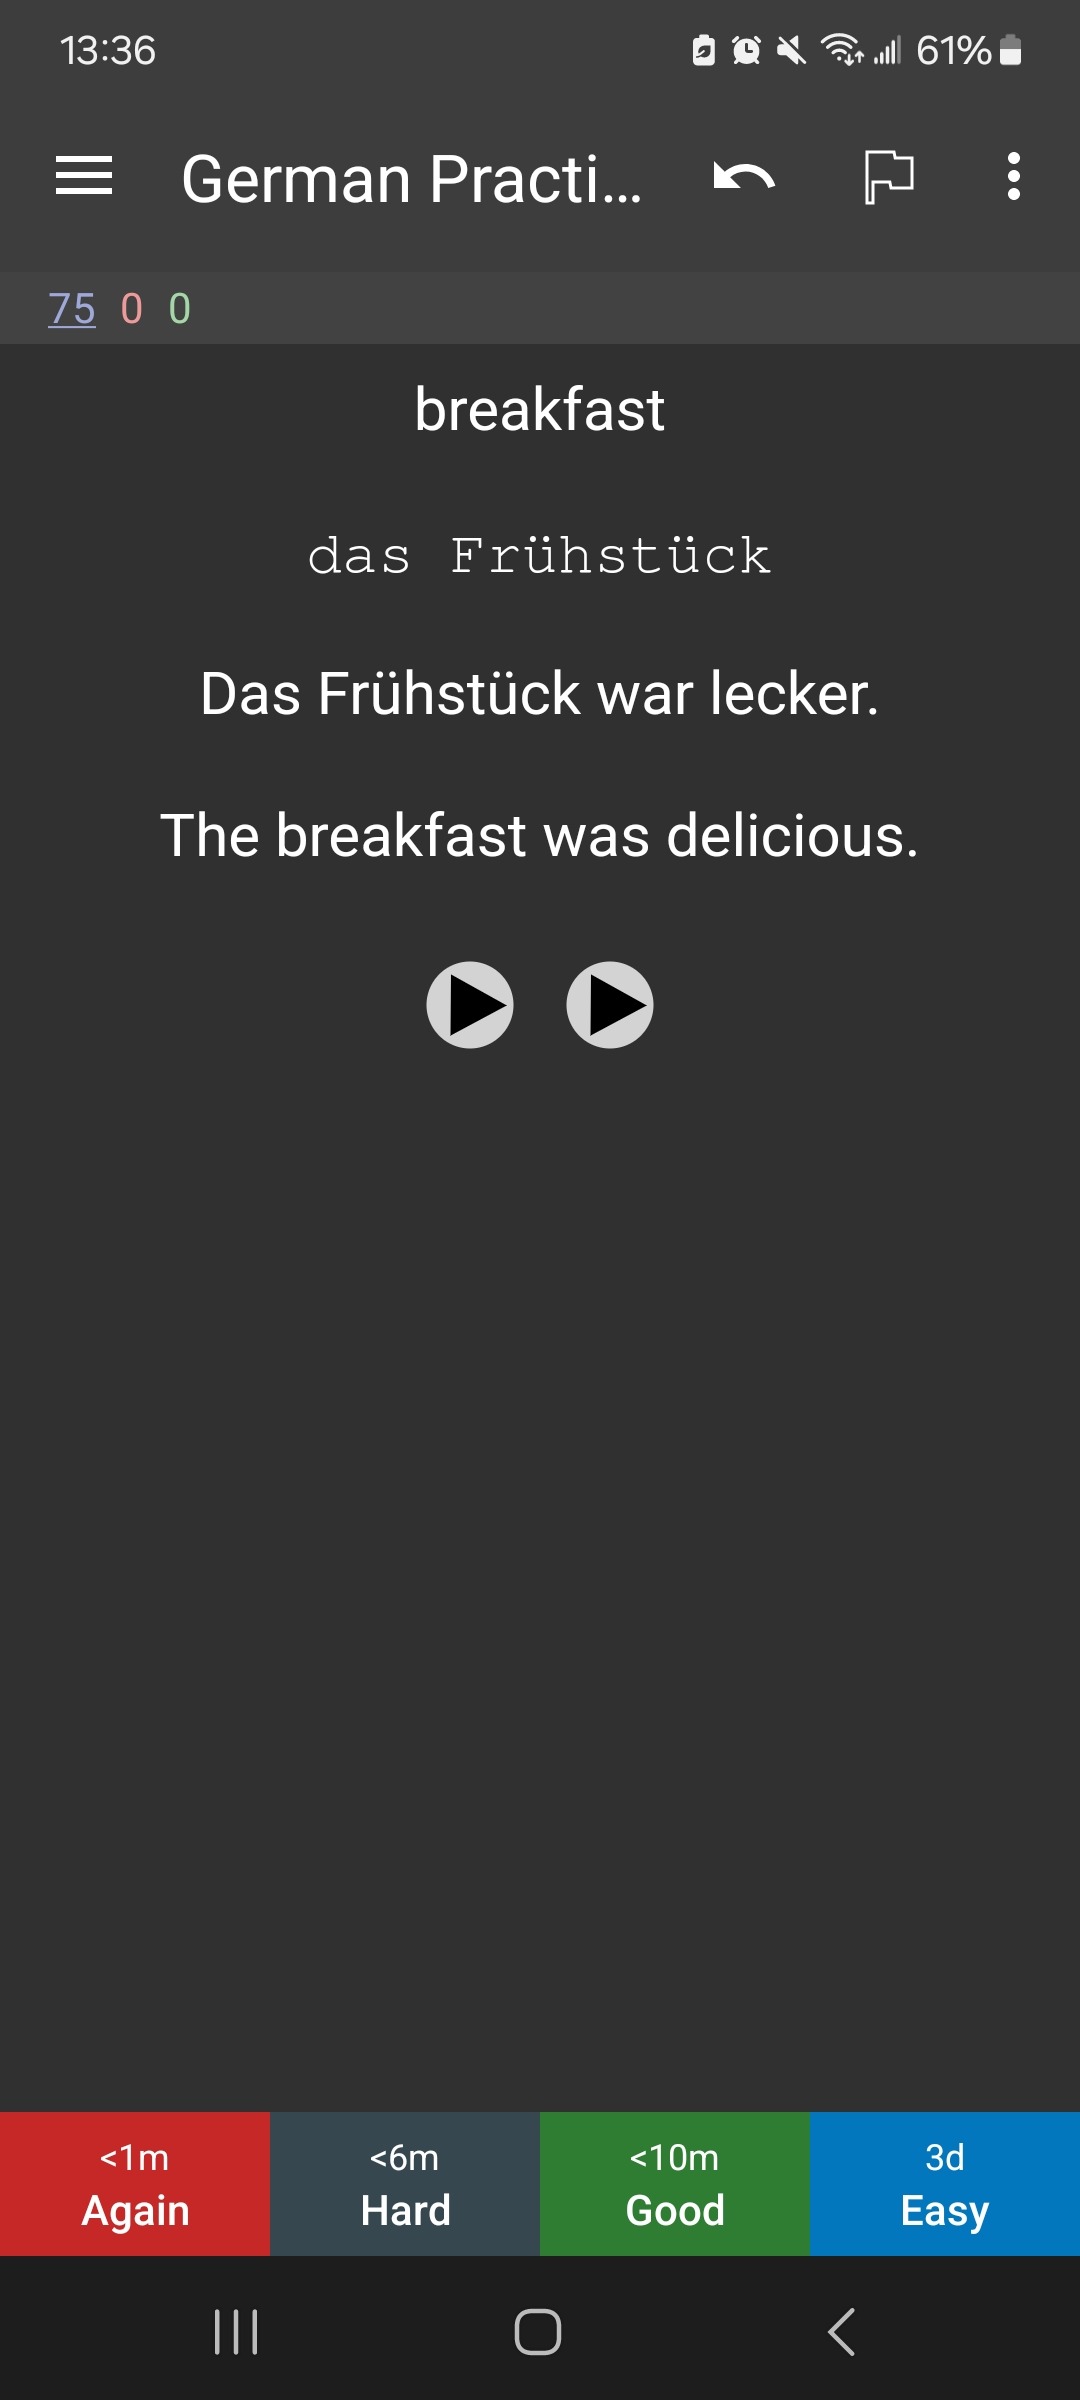
After you press “show answer,” you will see the back of the card and grade yourself based on how well you know the material on the card. How you grade yourself affects when you’ll see the card again. If you are stuck between grades, go with the lower one. For example, if you are between “good” and “easy,” select “good.” It never hurts to review more.
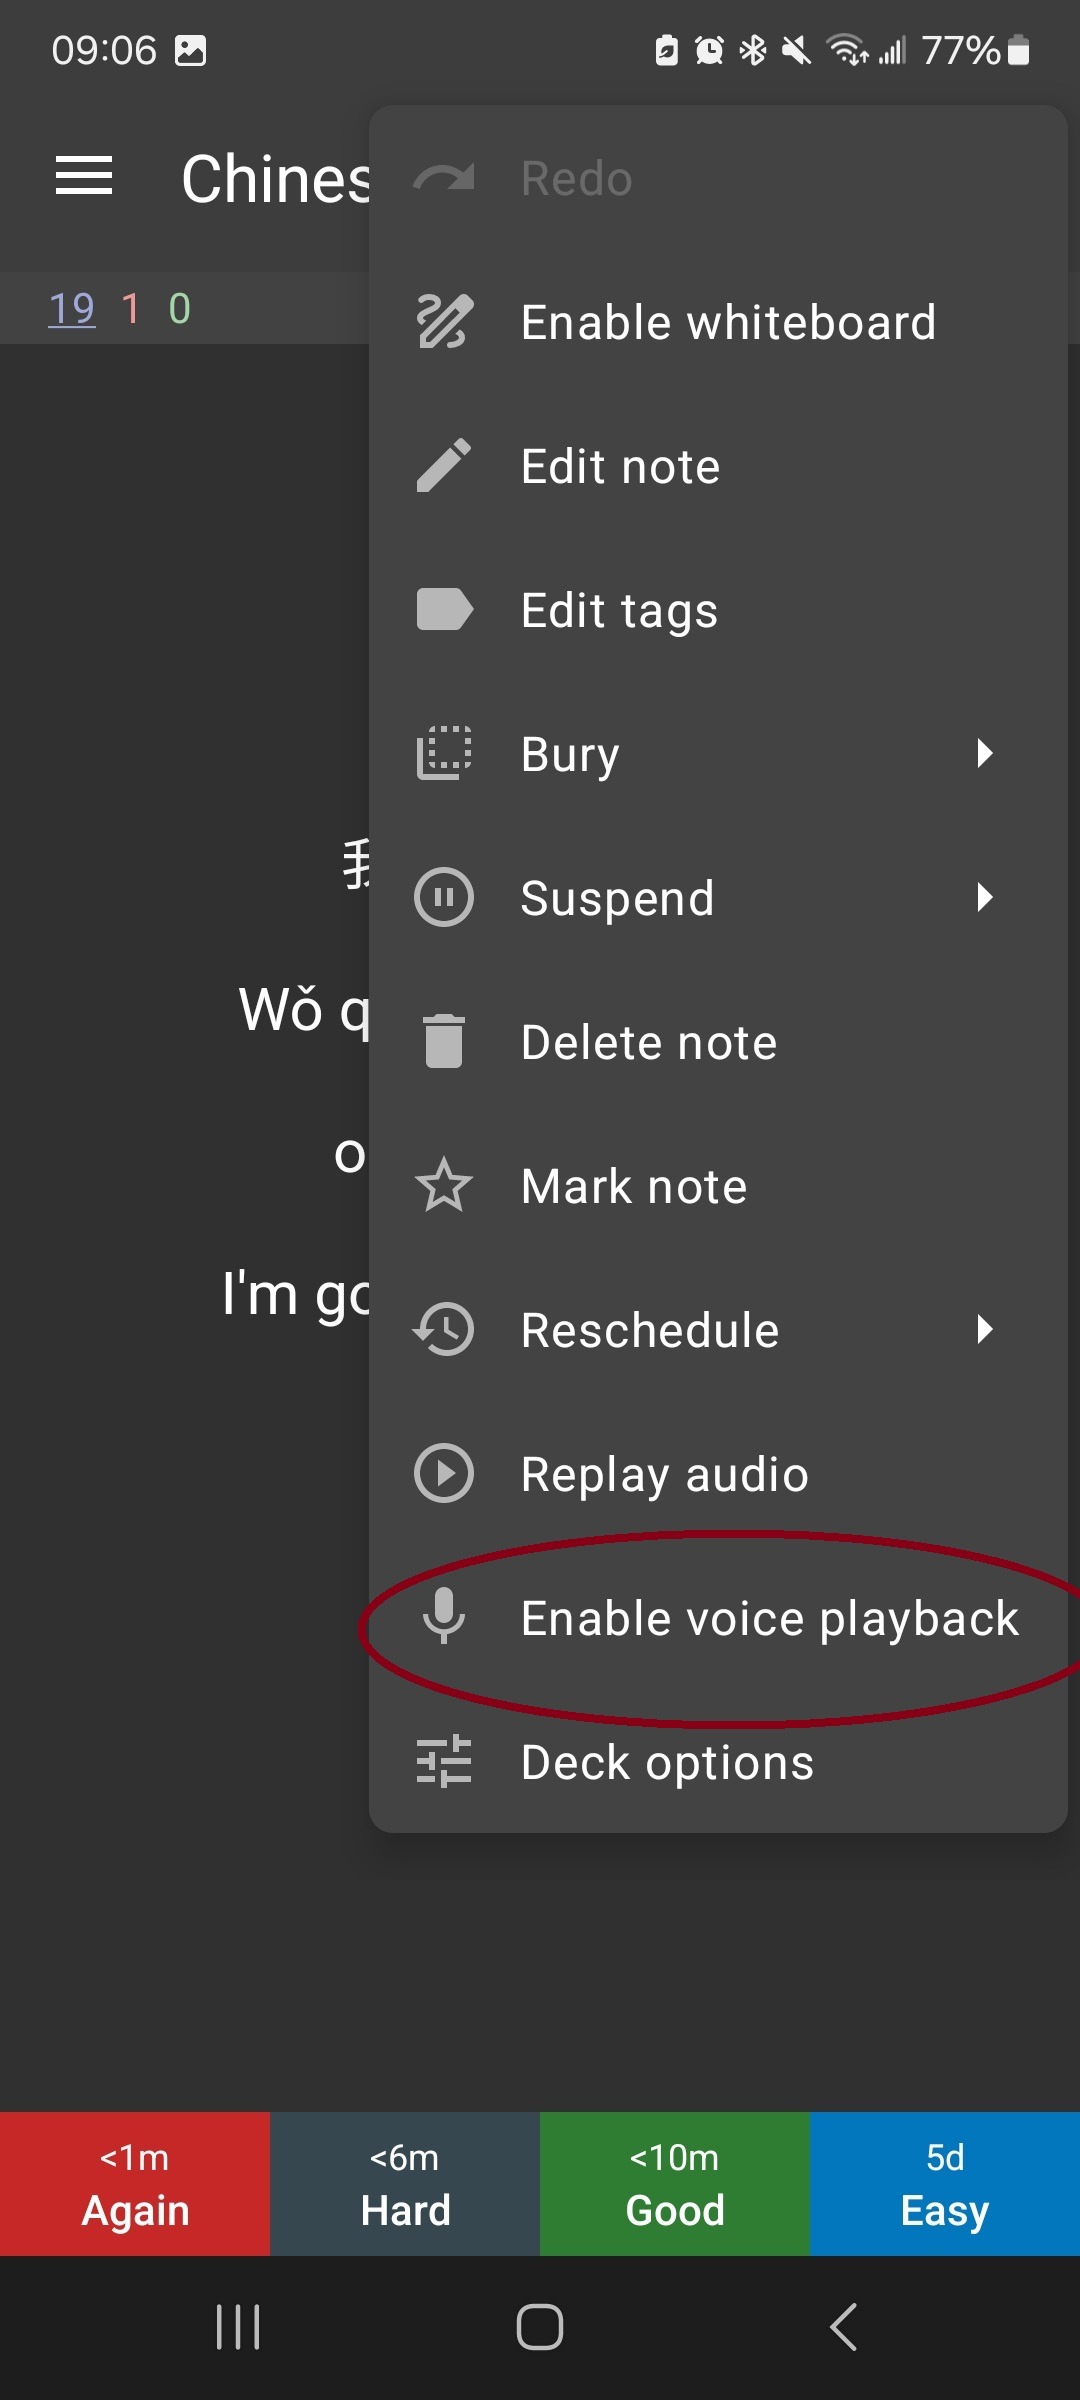
If you would like to get more out of your Anki sessions, you can use Anki’s built-in recording feature to record your voice and compare it to the flashcard audio. When I study, I will read the word and sentence out loud before flipping over the card, then compare my pronunciation and tones to the card audio. To use this feature on a phone, click on the three dots in the upper right corner, then select “Enable voice playback.”
Another way to get more out of your flashcards is to use the sentences as prompts for your own sentence creation. For example, I can take the sentence on the card below and switch out different words in the sentence to change the meaning. I can change the adjective to describe breakfast. “Das Frühstück ist salzig.” “The breakfast is salty.” I can also change what was delicious. “Der Kuchen war lecker.” “The cake was delicious.” Creating your own sentences will reinforce the words and patterns you’ve learned, as well as improve your recall time and speaking ability. If you would like to challenge yourself, try to come up with a new sentence for each flashcard you review. If you’re not sure if a sentence you created is correct, you can always ask ChatGPT or use a website like HiNative.
Deck of 10,000 German Vocab words
If you don’t want to go through the hassle of making your own cards, you can use my premade deck, which has 10,000 German vocabulary words with example sentences and audio. When you go to download it, the deck is called “German Practice Vocabulary.” You can download it either from the Google Drive file or as an Anki shared deck, but you do not need to download both! The deck contains two types of cards to help you first build recognition of a word and then recall the word. Below is an example of a recognition card. It will show you a German word and an example sentence, and then ask you to translate it into English. You will grade yourself based on how easily you can recognize and understand the word.
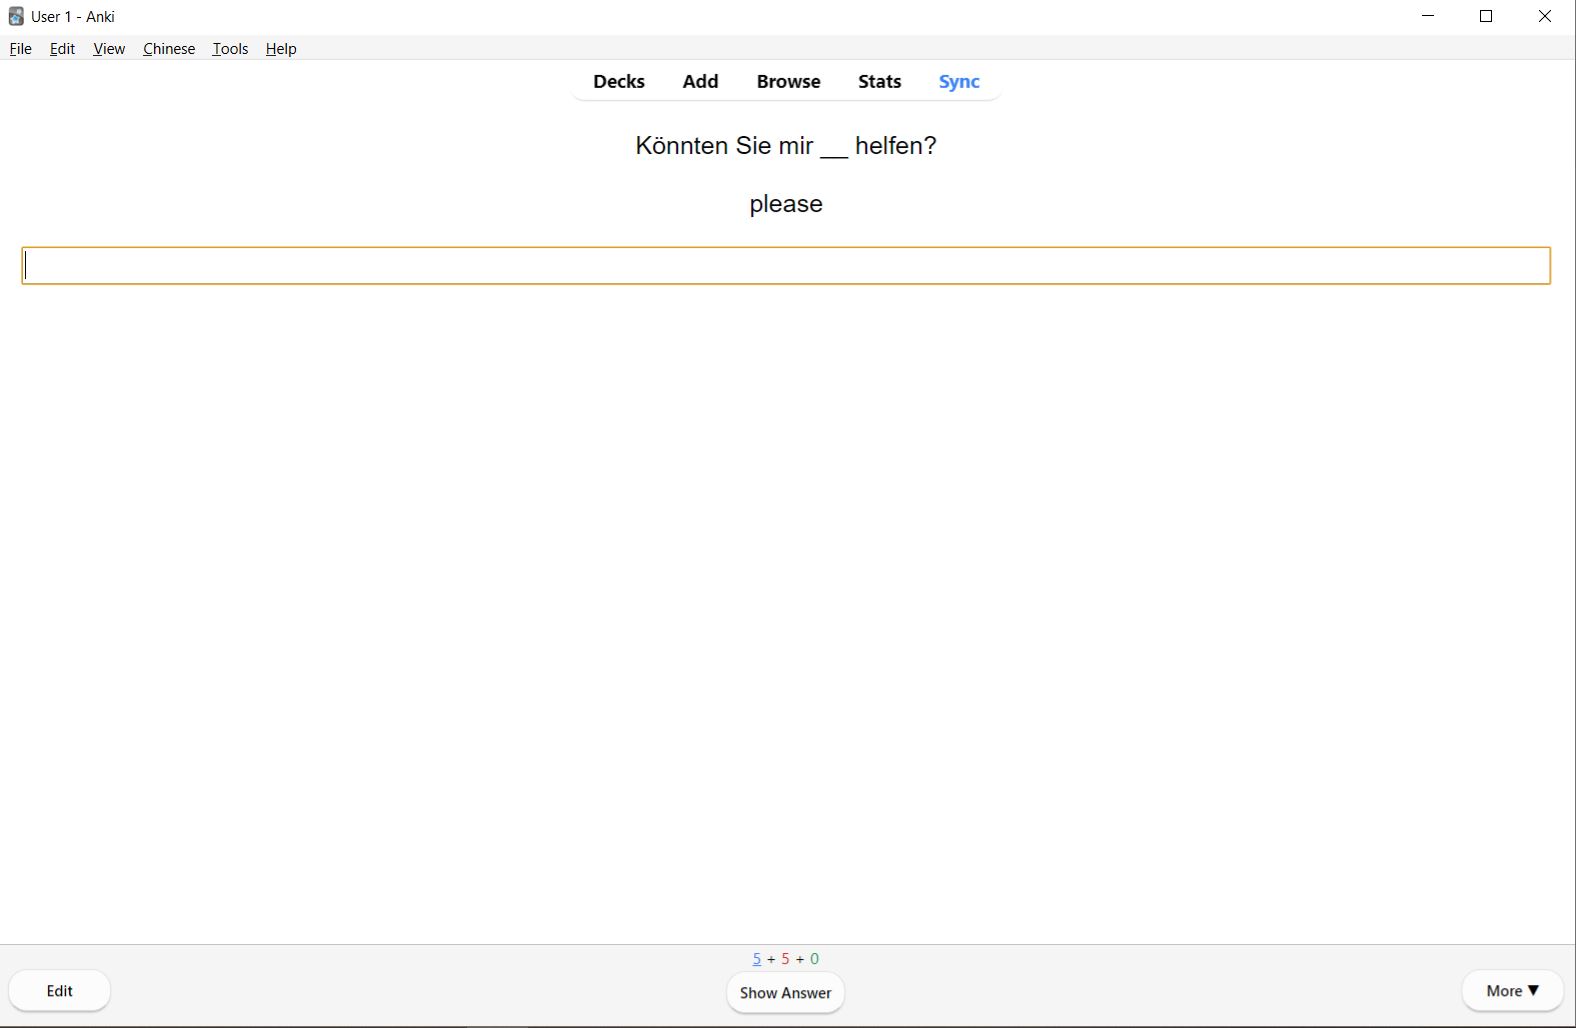
The second type of card will ask you to recall the vocabulary word. It will give you the example sentence with the word removed and the English translation, then you can type the answer in the space provided.
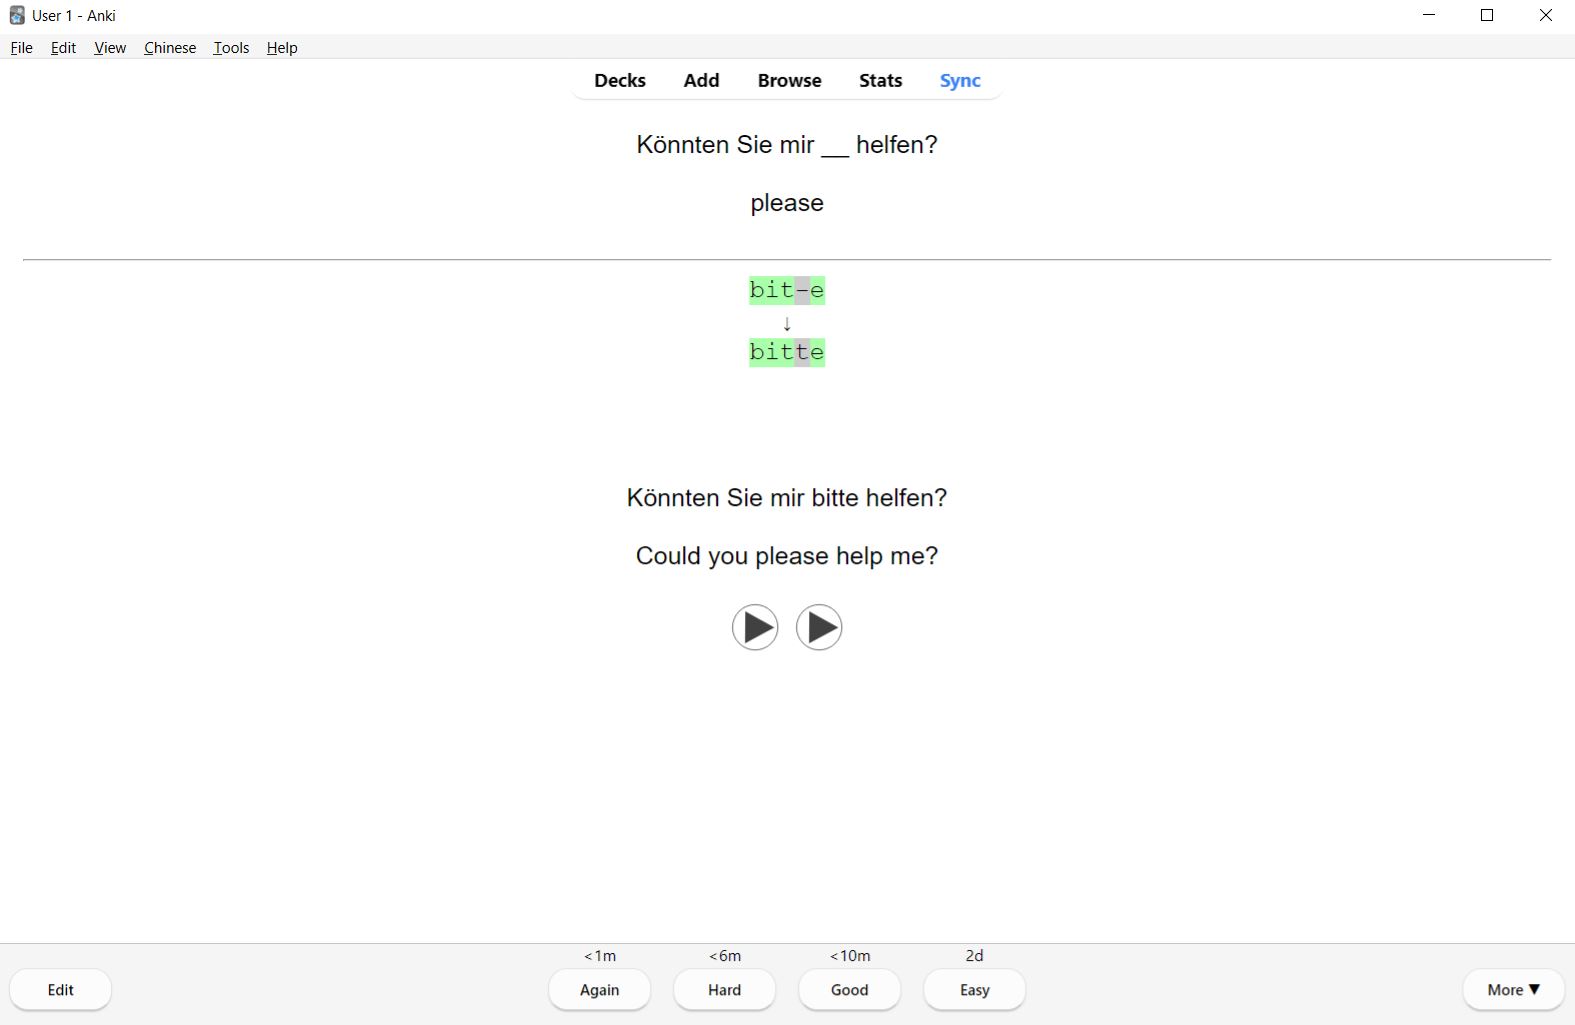
Anki will show you if there are any omitted or extra letters in your answer, but you will still need to grade yourself. Although typing the words is optional, I still highly recommend it because it will improve your recall and thoroughly test your abilities.
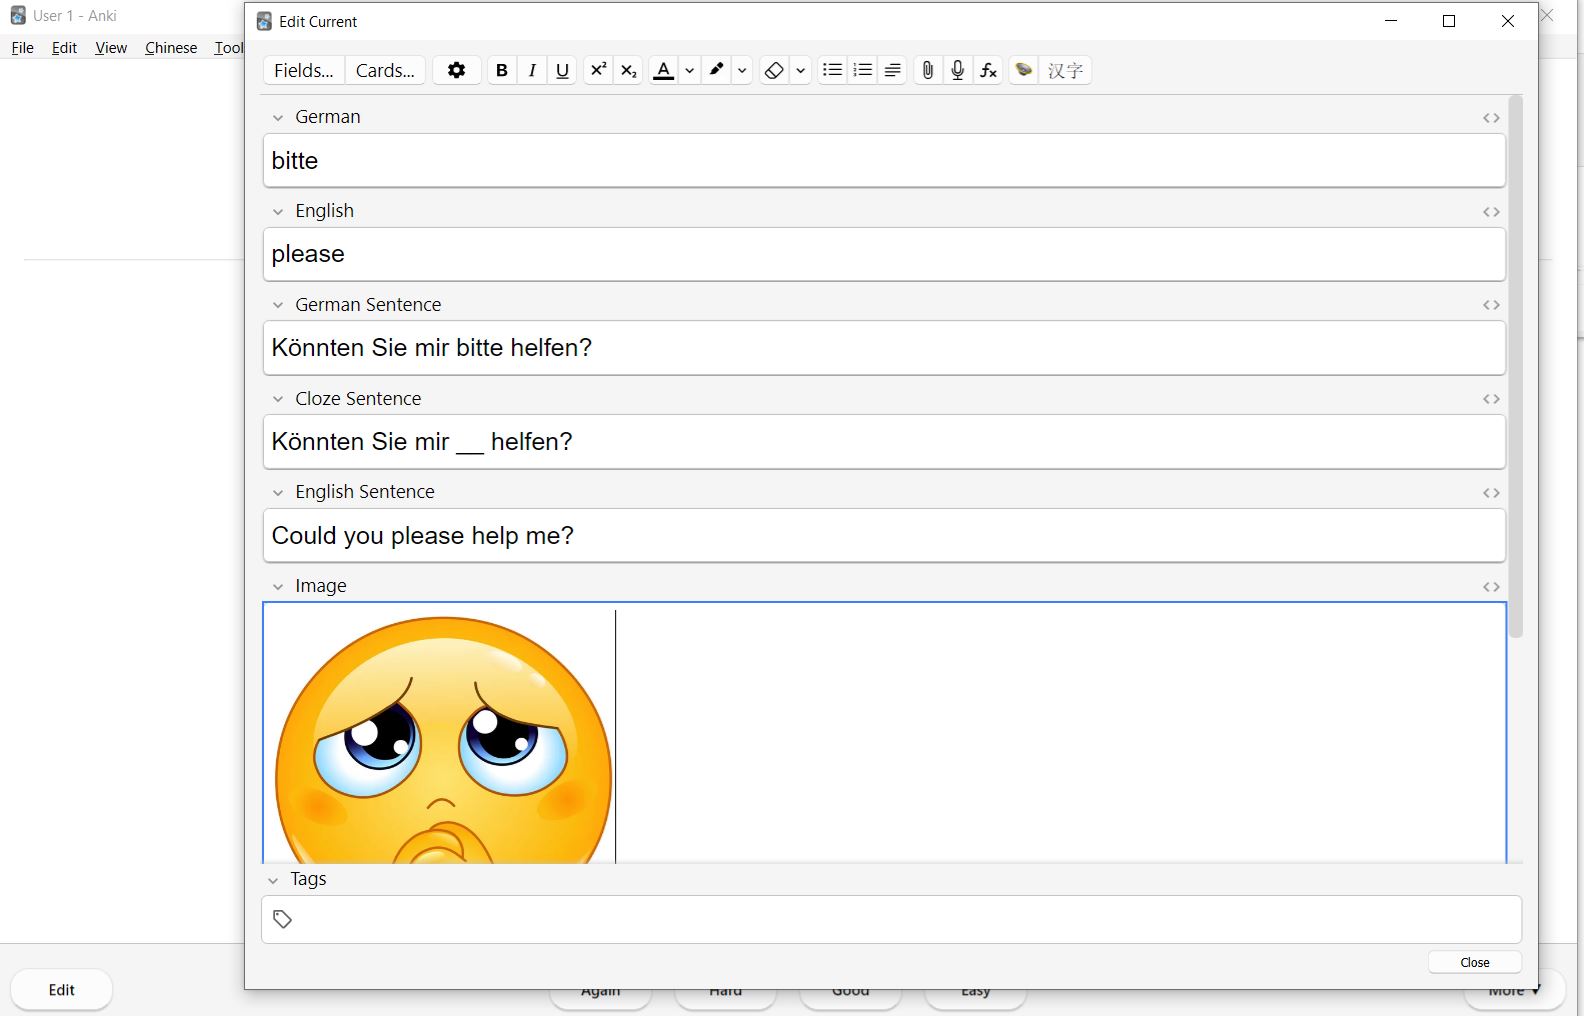
Although this deck does not come with images, it does have a field where you can add your own images. Adding an image is great for words you struggle to remember, as it will create a visual association with the word. To add an image, click on “edit” in the bottom left corner of the screen, then copy and paste the image of your choice into the image field. When you’re done, click “close” in the bottom right corner.
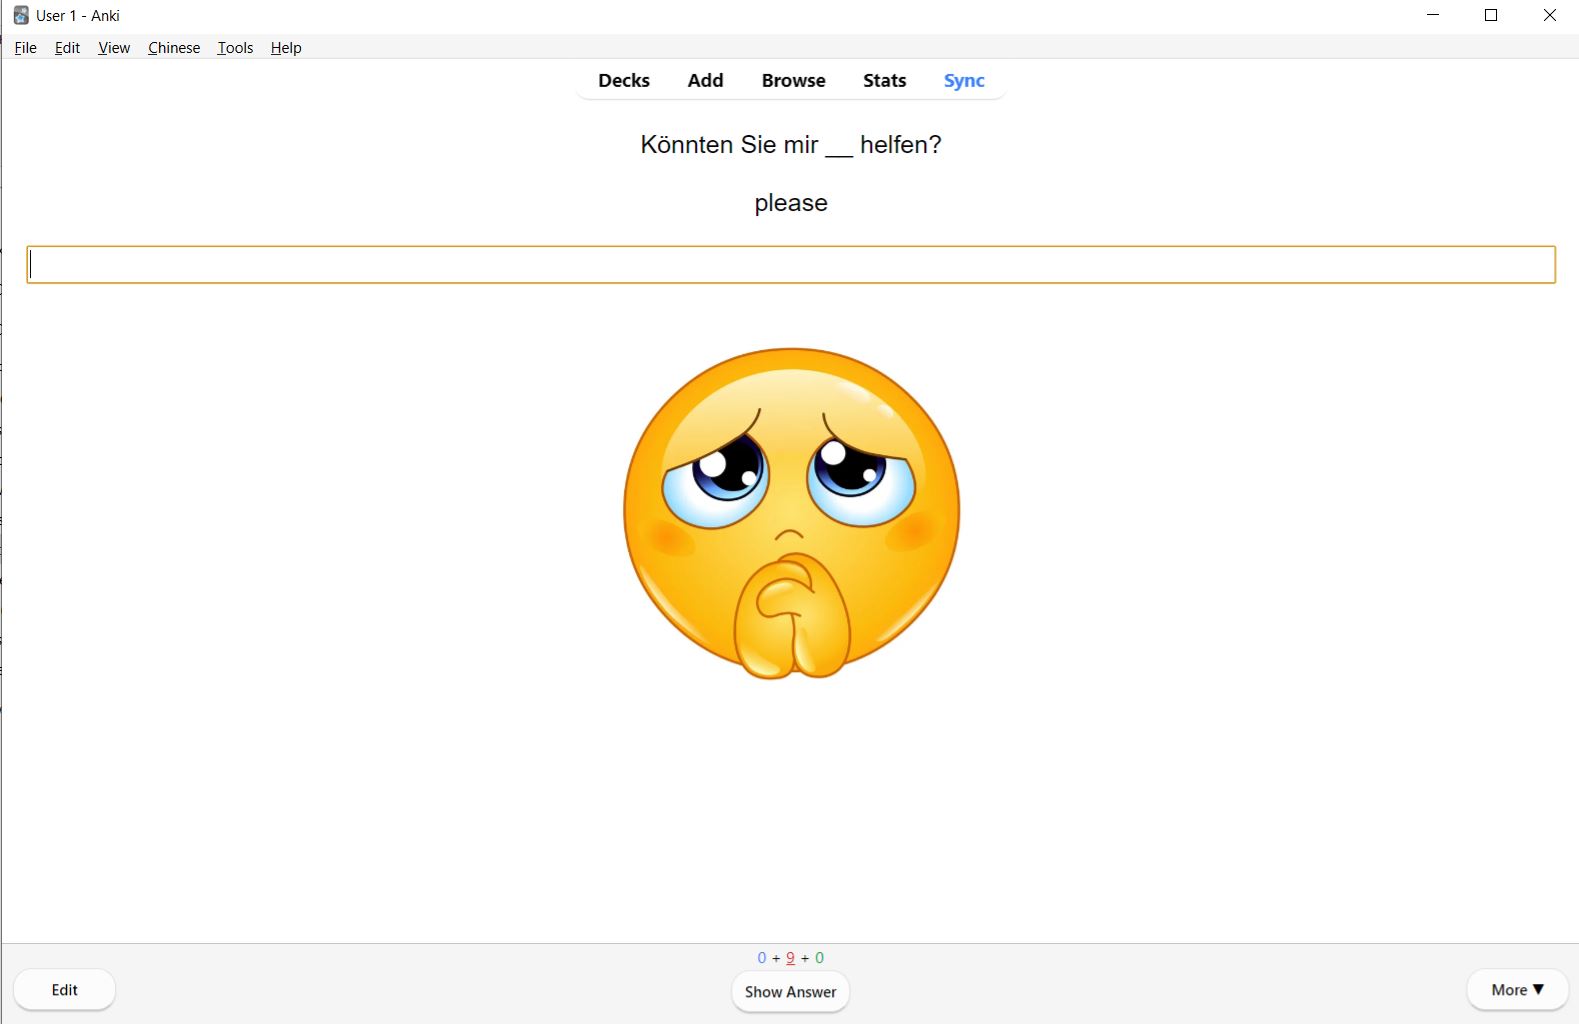
Now, when you see this card again, it will have the image you added on it!
Hopefully, you enjoy this deck and find it to be a useful tool. I created part of this deck using the German vocabulary list made by One Word at a Time, which you can find linked below!
Custom Cards
Custom cards are cards where you manually fill out all of the fields. They are more time-consuming to make, but they are specifically tailored to you, and you can use vocabulary and example sentences you have found through reading or listening. There are two types of cards you will want to focus on making: vocabulary cards and sentence cards. You can find the templates for these below.
When making vocabulary cards, focus on making just 5 new cards a day from material you have read or watched. Making too many cards is a mistake I often see with new learners, and it causes them to burn out and drop Anki altogether. Quality over quantity! You don’t need to make a card for every single new word or sentence. Just pick the ones that are most relevant or important to you. If a word is common, you will see it again later! It doesn’t help to make a bunch of cards you never study.
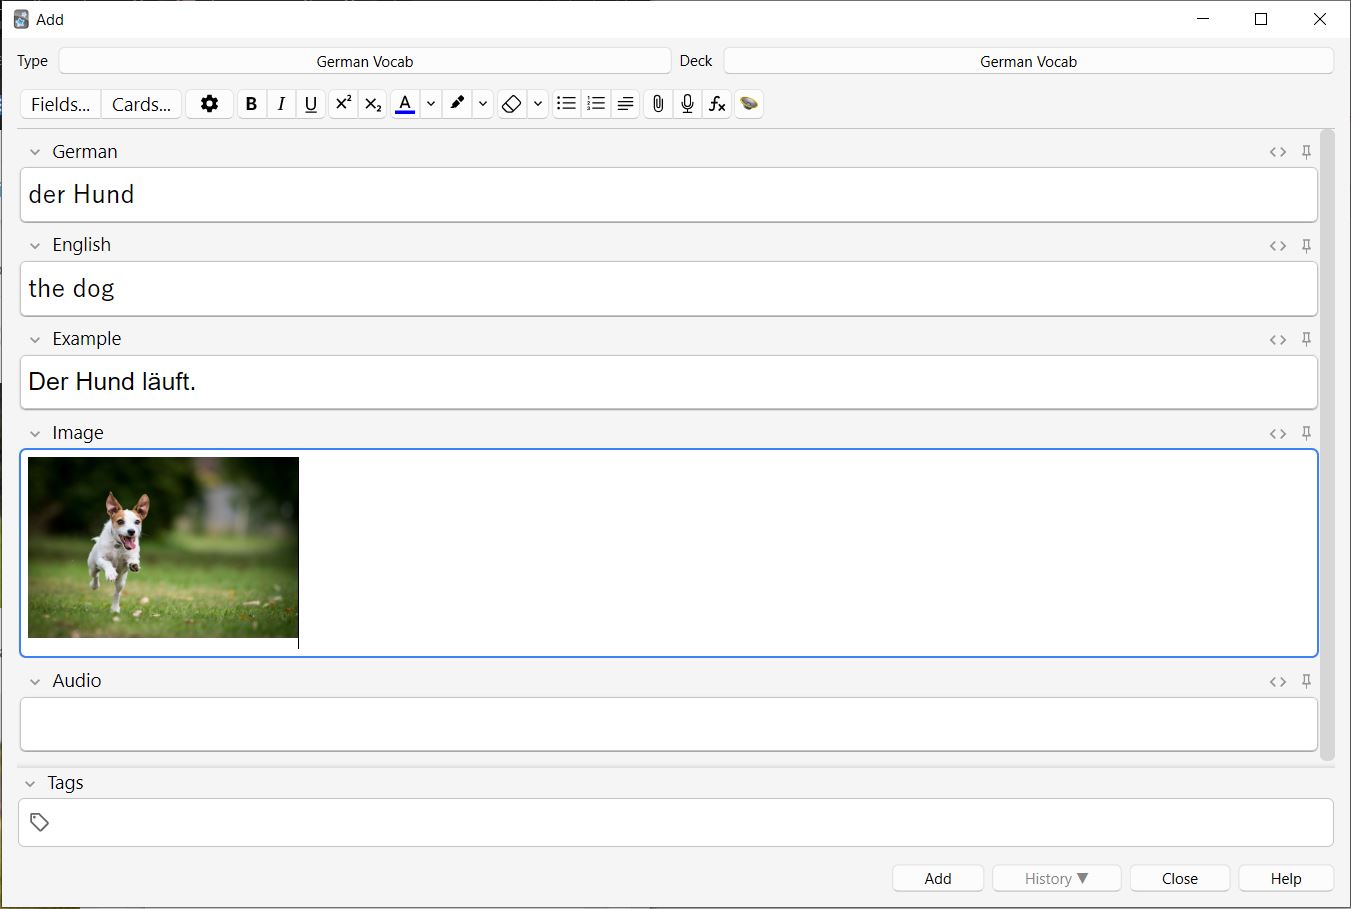
When creating vocabulary cards, you will fill out the fields according to how they are labeled. In the first field, write the German vocabulary word. I recommend including the article (der, die, or das) with nouns since it will help you memorize them. It’s better to learn the article with new words rather than trying to learn it later. Then write the English translation in the next field. The image and example fields are optional. I generally only add images for nouns. You can easily add an image by dragging it into the image field from Google or a folder on your computer. If the word I’m adding is from something I’m reading or watching, I will put the sentence I found it in in the example field. The best examples are sentences where you know every word except for the vocabulary word, however, this can be a little difficult when you first start studying German, so in that case, just choose a simple example or leave it blank. Press “add” when you’ve finished filling out the fields. Audio will be added later.
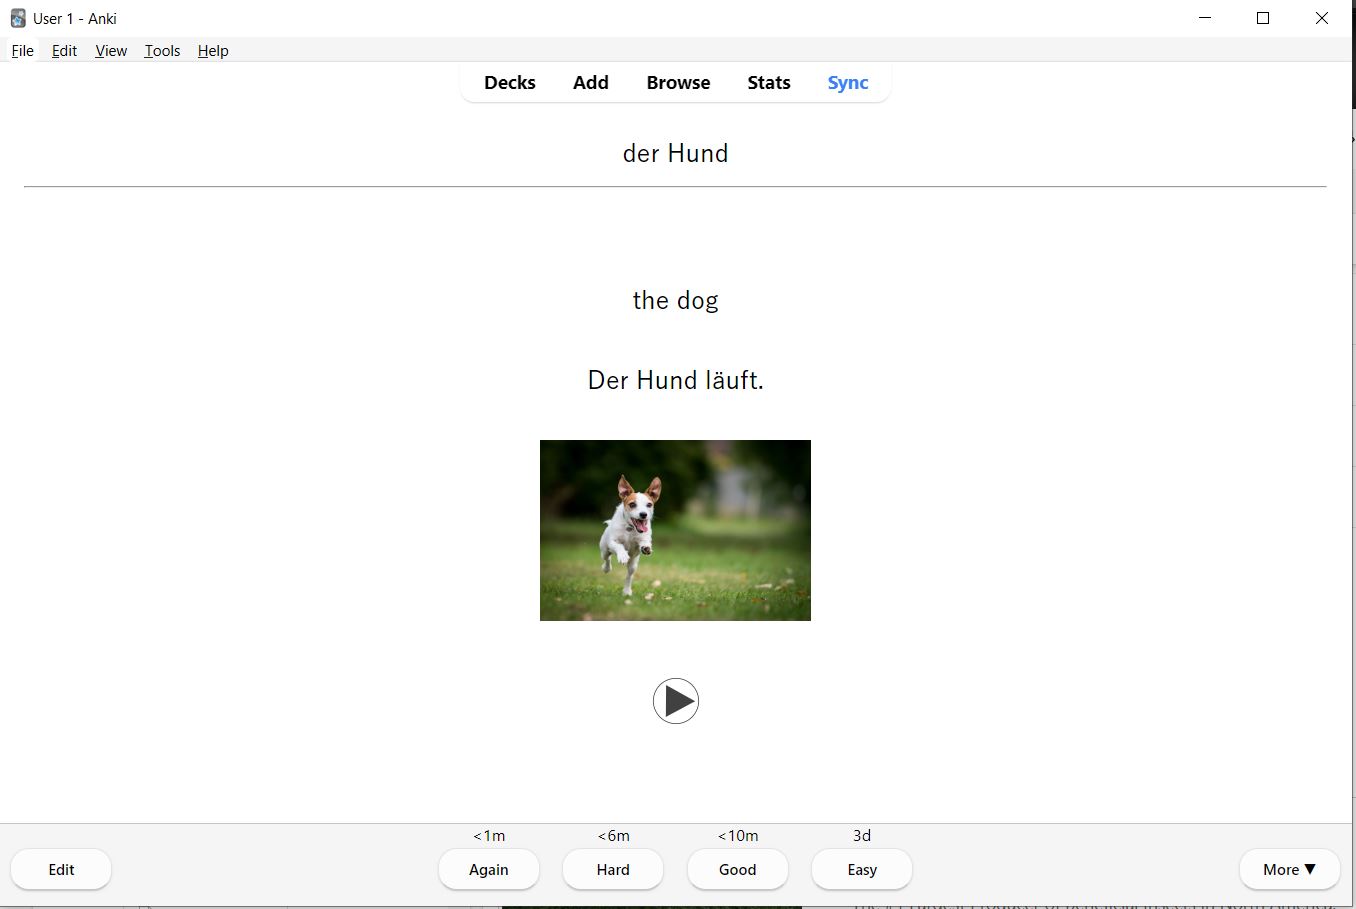
After you add a new card, it will generate two different types of cards. The first card will be a simple definition card where you need to translate the vocabulary word from German into English. After you flip the card, you will grade yourself on your ability to read and understand the word presented.
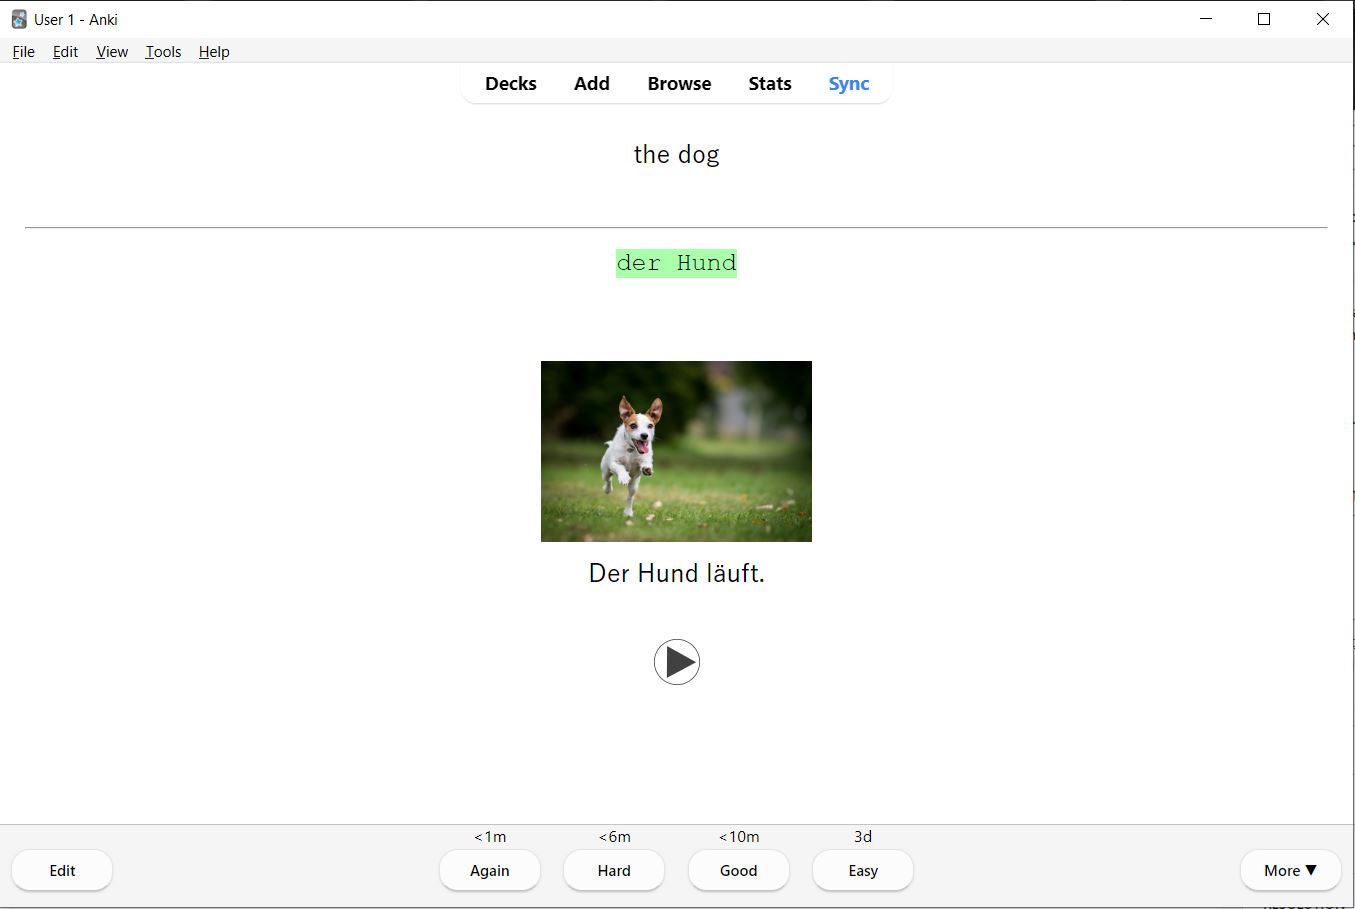
For the second type of vocabulary card, you will be presented with the English translation and asked to type the German word. Although typing is optional, it’s a great way to boost your memorization and practice writing in German.
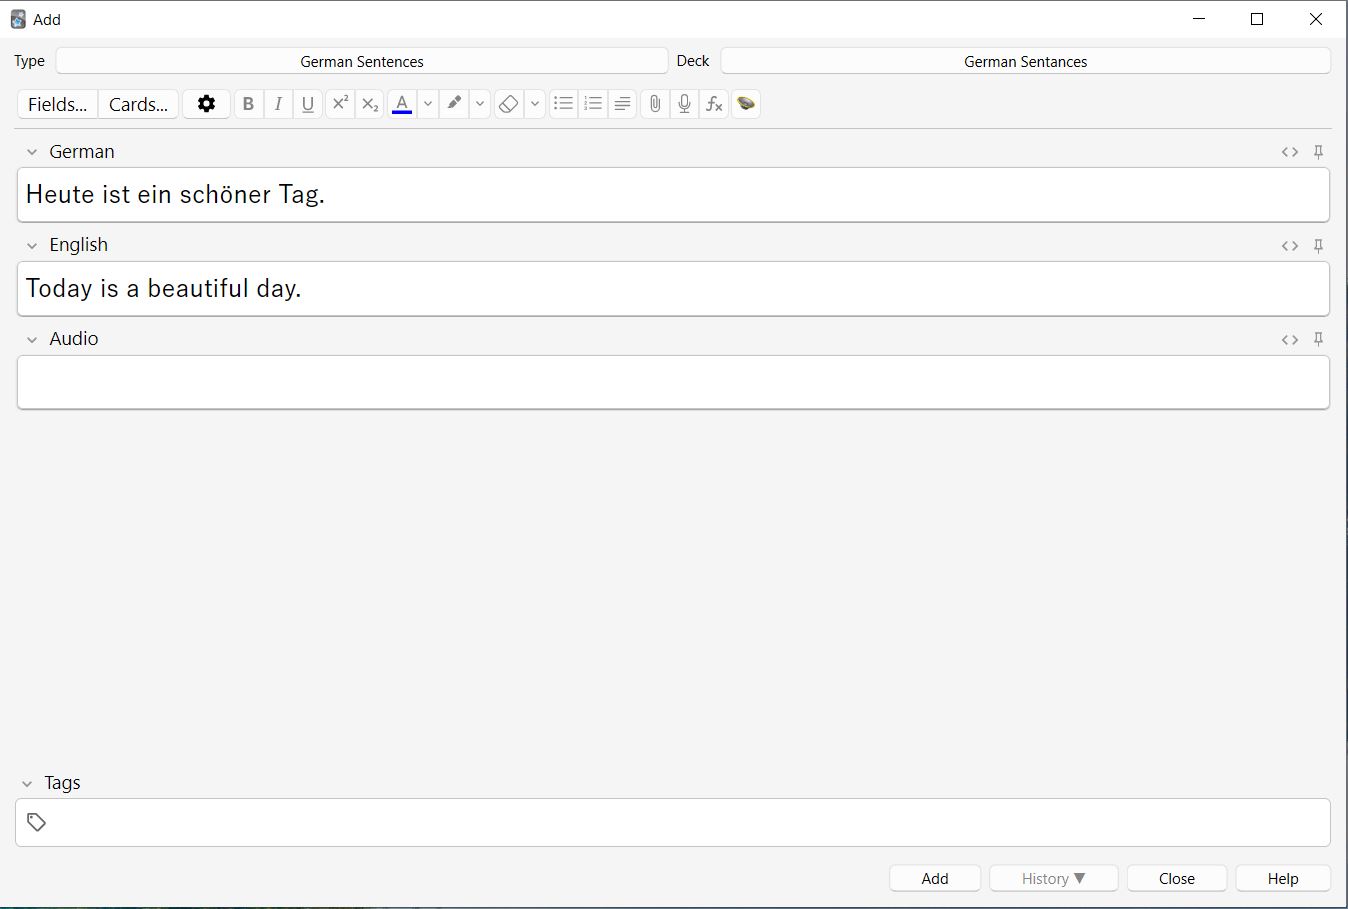
Sentence cards focus on reading and comprehension. Only the German and English fields need to be filled out. You can gather sentences from articles, textbooks, or videos. Press “add” when you’ve finished filling out the fields. I’ll show you how to add audio later.
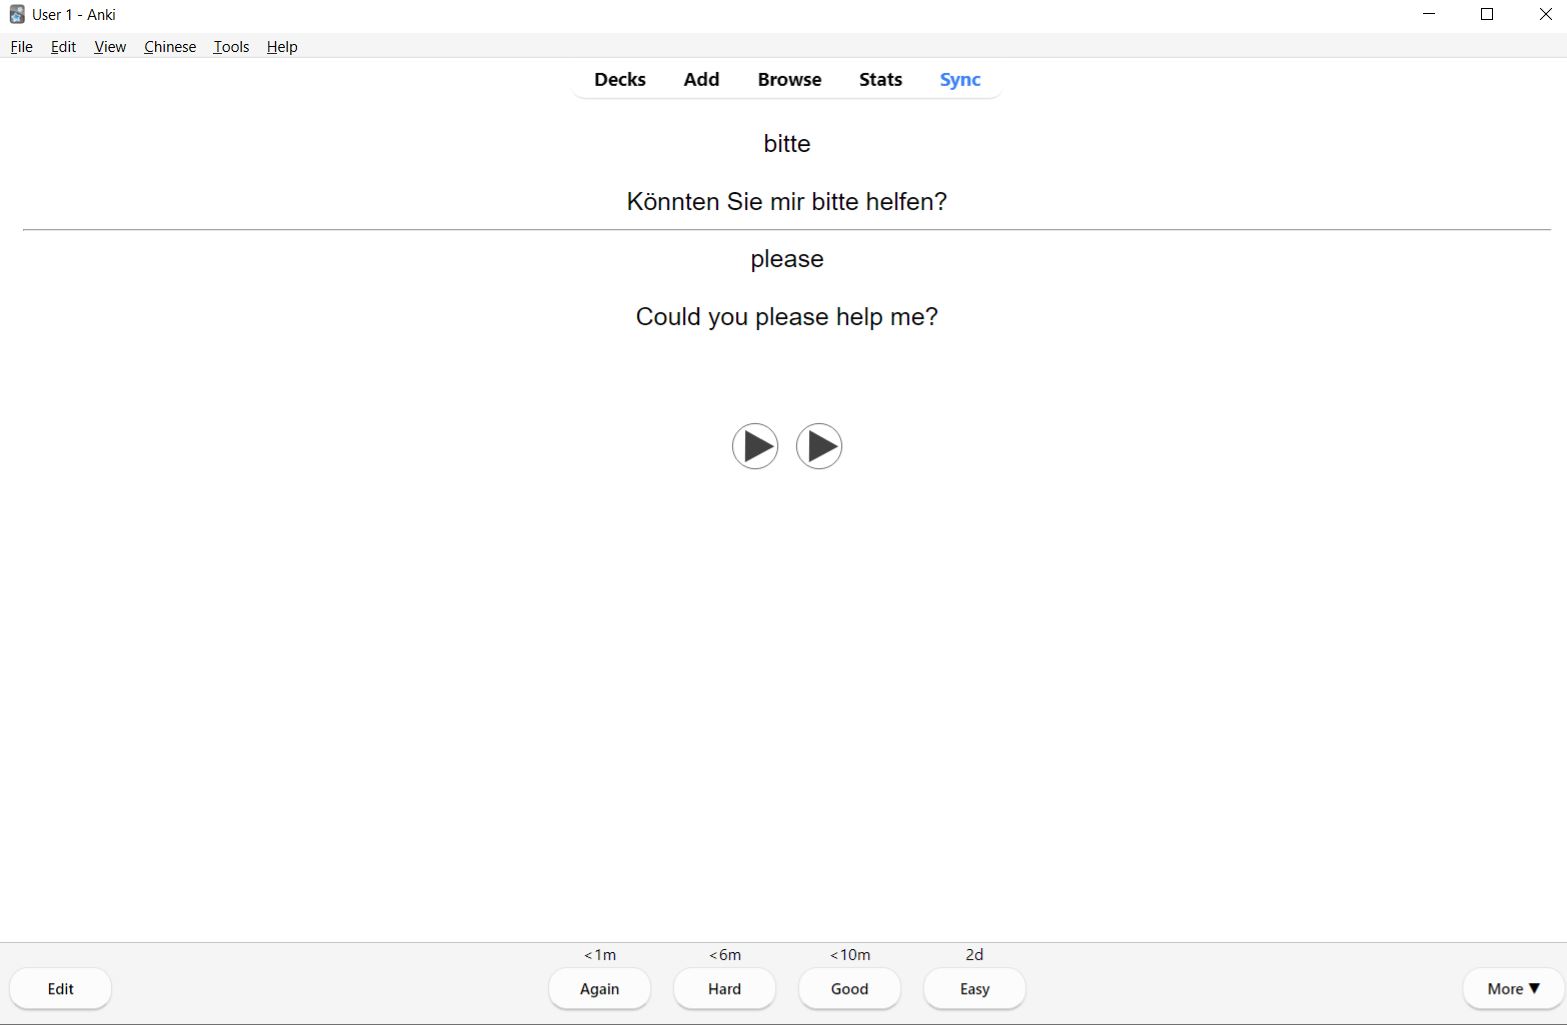
The first type of sentence card shows a sentence on the front for you to read. On the back will be the English translation and the audio file. You will grade yourself on how well you can read and understand the sentence.

The second type of sentence card focuses on listening comprehension. A sentence will be read out loud to you, and you will grade yourself based on how well you understood it. These cards are optional, and you can download the template without audio cards if you’d like.
Add Audio to Your Flashcards
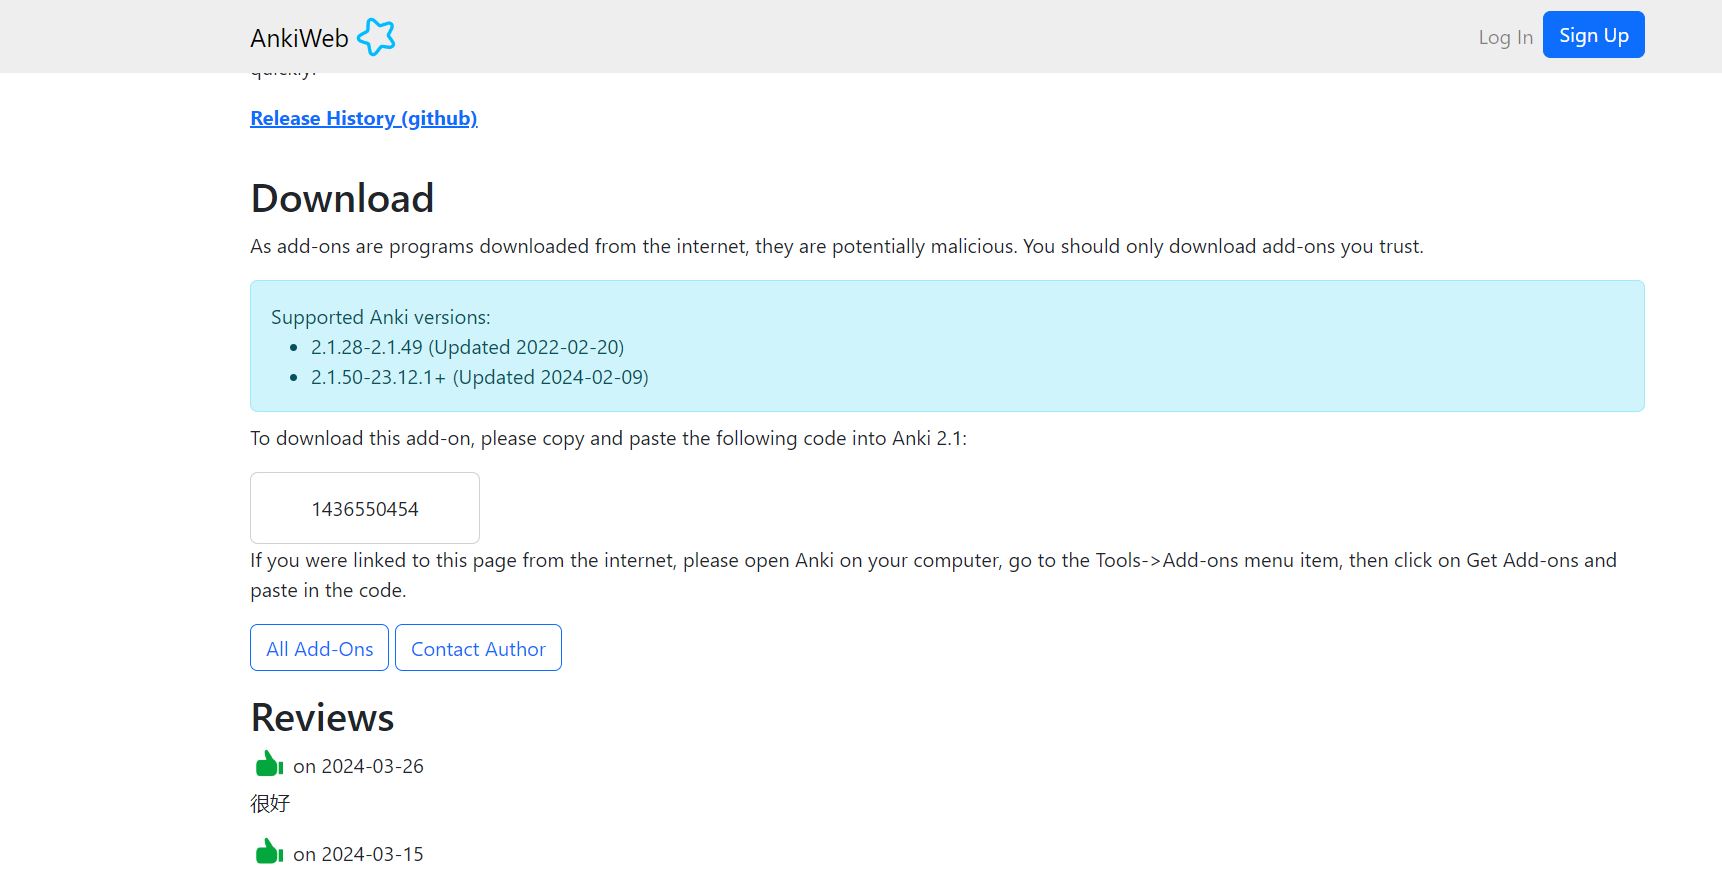
To add audio to your cards go to the webpage for the AwesomeTTS Anki extension. Scroll down until you find the add-on code and copy it.
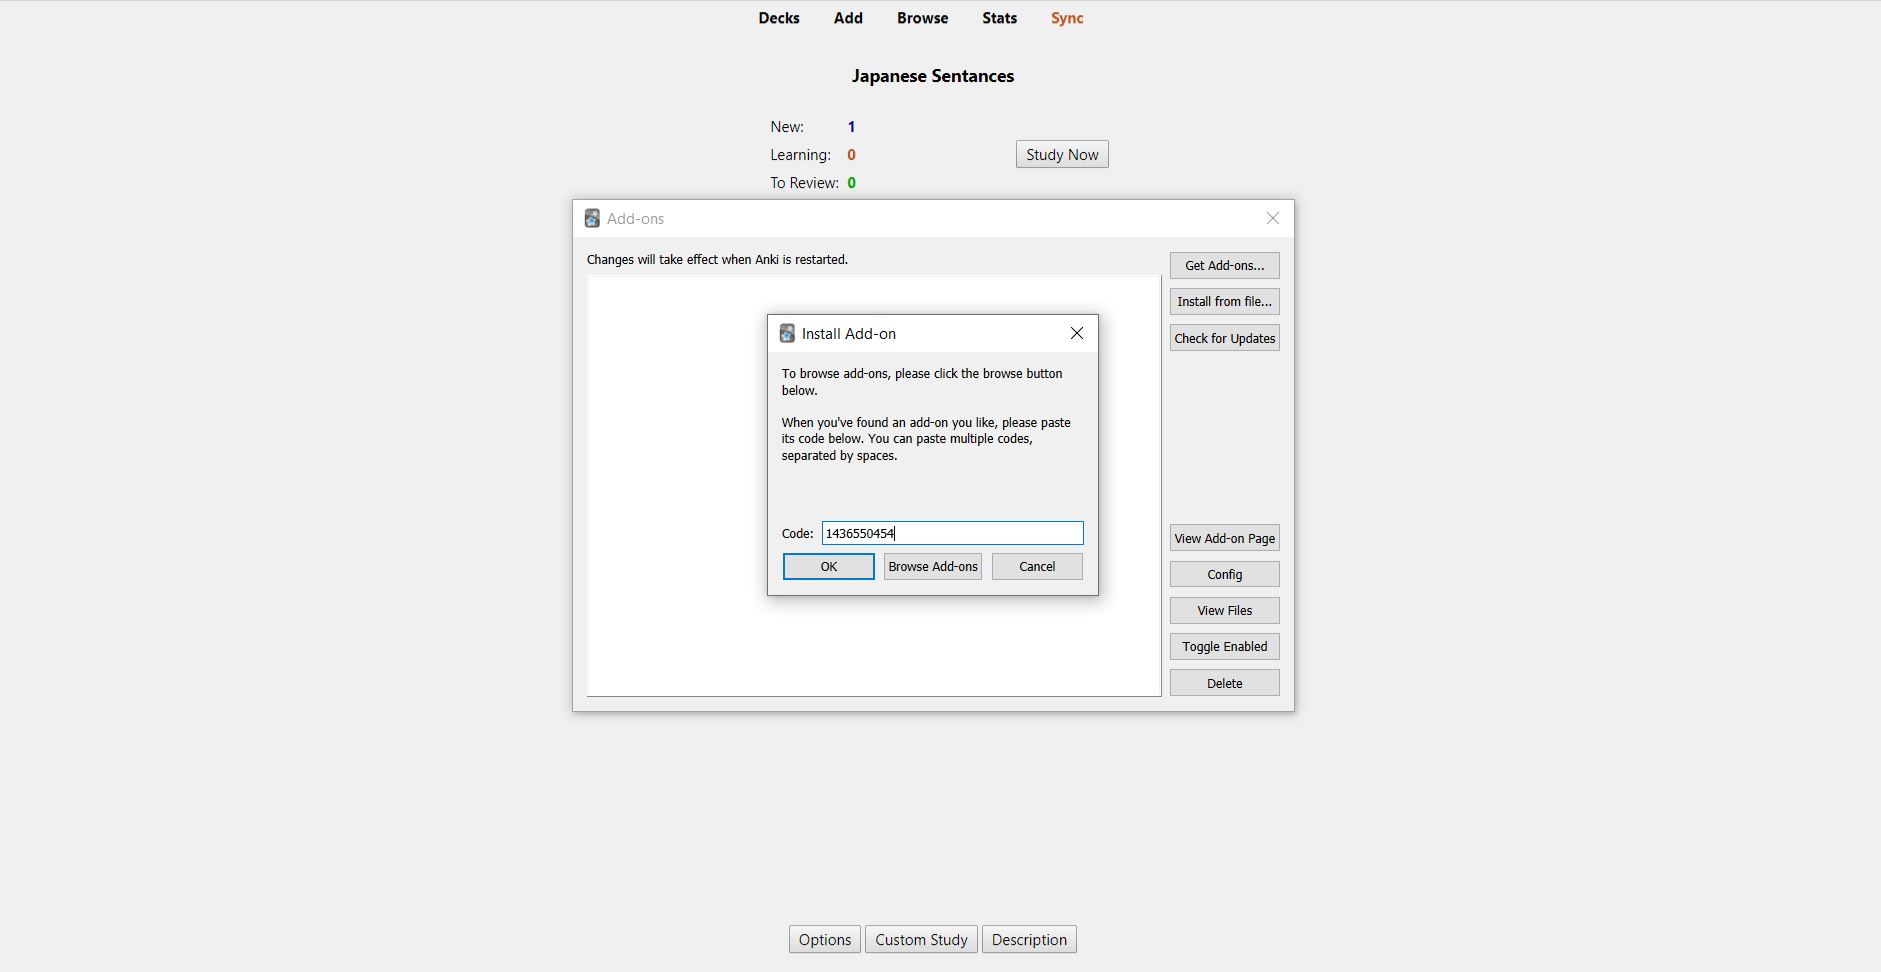
In Anki, go up to the top of the page and click “tools,” then click “add-ons.” You can also get there by pressing Ctrl + Shift + A.

Now, enter the code you got from the AwesomeTTS webpage and press ok.
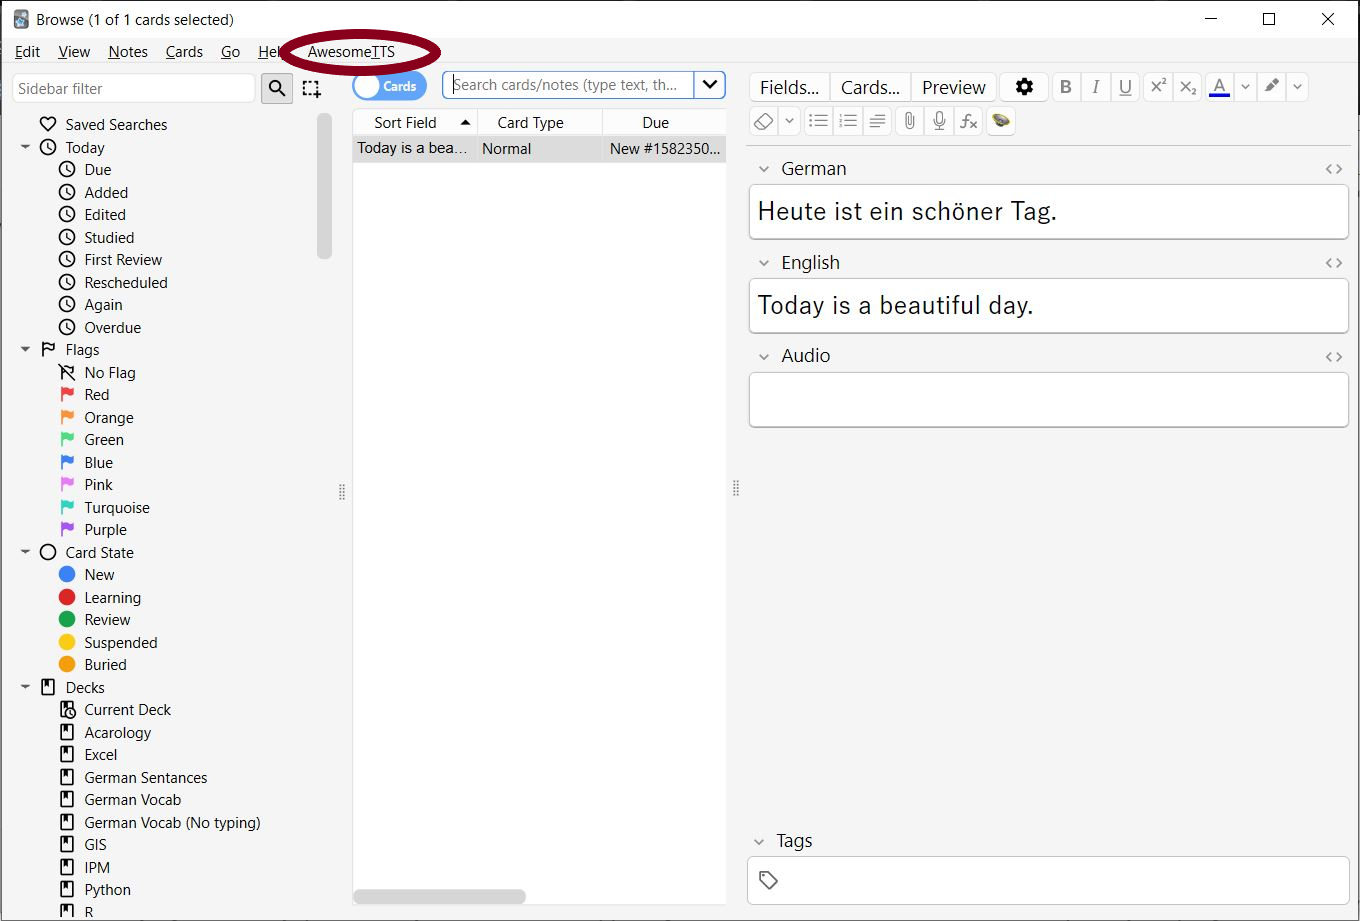
To add audio to multiple cards, go to the “browse” tab, where you should now see AwesomeTTS on your top toolbar. You may need to restart Anki if it hasn’t appeared. Next, select all the cards you want to add audio to and click “AwesomeTTS.”
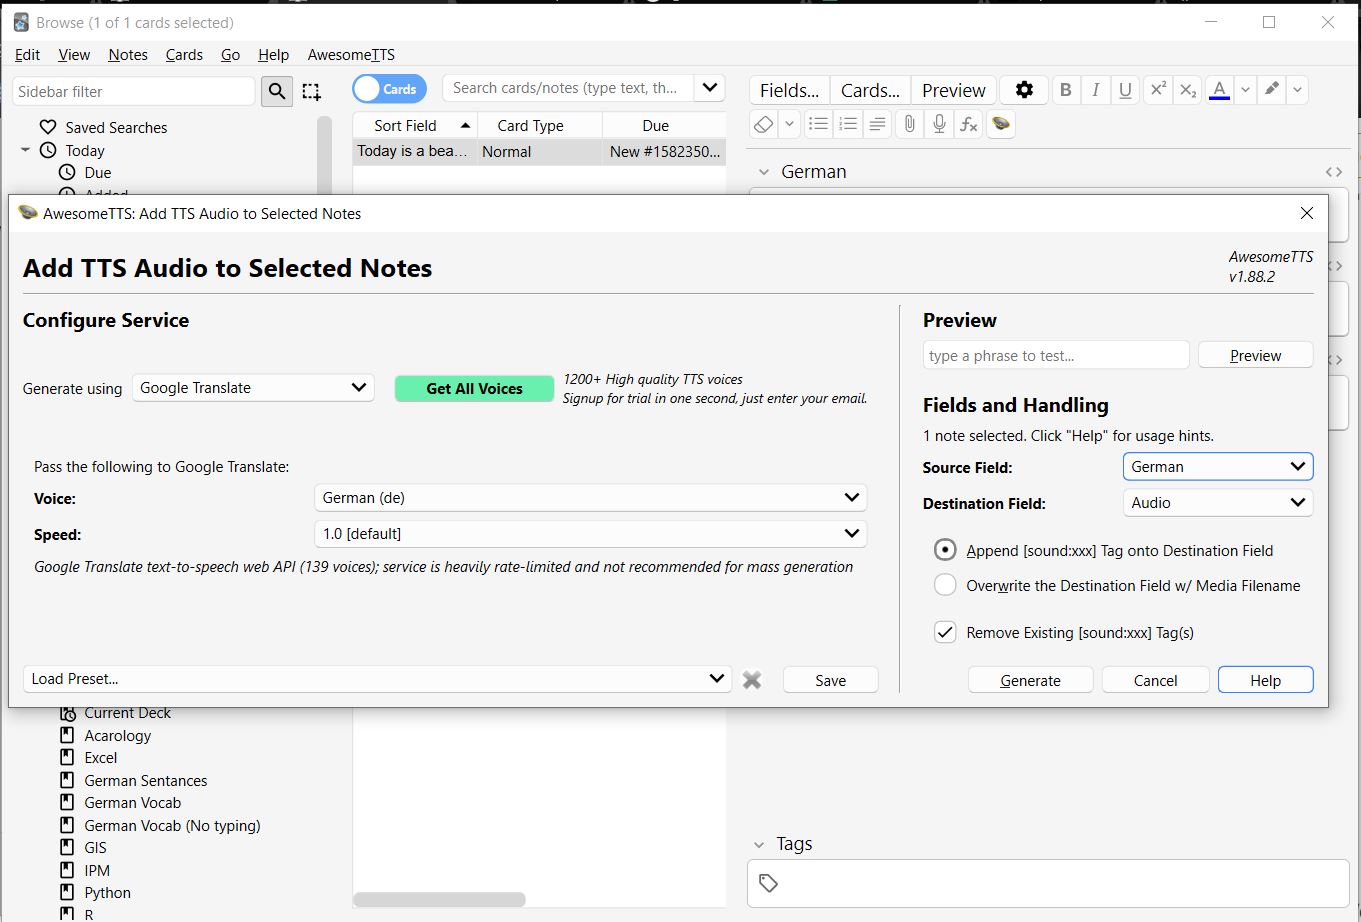
This is where you can choose what voice you want to put on your cards. The easiest voice to use is Google Translate, so select that first. Then make sure you have the voice set to German. Select “German” for your source field and “Audio” for your destination field, then press generate. If you’re not sure you set everything correctly, compare your screen to the image below. Click “Generate,” and the program will automatically add audio to all of your selected cards.
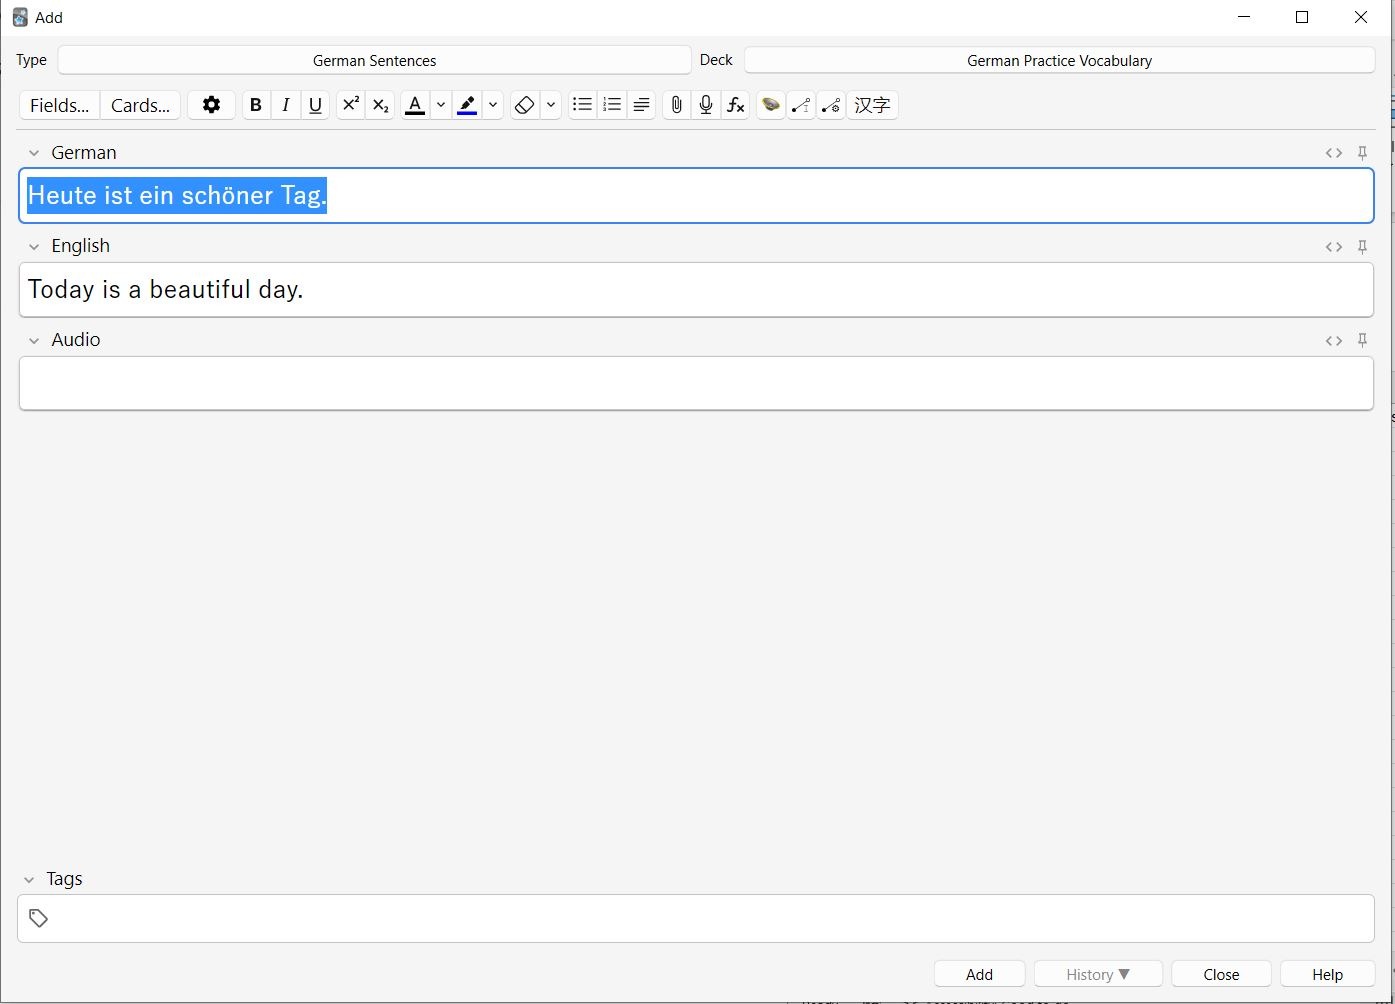
If you are only adding a few cards to your deck or updating a single card, you may choose to add audio in the card creation screen. To do this, select the German sentence you want to generate audio for and copy it to your clipboard using Ctrl + C.
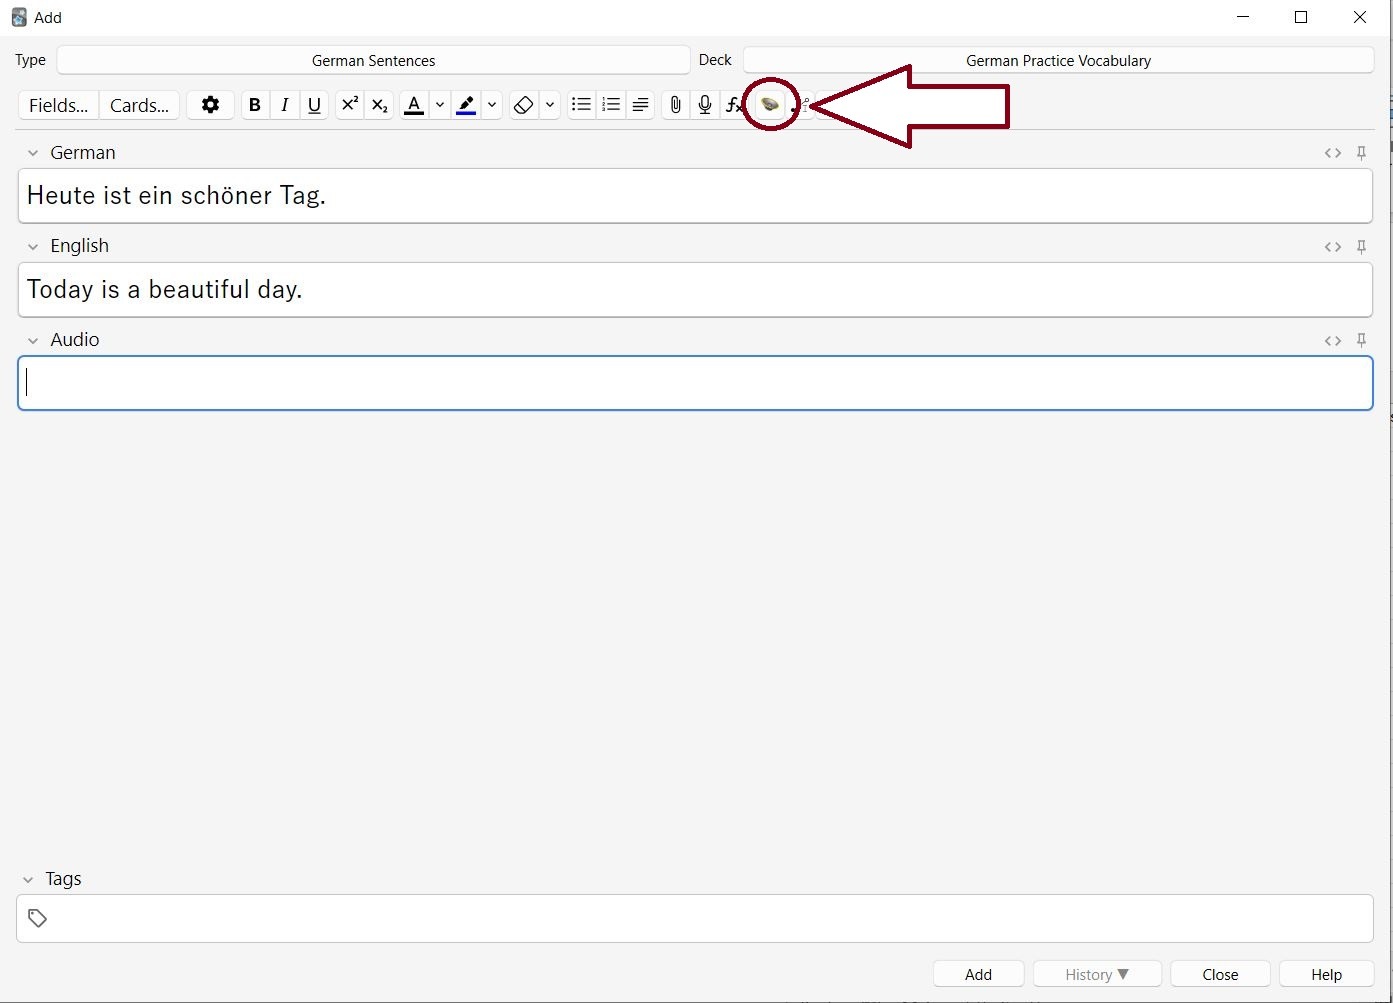
Next, place your mouse cursor in the field you want the audio file to go into, then click on the speaker button in your toolbar.
AwesomeTTS will automatically paste the sentence from your clipboard into the textbox, but you may still edit it or type something else if you wish. Ensure you have the right language and settings selected, then click on “record.”

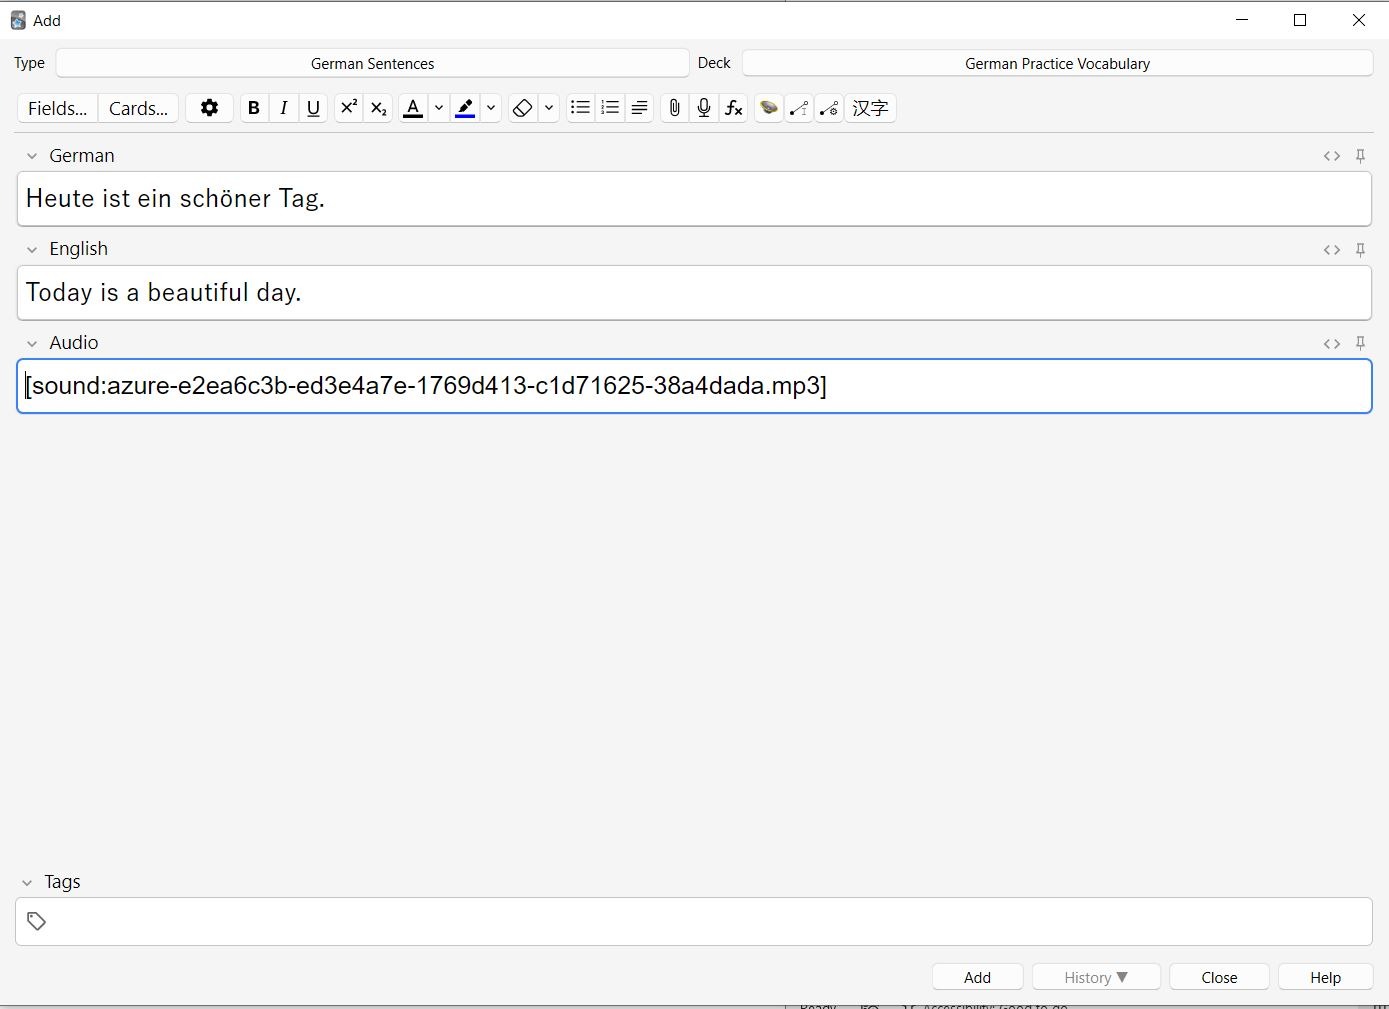
You will now see a sound tag in the field you selected. If you want to get rid of a sound tag, you can delete it as you would any other text.
If you would like higher-quality voices or larger batch generation, I recommend using Microsoft Azure. However, you will need to get an API key, which is a little complicated because it requires making an Azure account and giving them your payment information, even though it’s free. If you would like more information, you can click below.
Mnumonics
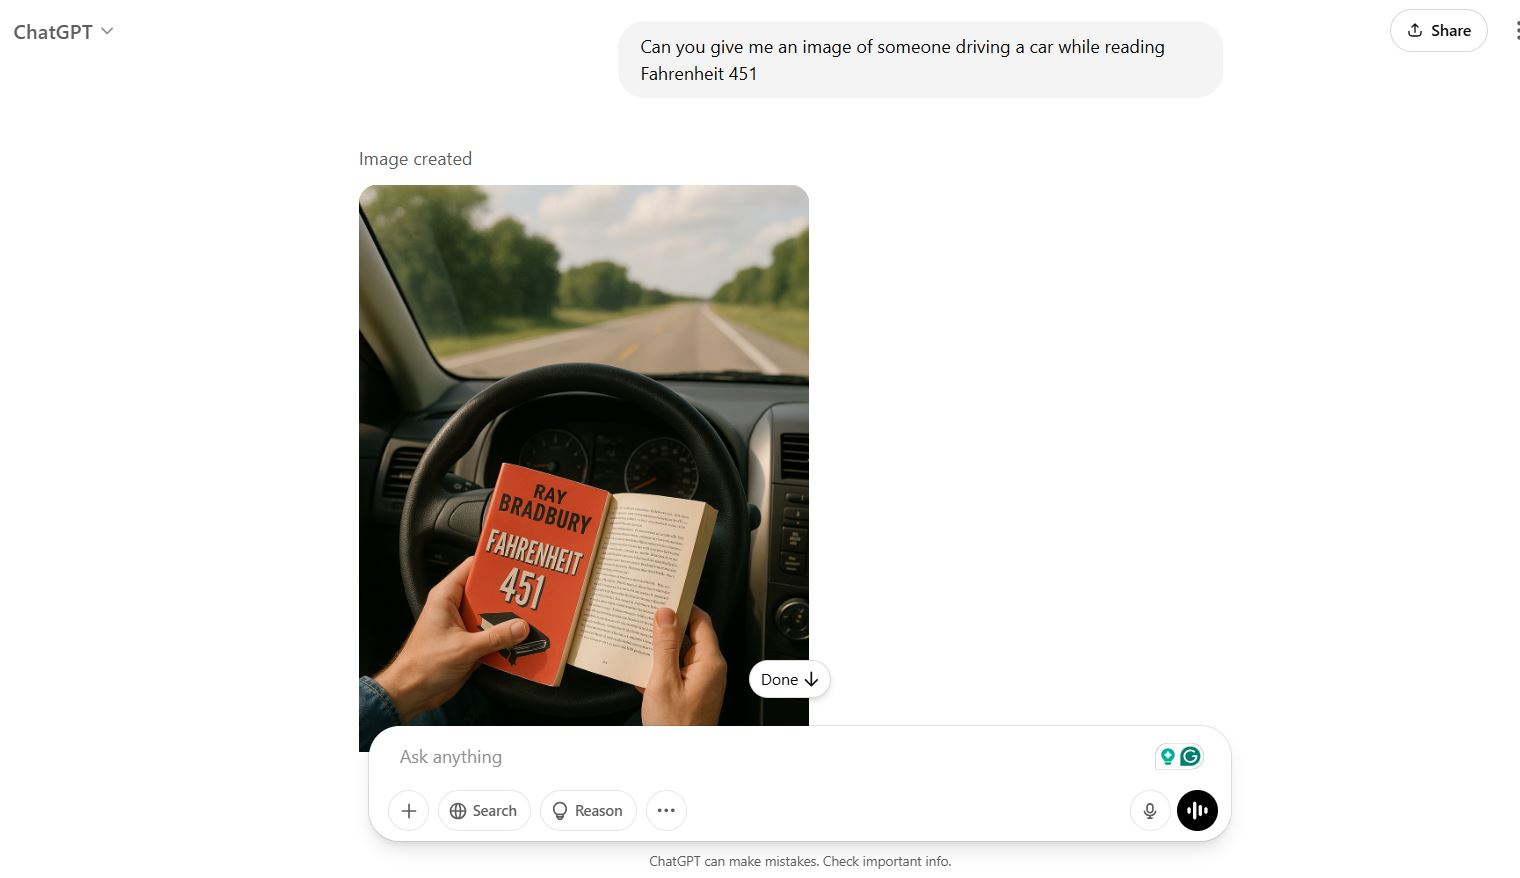
Mnemonics can be a great tool for memorization, and this is a trick I learned from the YouTube channel Language Jones. Mnemonics are phrases or images that help you memorize something, for example, using ROY G BIV to help you memorize the colors in a rainbow. This can work incredibly for memorizing new words or grammar. For example, if I’m struggling to remember the word “fahren,” which means “to drive,” I might picture someone reading Fahrenheit 451 while driving. Then I can ask ChatGPT for an image of this, and add it to my Anki flashcard for “fahren” to help me remember it! You can often find some good mnemonics online, but I also recommend tailoring them to your own personal experiences, as that will help you remember things better. Also, remember, what may help one person remember something may not work for someone else, so try coming up with your own mnemonics to add to words you struggle with.
I hope you found this guide helpful and are ready to use Anki to its full potential. These are just add-ons and decks I have found the most useful in my studies. There are many other useful add-ons and decks to aid you on your language journey, and because Anki is open-source, it’s constantly being improved. Anki is an incredibly useful tool you can use to learn almost anything, and you now have the foundation to do just that!